The Stock Scarcity campaign allows users to manage product stock as well as create FOMO (Fear of Missing Out) among users. It’s the newest campaign added to WowRevenue’s list of discount campaigns.
There’s a good piece on the real-world applications of Stock Scarcity here.
Here’s how it works:
If you need further assistance after reading this, please don’t hesitate to contact us. We’re always happy to help!
Create the Stock Scarcity Campaign
To create a “Stock Scarcity” campaign, follow these simple steps: from your WordPress Dashboard,
- Navigate to WowRevenue -> Campaigns.
- Click on the “Create Campaign” button.
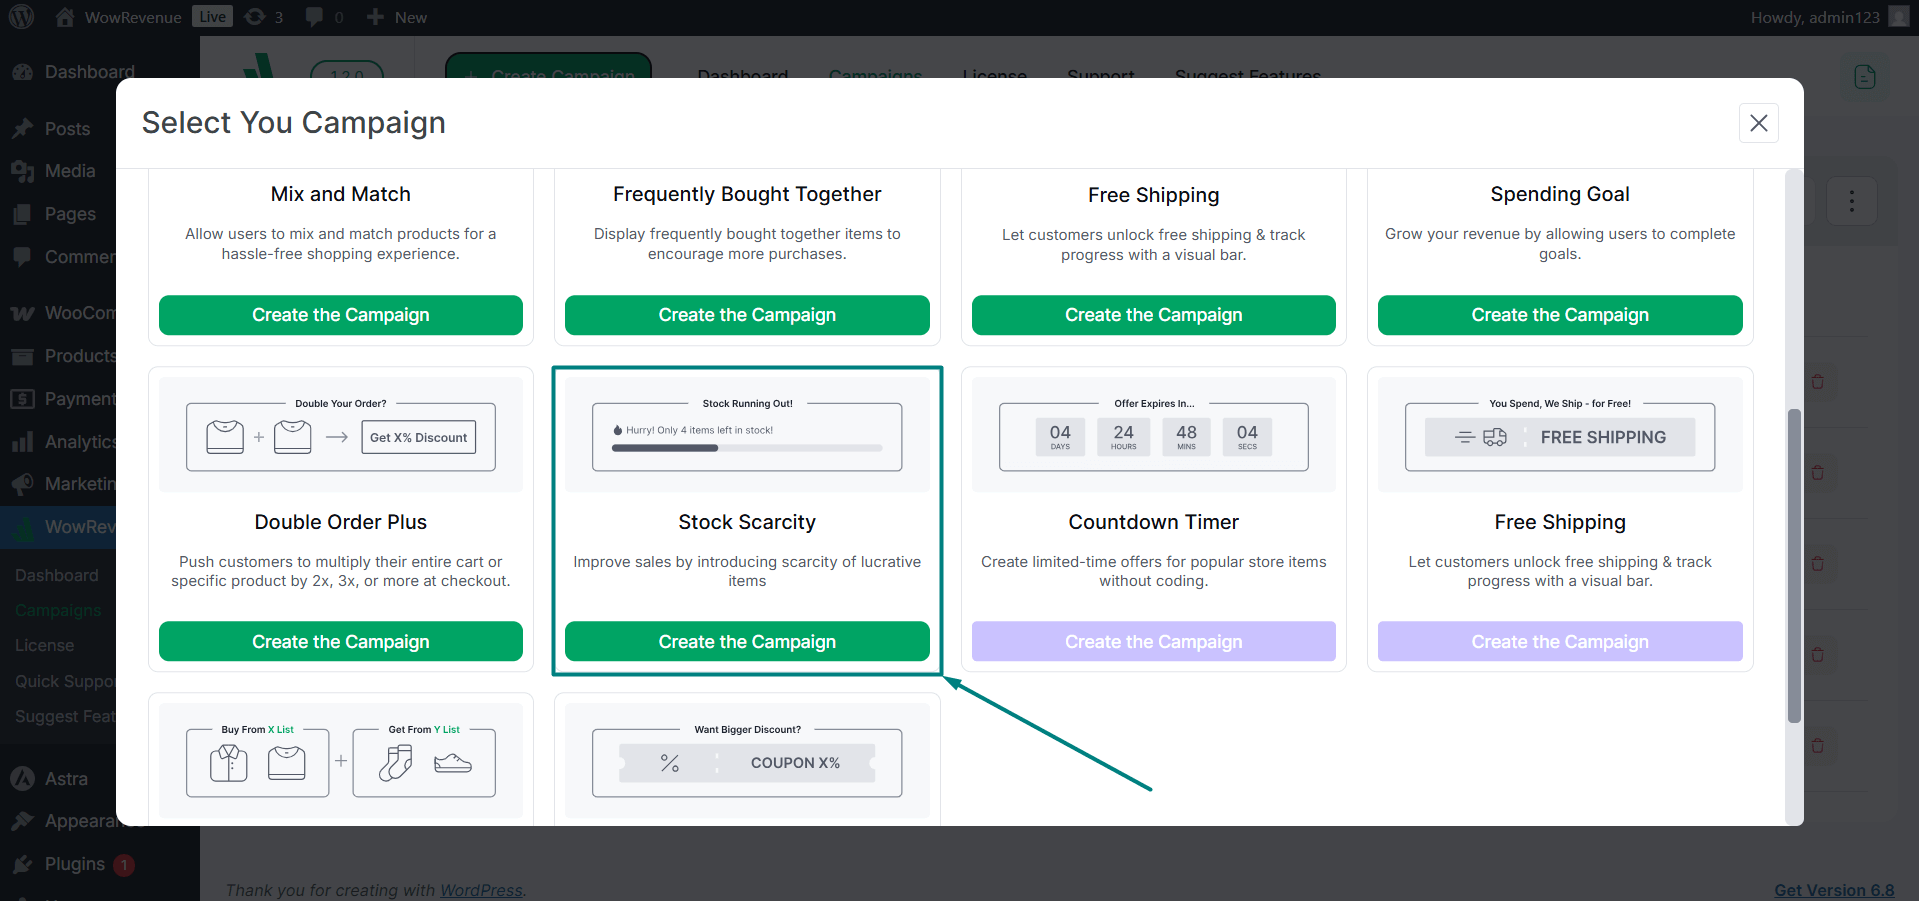
- A pop-up will appear, find and select “Stock Scarcity” and then
- Click the “Create the Campaign” button to proceed.
This will initiate the process of setting up your stock scarcity campaign. If you want to get a “birds eye” view of the plugin – visit this link.
Initial Campaign Setup
There are a couple of things you need to do before your stock scarcity campaign is fully ready:
Select The Pages – Where You Want the Campaign to Run
There are specific page options where you can run the campaign. The stock scarcity can currently run on:
- The Product Page
- The Cart Page
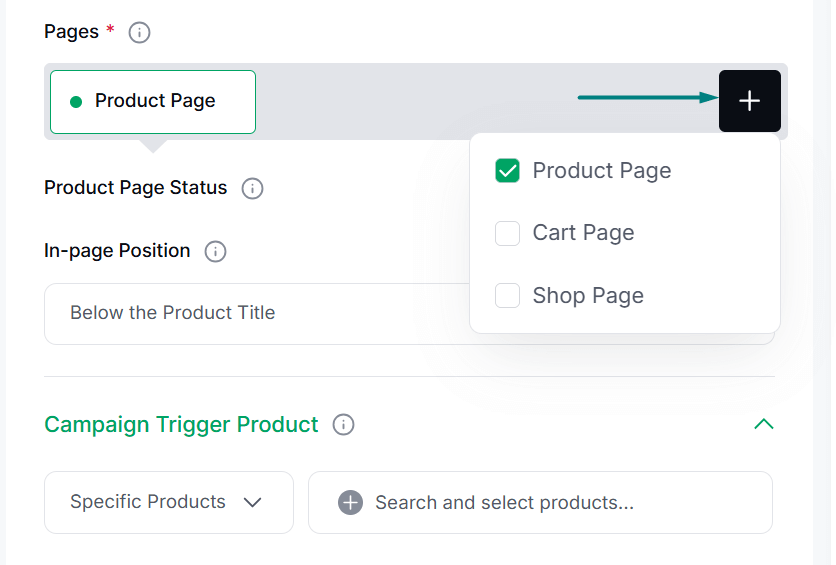
- The Checkout Page
You can enable or disable certain page combinations using the ‘Product Page Status’ toggle. This feature is super helpful when running A/B testing on your WooCommerce store.
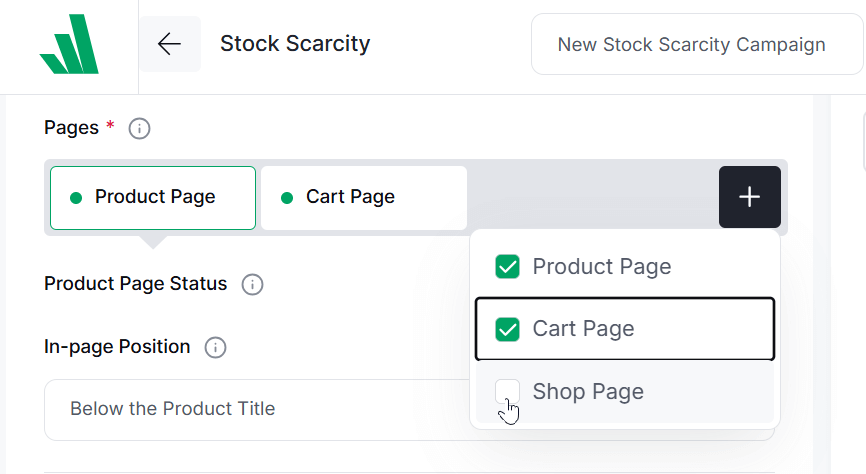
Or you can only select certain pages from the very beginning.
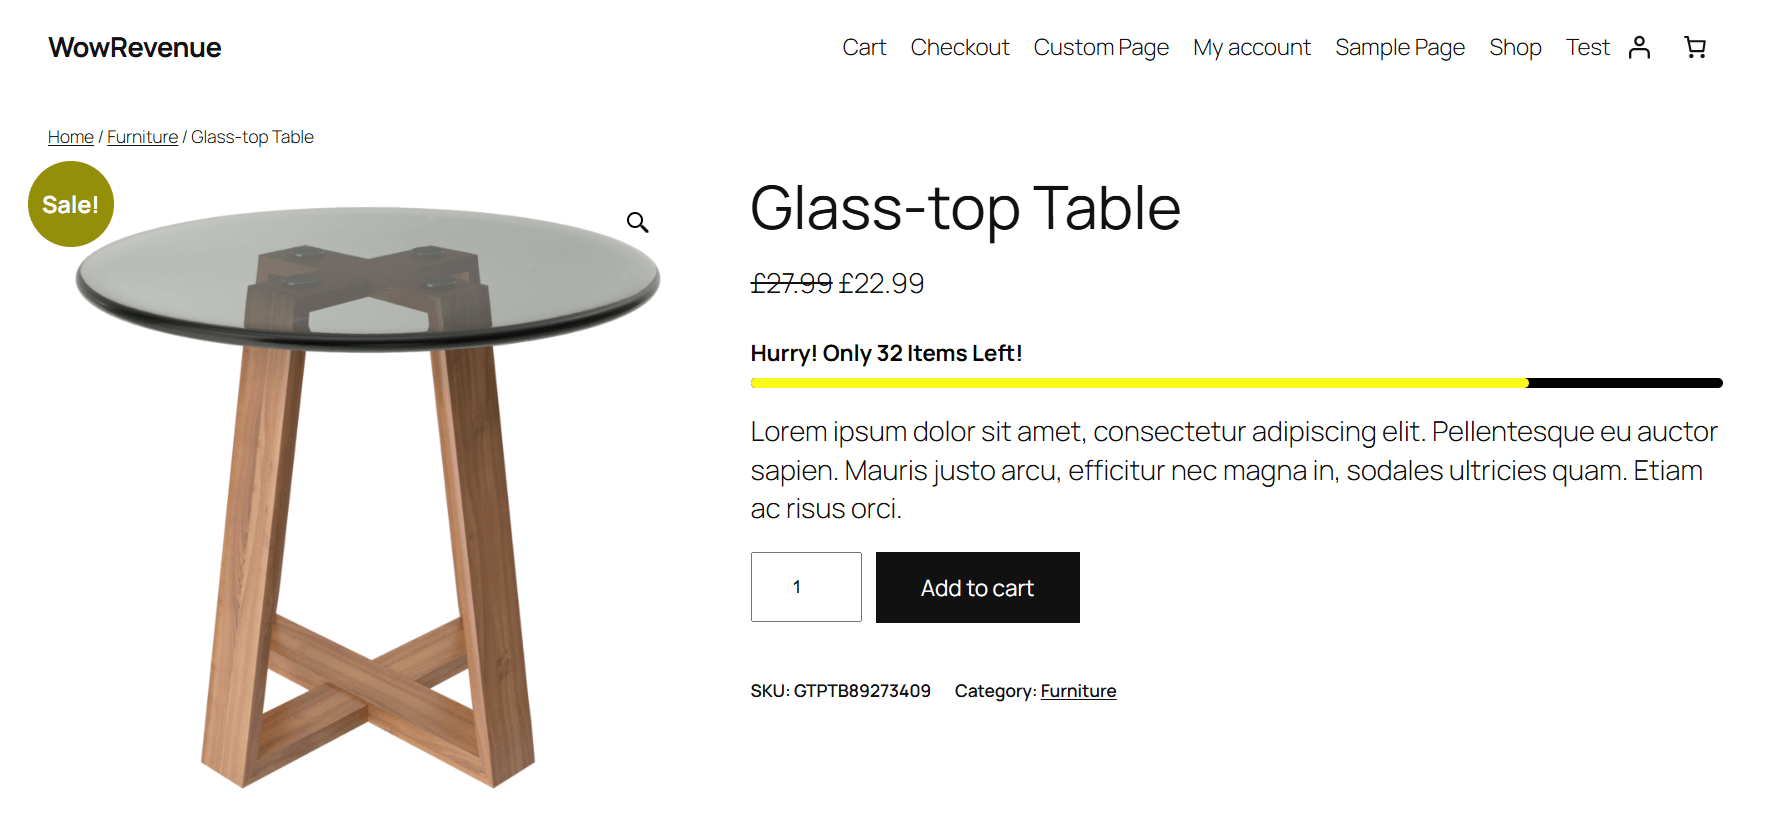
Stock Scarcity Bar Appearance
Please note that the stock scarcity bar can only appear in an “in-page” position. There are a couple of places you can make the scarcity bar appear (select them from the dropdown).
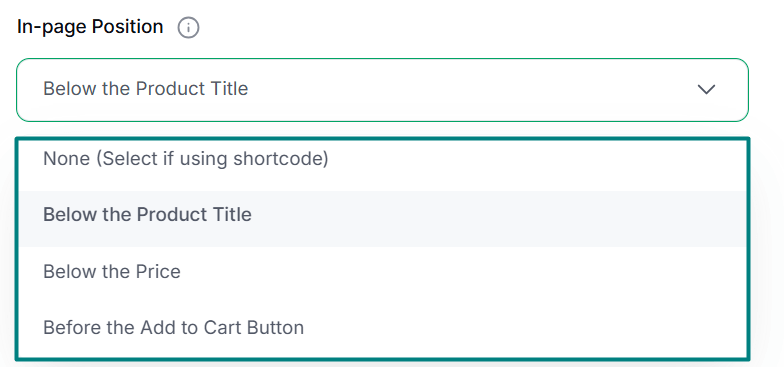
There are 4 available positioning options (highlighted in the image below):
Stock Scarcity Trigger Product
Just like any other WowRevenue campaign, you need a trigger product for the campaign to work properly. You can set the trigger for:
- All products
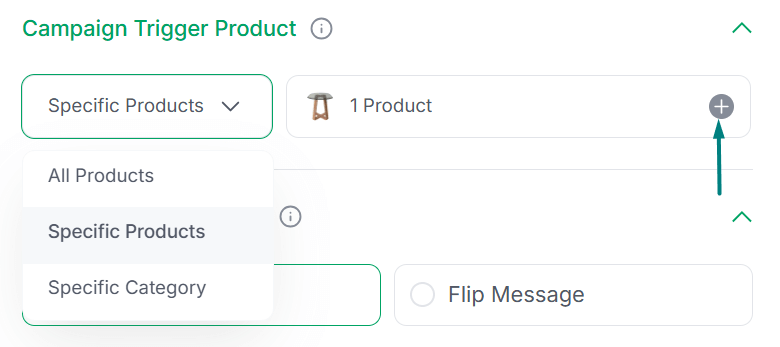
- A specific category of products or,
- A specific product
Core Campaign Settings
There are 3 core settings you should know about:
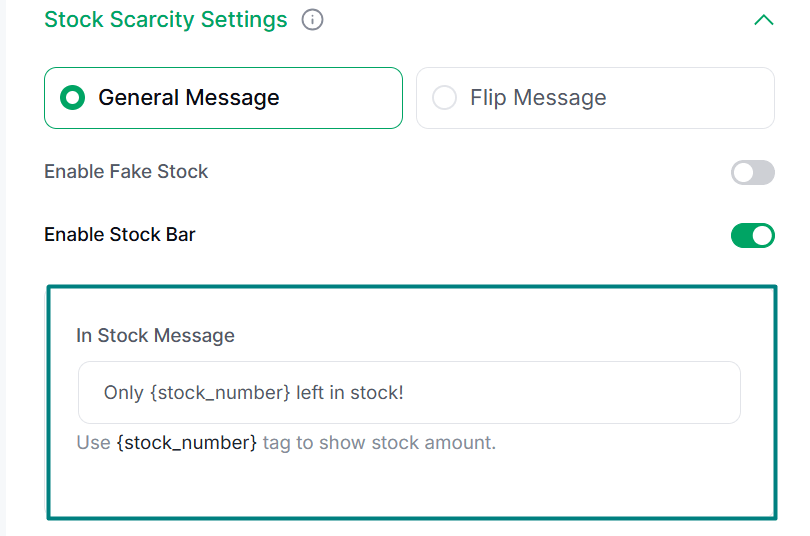
1. Managing the General Stock
There are 3 options of interest here:
- In-stock Settings: You can set the in-stock item number here. Please note that you can enable the stock progress bar using the “Enable Stock Bar” toggle.
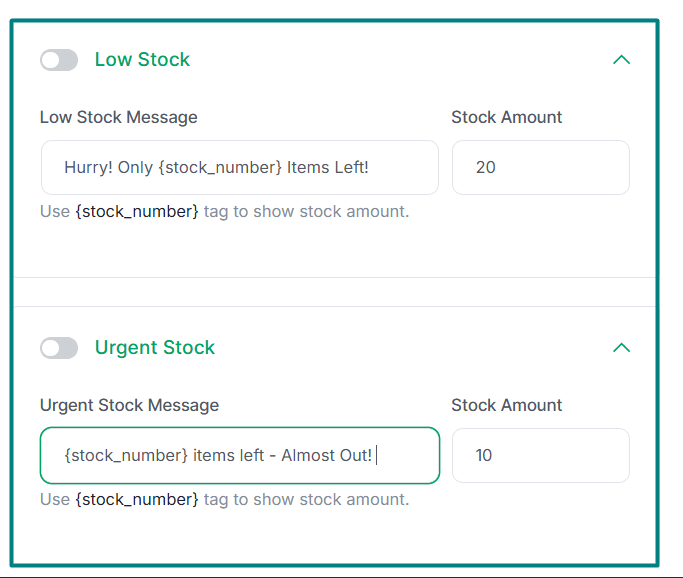
- Low-stock: Enable it and set a low-stock number. Once the item counts goes below this number, the low-stock message will appear.
- Urgent Stock: Enable it and set an urgent stock number. Once the item count goes below this number, the urgent-stock message will show up. This type of message will let the user know that the product may go out of stock very soon.
2. Managing Fake Stock
Often times you need to show stock to create FOMO among users. In this case, you could enable the fake stock option. Please note that it is only available under the “General Message” settings. To use fake stock, you need to:
- Toggle the “Enable Fake Stock” button to “On” state.
- Enable or disable the “Enable Stock Bar” toggle for the fake stock
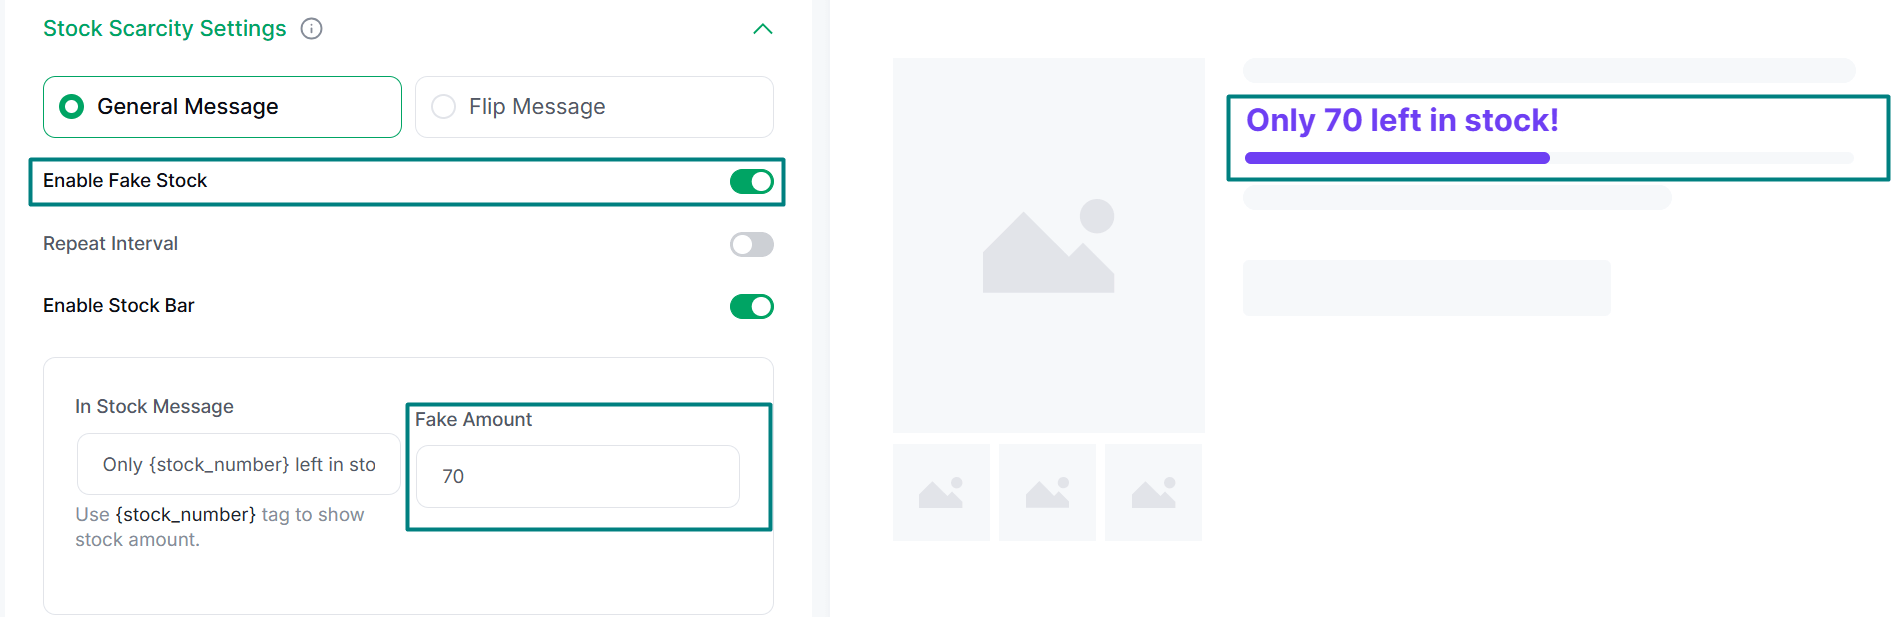
- Enable/disable repeat interval – enabling it will repeat the stock even if the stock is completely depleted.
Here’s the backend view. Here, the fake stock system is enabled with the stock progress bar.
Here’s how it appears on the front-end.
***Please note the you can manage low stock and urgent stock for the fake stock system.
Flip Message
The filp message system acts as a dynamic setting where multiple messages show up regarding the product stock. Once enabled, you can input 2 messages:
- The stock number – the product stock
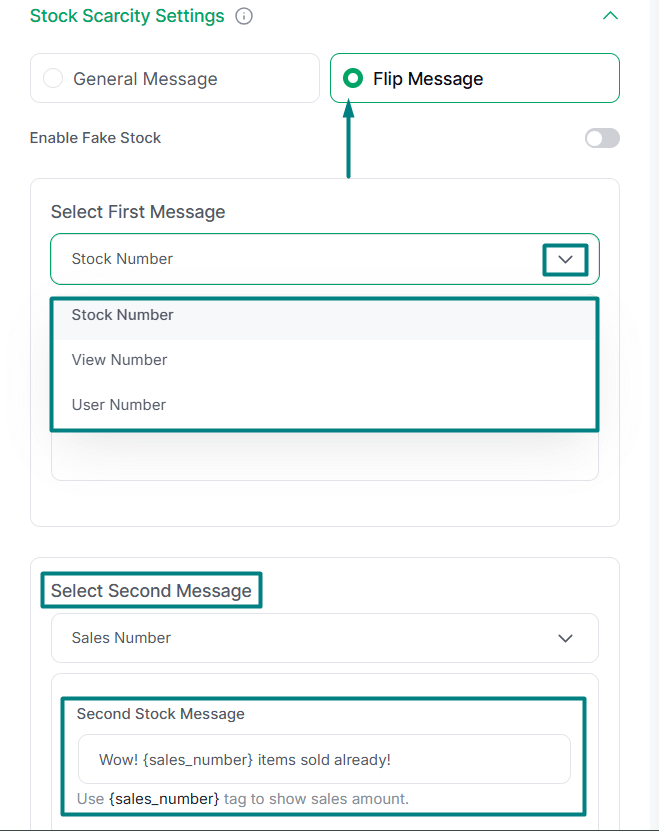
- The buyer view number – how many people are viewing it
- And the user number – how many users are using or interacting with it.
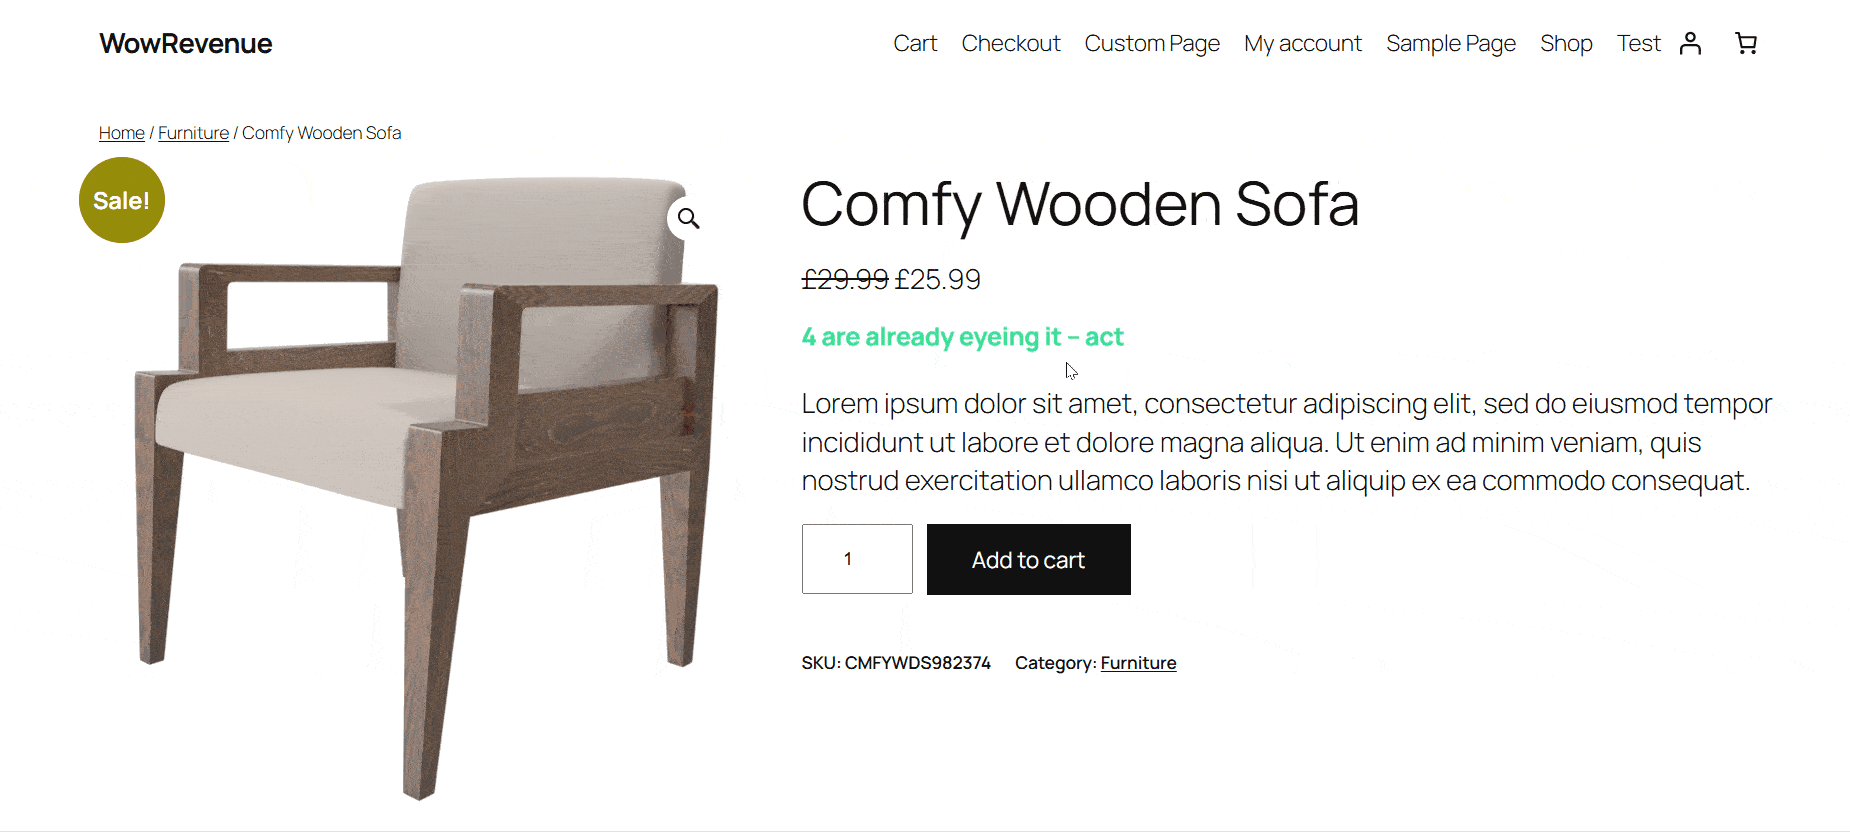
Here’s how it looks on the front-end:
Designing the Campaign
Like all other WowRevenue discount campaigns, you can change the design properties of the stock scarcity campaign. You can change the text color, text style, bar color, padding, and more directly from the campaign settings.
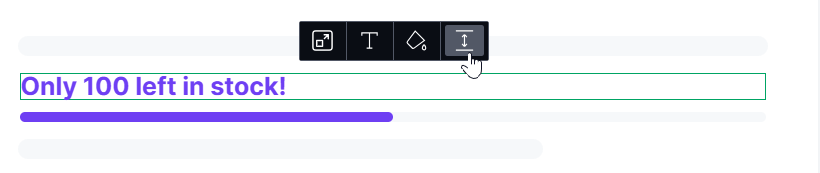
Here’s a custom stock bar design: