To customize Front-end Campaign Title-Schedule Settings-Additional Settings, follow along.
On this page, you will learn everything about customizing your campaigns. It guides you through setting up campaign titles and scheduling start and end dates. Additionally, you can tweak settings like skipping the cart page or enabling quantity selectors. You can also decide what happens when users click on product titles or images.
If you need further assistance after reading this, please don’t hesitate to contact us. We’re always happy to help!
Front-end Campaign Title
To give a campaign title and subheading to your campaign:
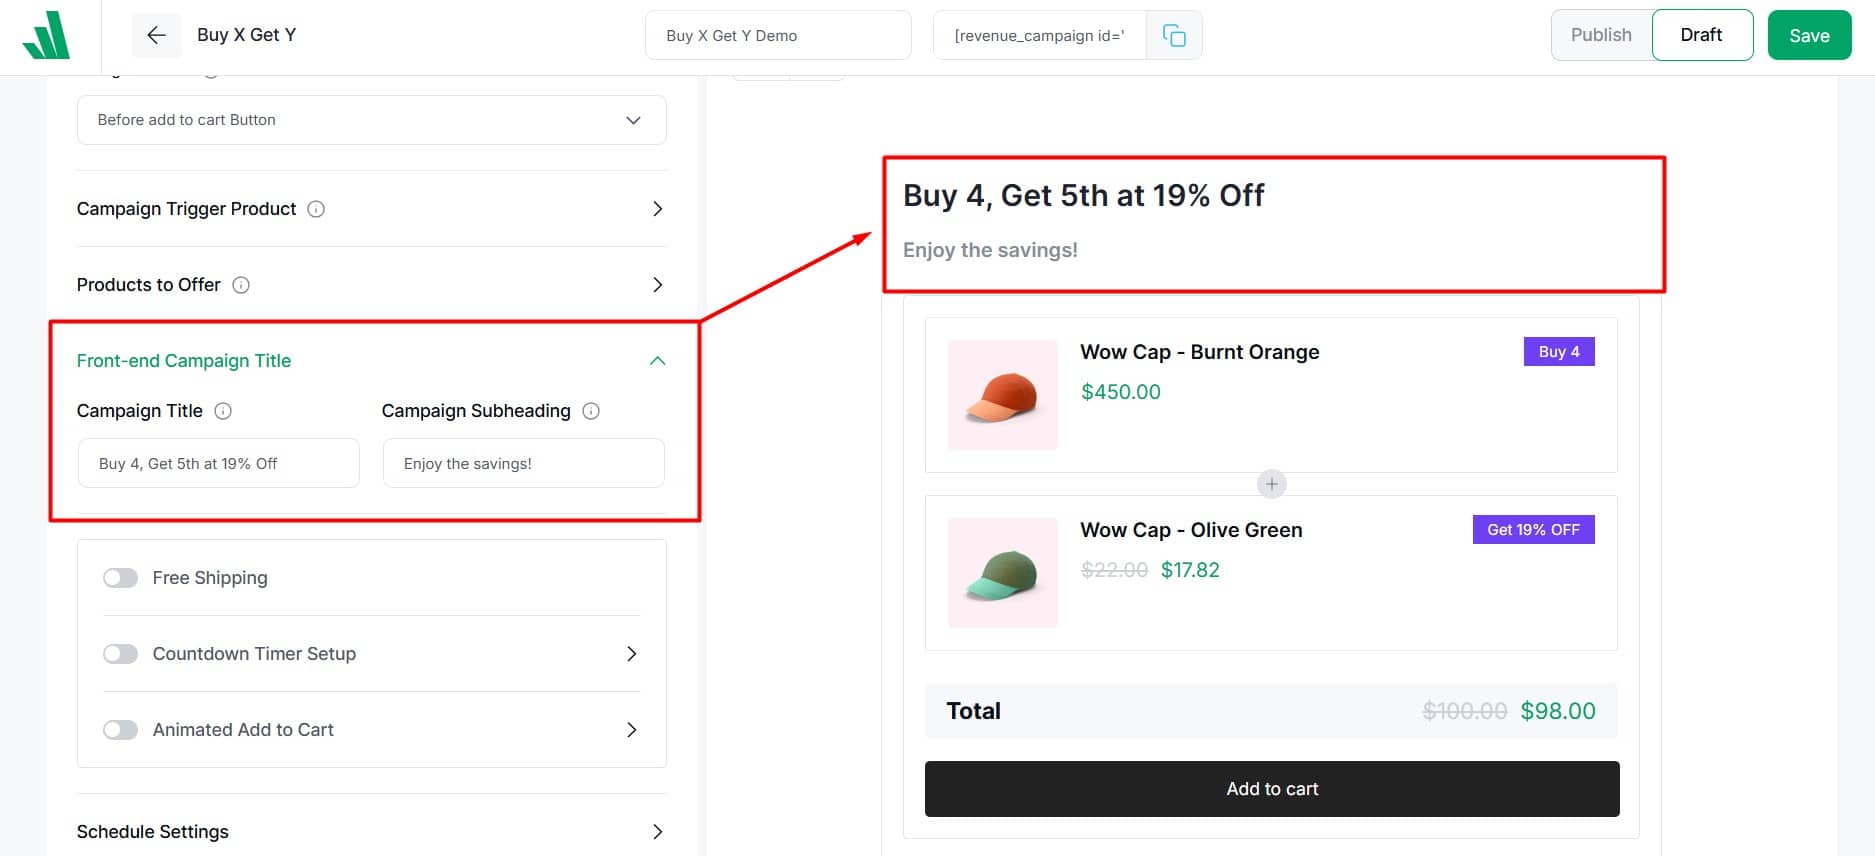
- Navigate to the “Front-end Campaign Title” Section in any campaign.
- Give a campaign title to display to visitors.
- If needed, add a campaign subheading to display below the title.
That’s it!
Schedule Settings
This setting allows you to set a specific time frame for your campaign. You can specify the start date for the campaign. If required, you can also set an end date. This enables you to have precise control over the campaign’s duration. To set the campaign duration:
- Navigate to the “Schedule Settings” Section in any campaign.
- Pick the desired start date using the date picker.
- Select the start time from the dropdown.
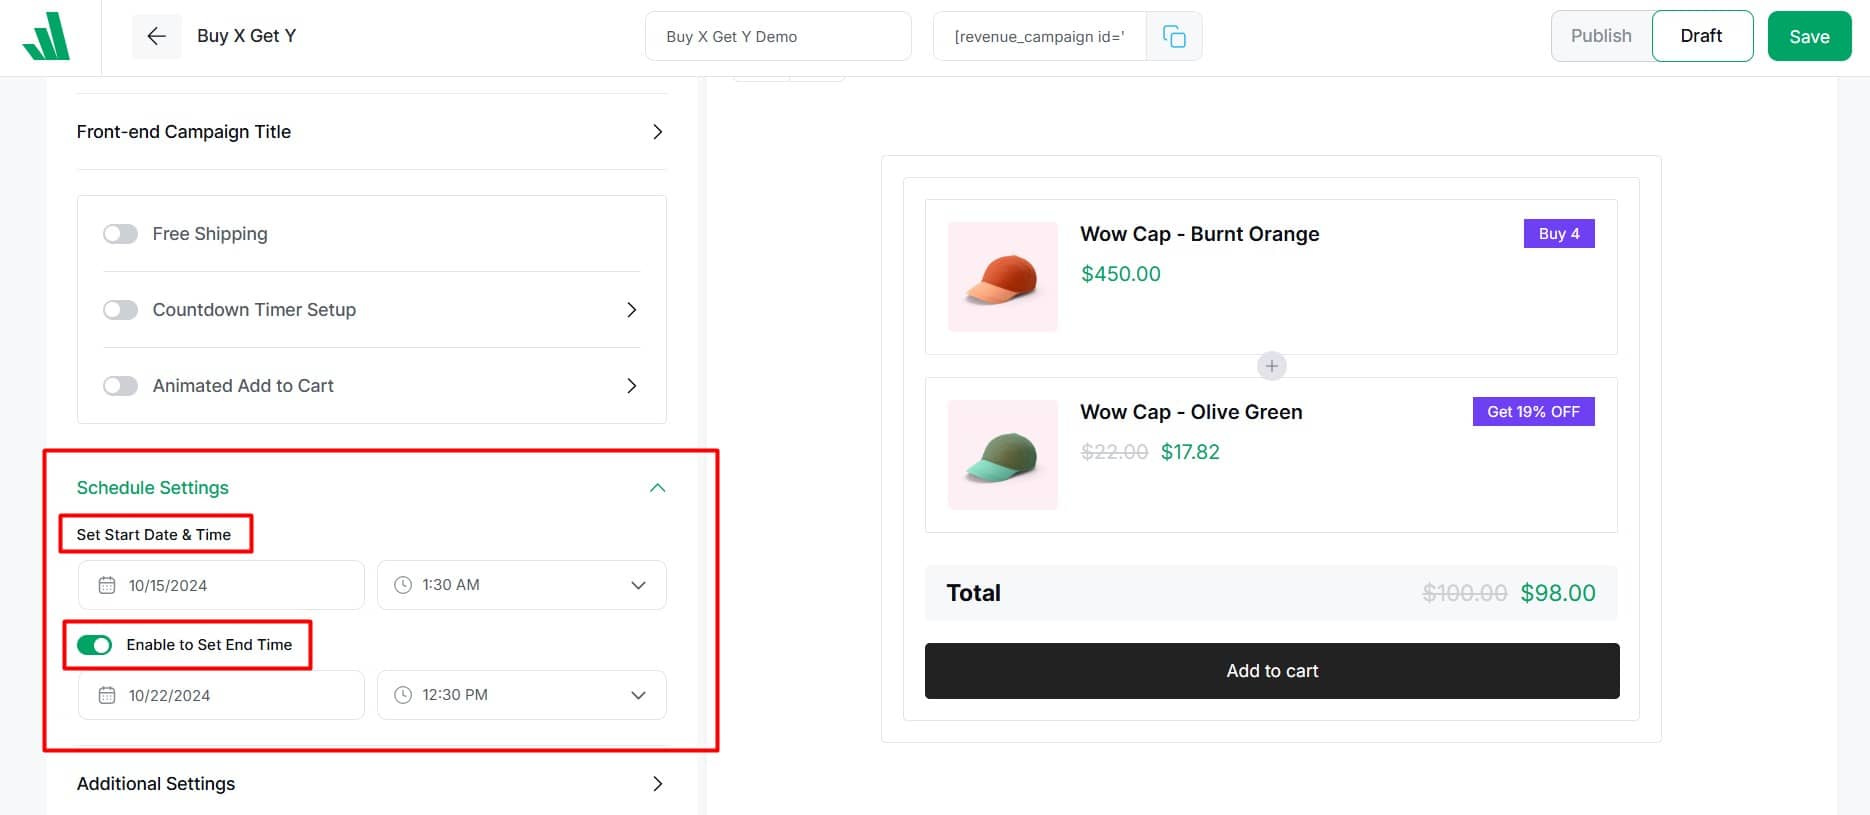
By default, campaigns have no end date and remain active indefinitely. But you can set an end date for your campaign. To specify an end date:
- Switch on the “Enable to Set End Time” option.
- Choose the desired end date using the date picker.
- Select the end time from the dropdown.
Note: The campaign scheduling feature operates based on the server’s time zone, not the user’s time zone.
To schedule campaigns correctly, update the time zone settings in your WordPress dashboard. Here’s how:
- Go to Settings > General > Timezone in your WordPress dashboard.
- Select your desired time zone from the dropdown menu.
- Click Save Changes to apply the settings.
Once the time zone is set, all campaign scheduling will follow this time zone. This ensures that your campaigns are launched at the intended times.
Great job! You’ve successfully scheduled the duration of your campaign!
Additional Settings
The Additional Settings section allows you to fine-tune your campaign display and functionality. Here’s how you can configure each option:
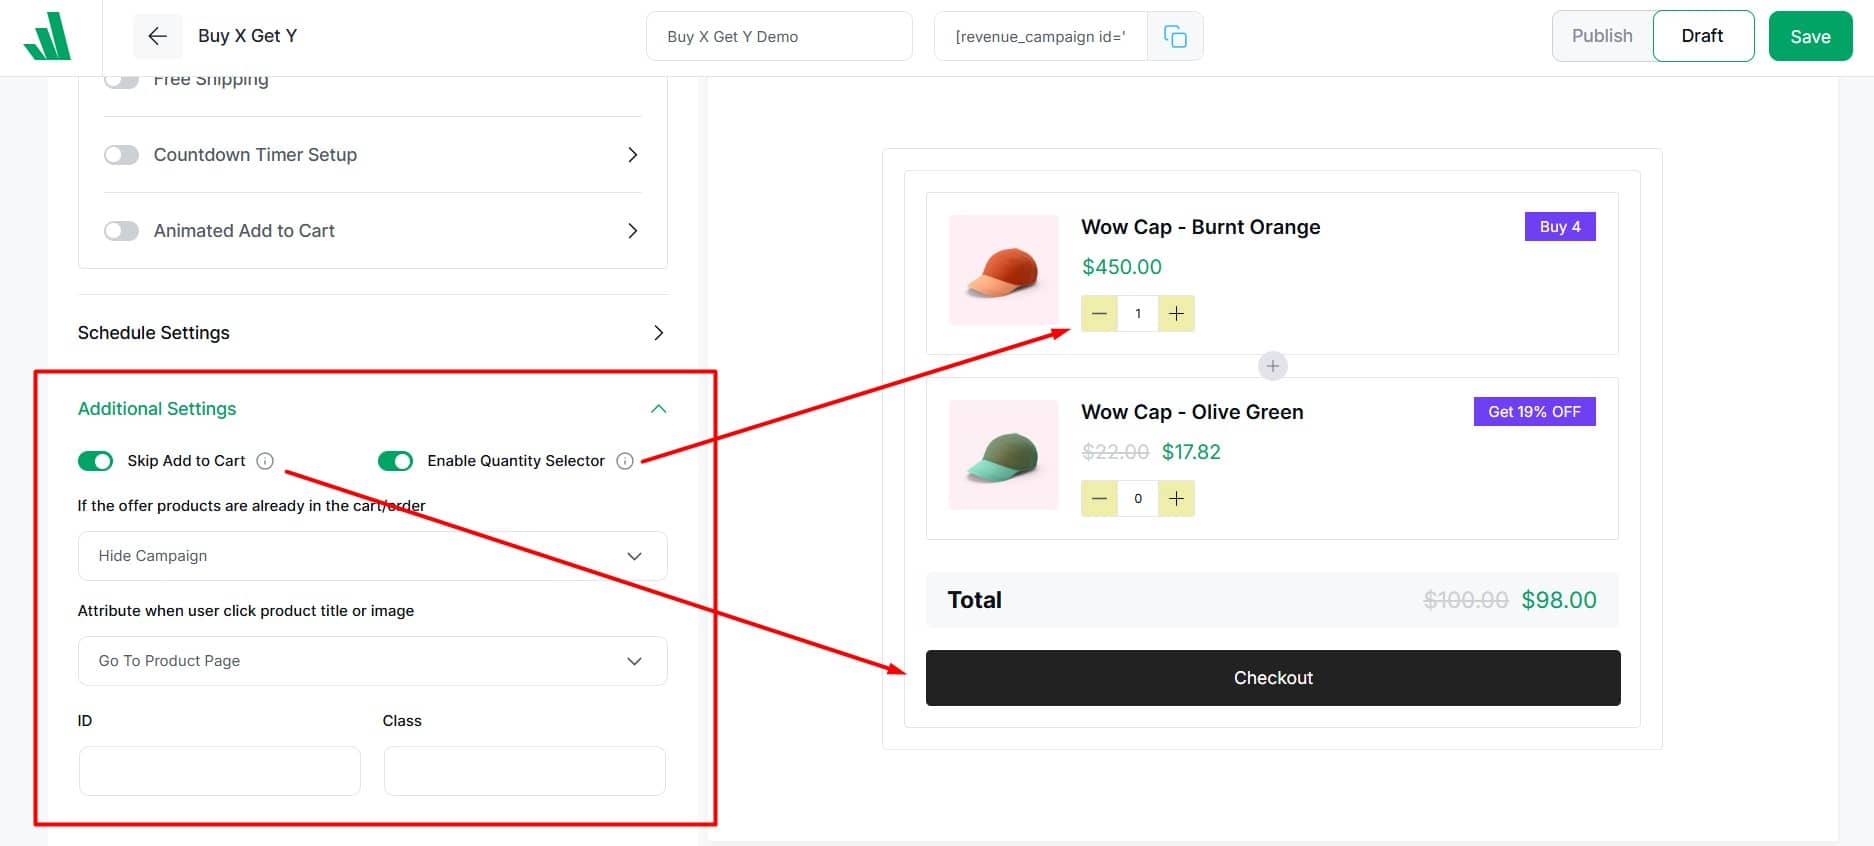
Skip Add to Cart
Make it easier for customers to buy by taking them directly to the checkout page. This way, they can skip the cart page entirely. To do this:
- Turn on “Skip Add to Cart”
Enable Quantity Selector
Let customers add product quantities directly in the offer section before adding to the cart. This way, they don’t need to go to another page to adjust quantities. To do this:
- Turn on “Enable Quantity Selector”
Handle Products Already in Cart/Order:
Select an option to determine how to manage products that are already in the user’s cart or order
The user is presented with a dropdown menu.
- Do Nothing
- Hide Products
- Hide Campaign
Product Title/Image Click Action
This option lets you decide what happens when a user clicks on the product title or image. You can choose from three possible actions. Select the one that best fits your strategy.
- Go To Product Page: The user will be taken to the product page they clicked on.
- Show Product Details on Popup: Clicking on a product will open a popup with its details.
- Do Nothing: No action will be taken. The user will remain on the current page.
Input ID and Class
This allows you to have more tailored customization options.
- Enter custom IDs or CSS classes in this field to personalize the product display.