
A Volume / Quantity Discount is a pricing strategy where customers get a discount for buying an item in bulk. The more they buy a product, the cheaper each unit becomes.
Note: If you need further assistance after reading this, please don’t hesitate to contact us. We’re always happy to help!
Create Campaign
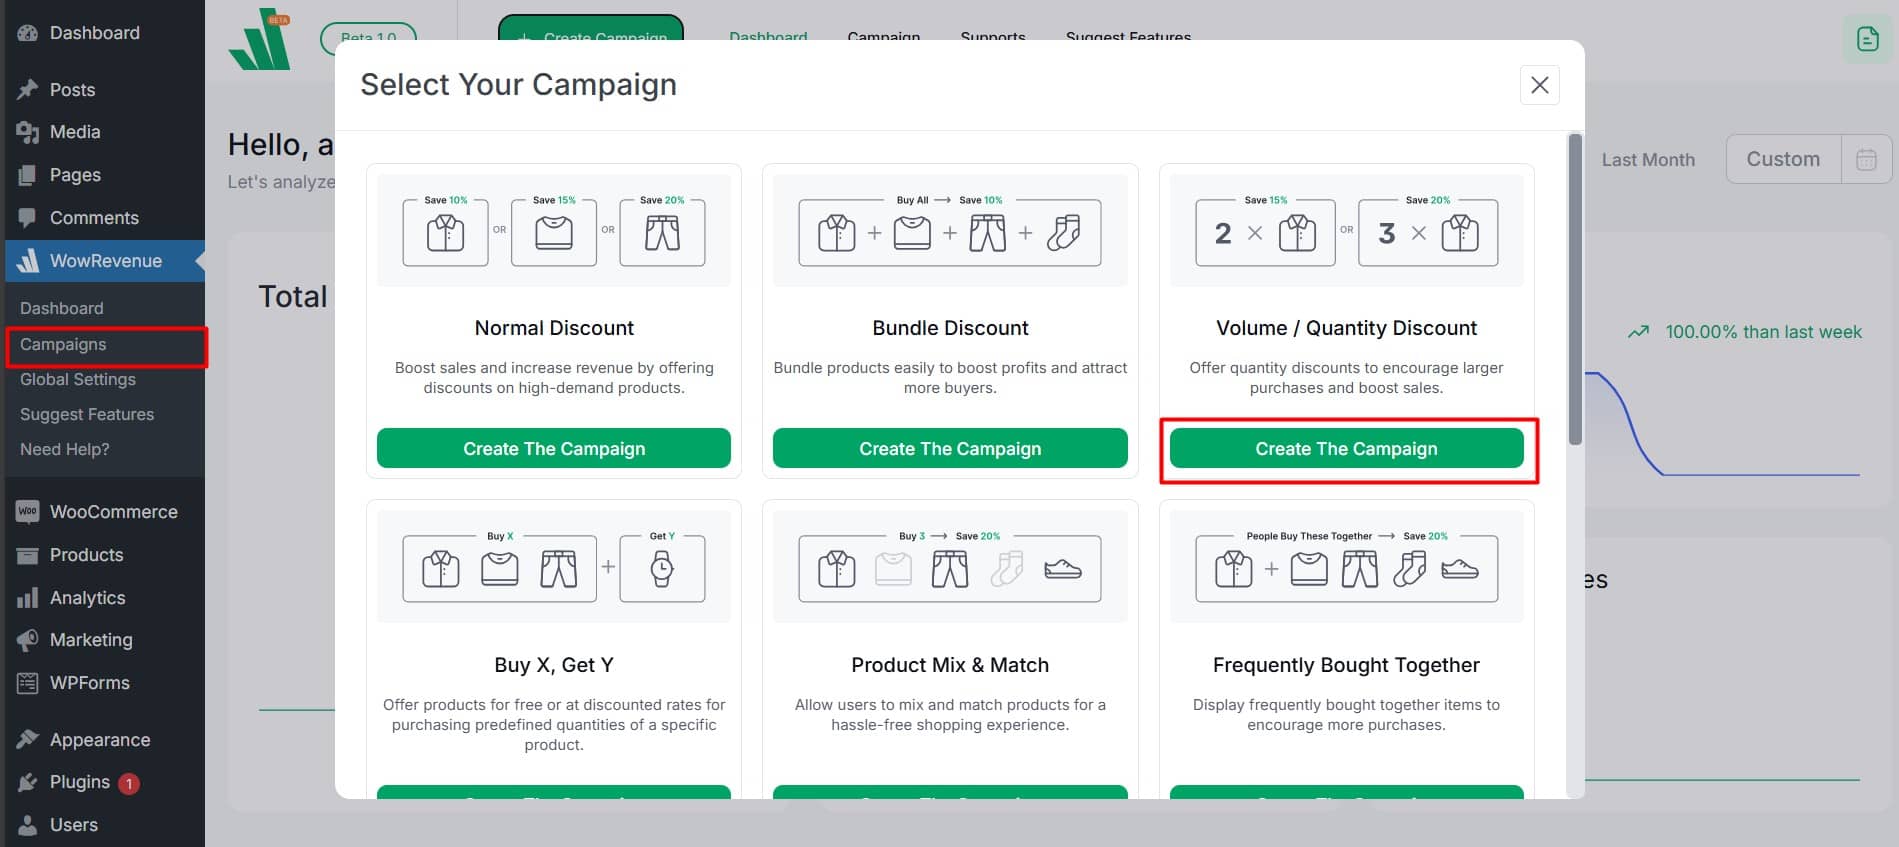
To create a “Volume Discount” campaign, follow these steps.
- From your WordPress Dashboard, go to WowRevenue -> Campaigns -> click on the “Create Campaign” button.
- From the pop-up page, choose “Volume Discount” -> click on the “Create The Campaign” button.
Edit Behavior Settings
Campaign Name: Create a unique campaign name for easy identification to efficiently manage multiple discount campaigns.
Short Code: Use shortcodes to place your quantity discount campaign in a specific position or with third-party solutions.

Campaign Placement: Choose where to display your volume discount campaign. There are four options:
- On The Product Page: When customers view the product, it triggers and shows offers for other items.
- In the Cart: When customers add the product to the cart, it triggers and displays discounts on the cart.
- At Checkout: When customers reach the checkout page with the product, it activates and displays offers on other items.
- On The Thank You Page: Buying a product triggers and displays a discount on the Thank You page.
Display Style: Select how to present your volume discount campaign. There are three options:
In-Page: The volume discount campaign will be displayed directly on the desired page.

- Select an in-page position from the dropdown menu (10 options available).
- Note: The in-page position option is not available for campaigns on checkout or thank you pages.
Pop-Up: The volume discount will appear as a pop-up on the desired page.

- Choose a pop-up animation (8 options available).
- Enable the immediate trigger to appear as soon as the page loads.
- Or set a delay in seconds for it to appear later.
Floating: The volume discount will stay floated on the desired page.

- Pick a floating position from four options.
- Enable the immediate trigger to appear as soon as the page loads.
- Or set a delay in seconds.
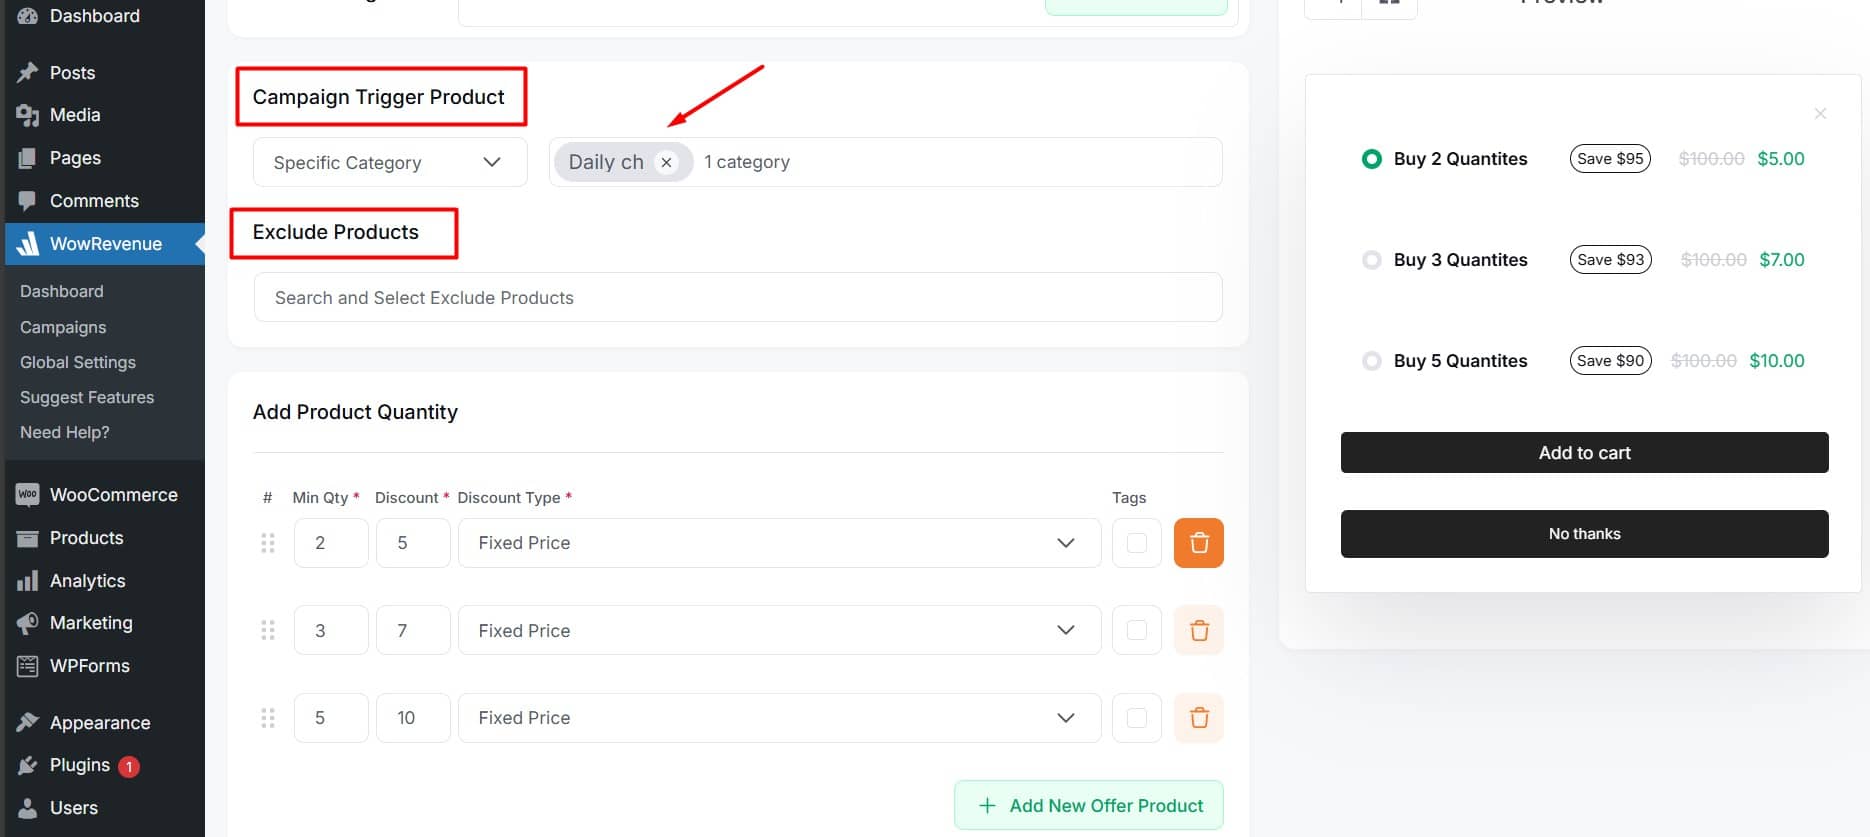
Campaign Trigger Product
In this section, select the products for which you want to make the quantity discount. These will act as trigger products for your Quantity Discount Campaign.
Click on the “Select an option” field and choose your trigger product(s). You have three options:
All products: It’s not common to use all products as a trigger for a volume discount. But this option is available. You can also exclude certain products.
Specific product: Search and select the products for which you want to make a quantity discount.
Specific category: Choose specific categories to apply the quantity discount to all products within those categories. You can also exclude certain products from the categories you selected,
Add Product Quantity
In this section, you can set the quantity of the product and the discount for each quantity. You can create as many quantity-based discounts for the trigger product as you like. Follow these steps to define the quantity and the associated discount.
- Click on the “Min Qty” field and set the minimum quantity of the product.
- Enter the discount amount you want to offer for the chosen quantity.
- Select the type of discount from the dropdown menu. There are two discount types.
- Percentage Discount: Offer the product at a reduced price by a certain percentage of the original price.
- Fixed Discount: Cut a specific amount from the product’s original price.
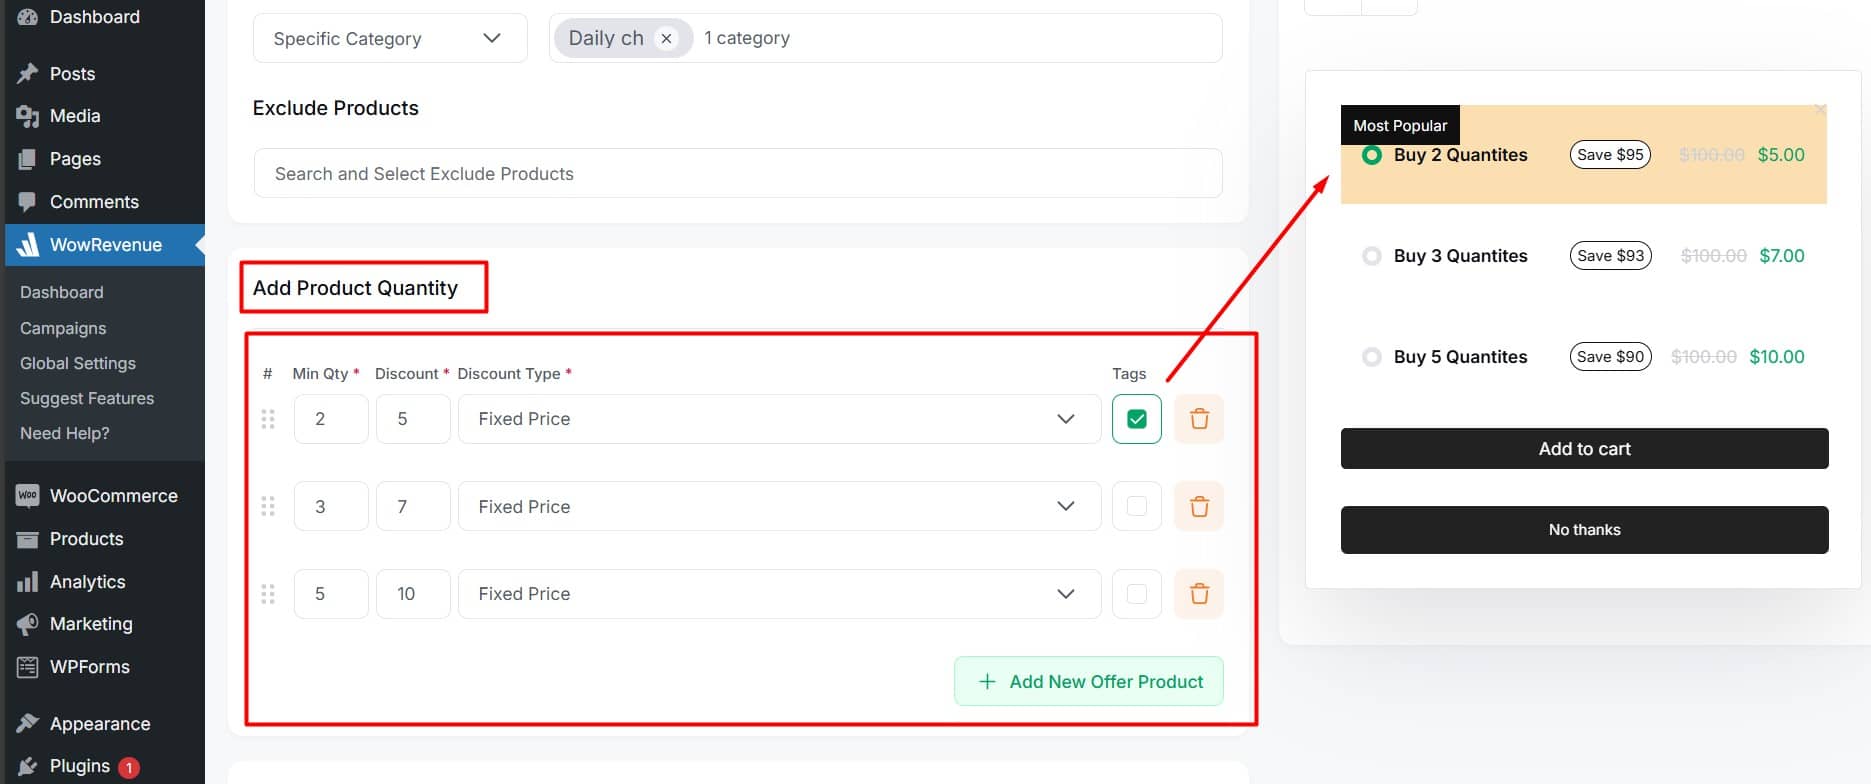
- Click the “+ Add New Offer Product” button to add more products with different quantities and discounts
- Click on the “Tags” field to add a label, like “Most Popular,” to any entry.
- Use the trash bin icon to delete the entry if needed.
- You can drag and drop to reorder easily.
To set up Front-end Campaign Title, Campaign Time Schedule Settings, and Additional Settings, click here.
To learn about Countdown Timer, Animated Add to Cart, and Free Shipping features, click here.
For Typography, Color, and Spacing, click here.