A Free Shipping campaign is a promotional element displayed on e-commerce websites. It shows customers how close they are to getting free shipping.
This campaign encourages customers to add more items to their cart to reach a specific order threshold. Then it rewards them by waiving shipping costs.
If you need further assistance after reading this, please don’t hesitate to contact us. We’re always happy to help!
Create the Free Shipping Campaign
To create a “Free Shipping” campaign, follow these simple steps: from your WordPress Dashboard,
- Navigate to WowRevenue -> Campaigns.
- Click on the “Create Campaign” button.
- A pop-up will appear, find and select “Free Shipping” and then
- Click the “Create the Campaign” button to proceed.
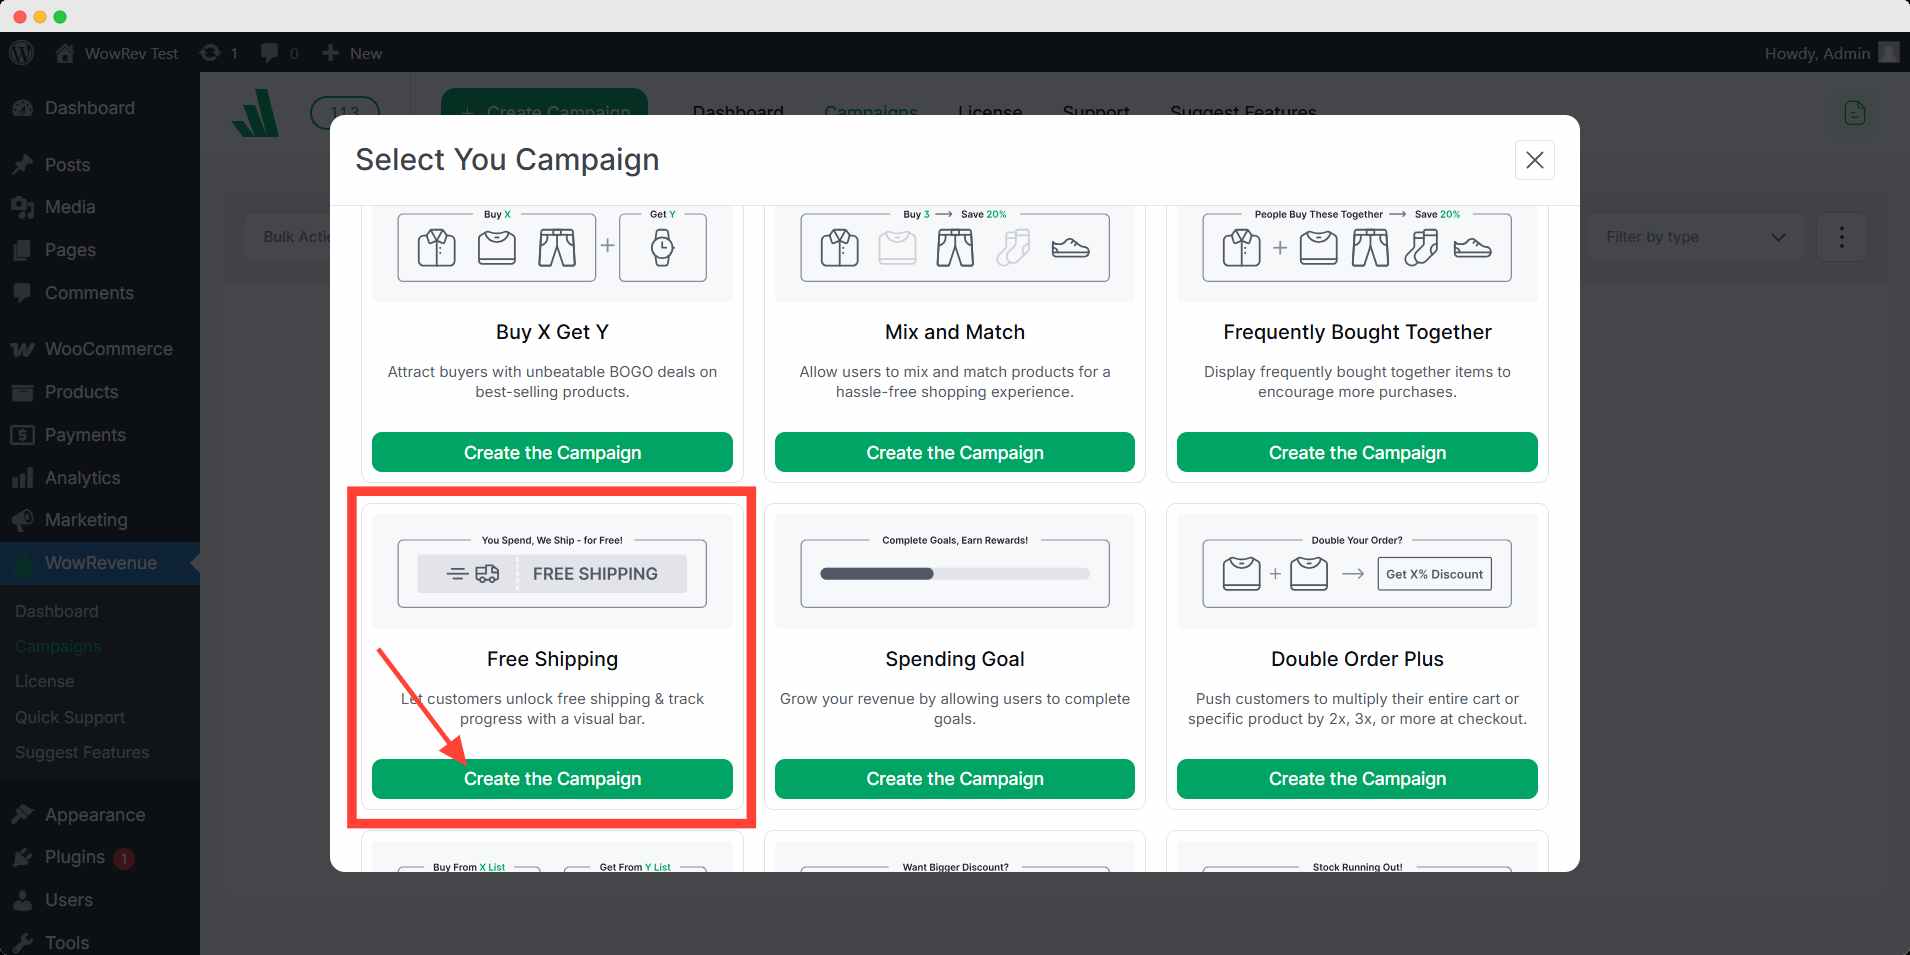
This will initiate the process of setting up your Free Shipping campaign.
Configure Basic Campaign Settings
To set up the initial options for your Free Shipping campaign, follow these steps:
Campaign Name: Give your campaign a unique and descriptive name so you can easily recognize and manage it later.
Shortcode: Use the shortcode to place your Free Shipping campaign on specific pages, posts, or sections of your website. Simply copy and paste the generated shortcode into your desired location.
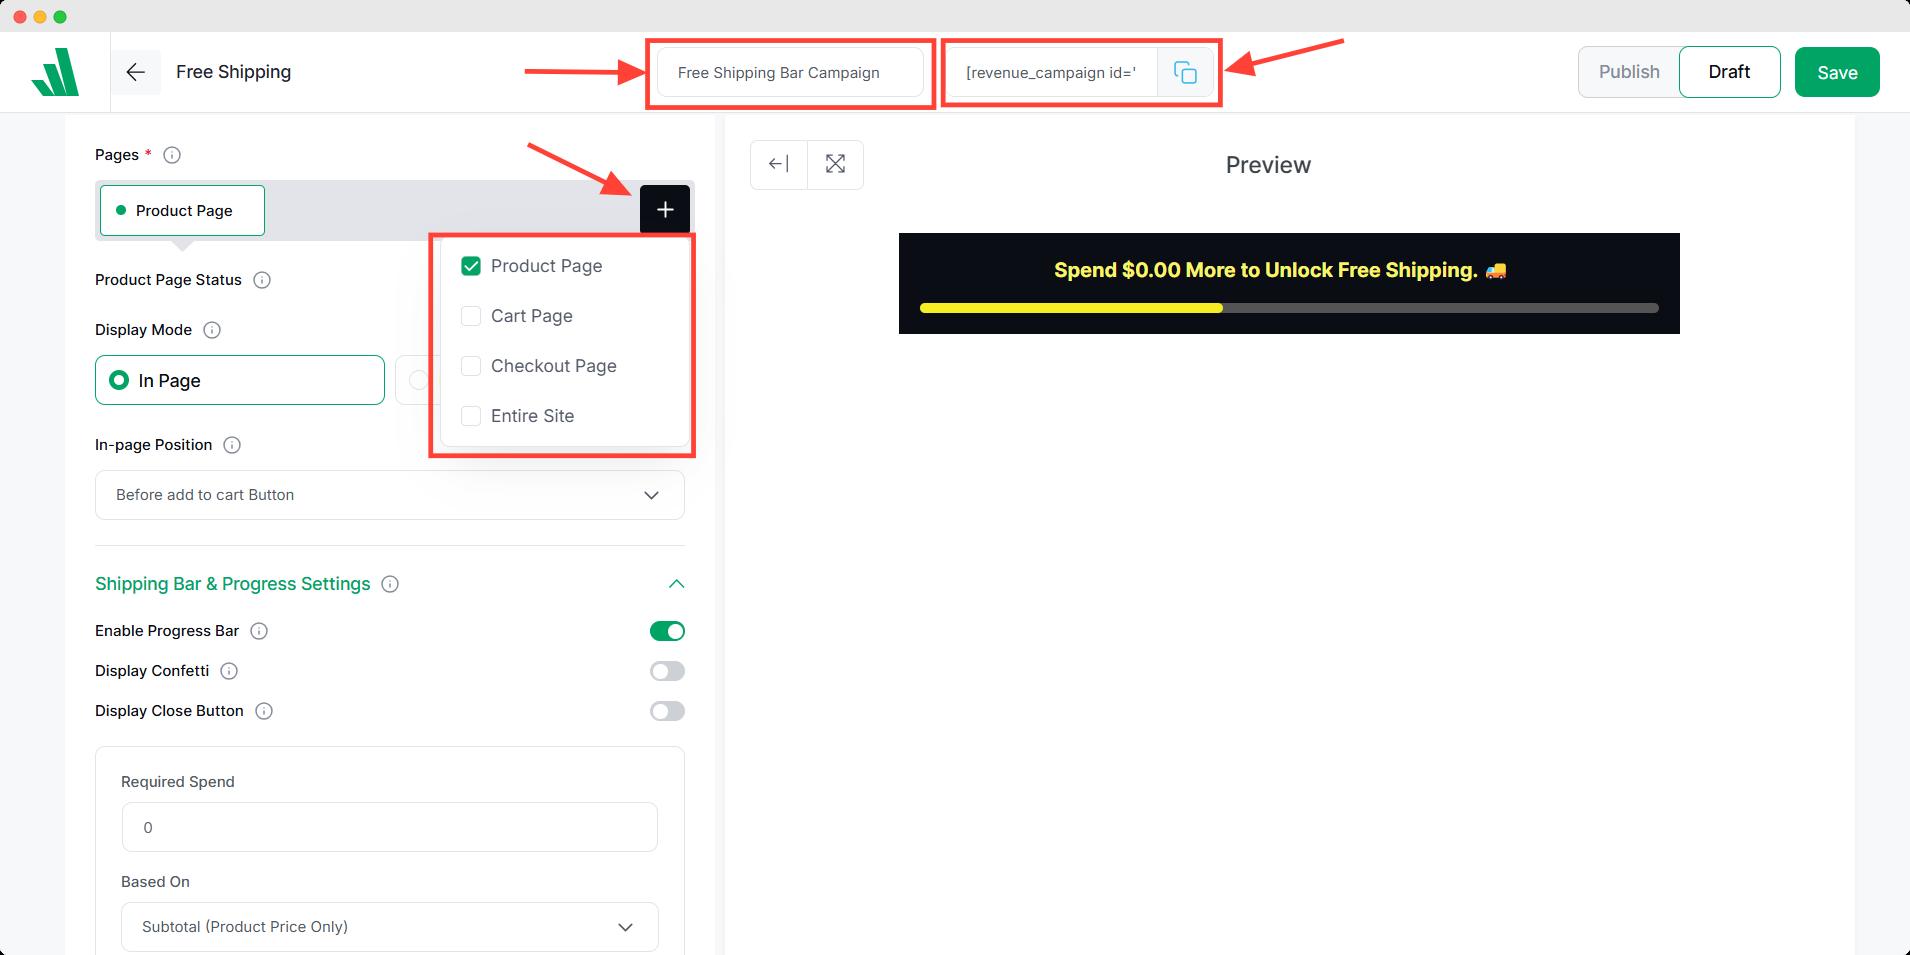
Select Page(s): Choose the specific page(s) on your website where you’d like the free shipping campaign to be displayed. You can choose from four options:
Entire Site: Display the free shipping campaign across your entire website.
Product Page: Show free shipping campaign only on individual product pages.
Cart Page: Display the free shipping campaign on the shopping cart page.
Checkout Page: Show the campaign on the checkout page.
Page Status: Set the page status to Active or Inactive to control when the campaign is live or temporarily disabled.
Display Mode: Select how the campaign will be displayed. The available options depend on the page(s) you choose:
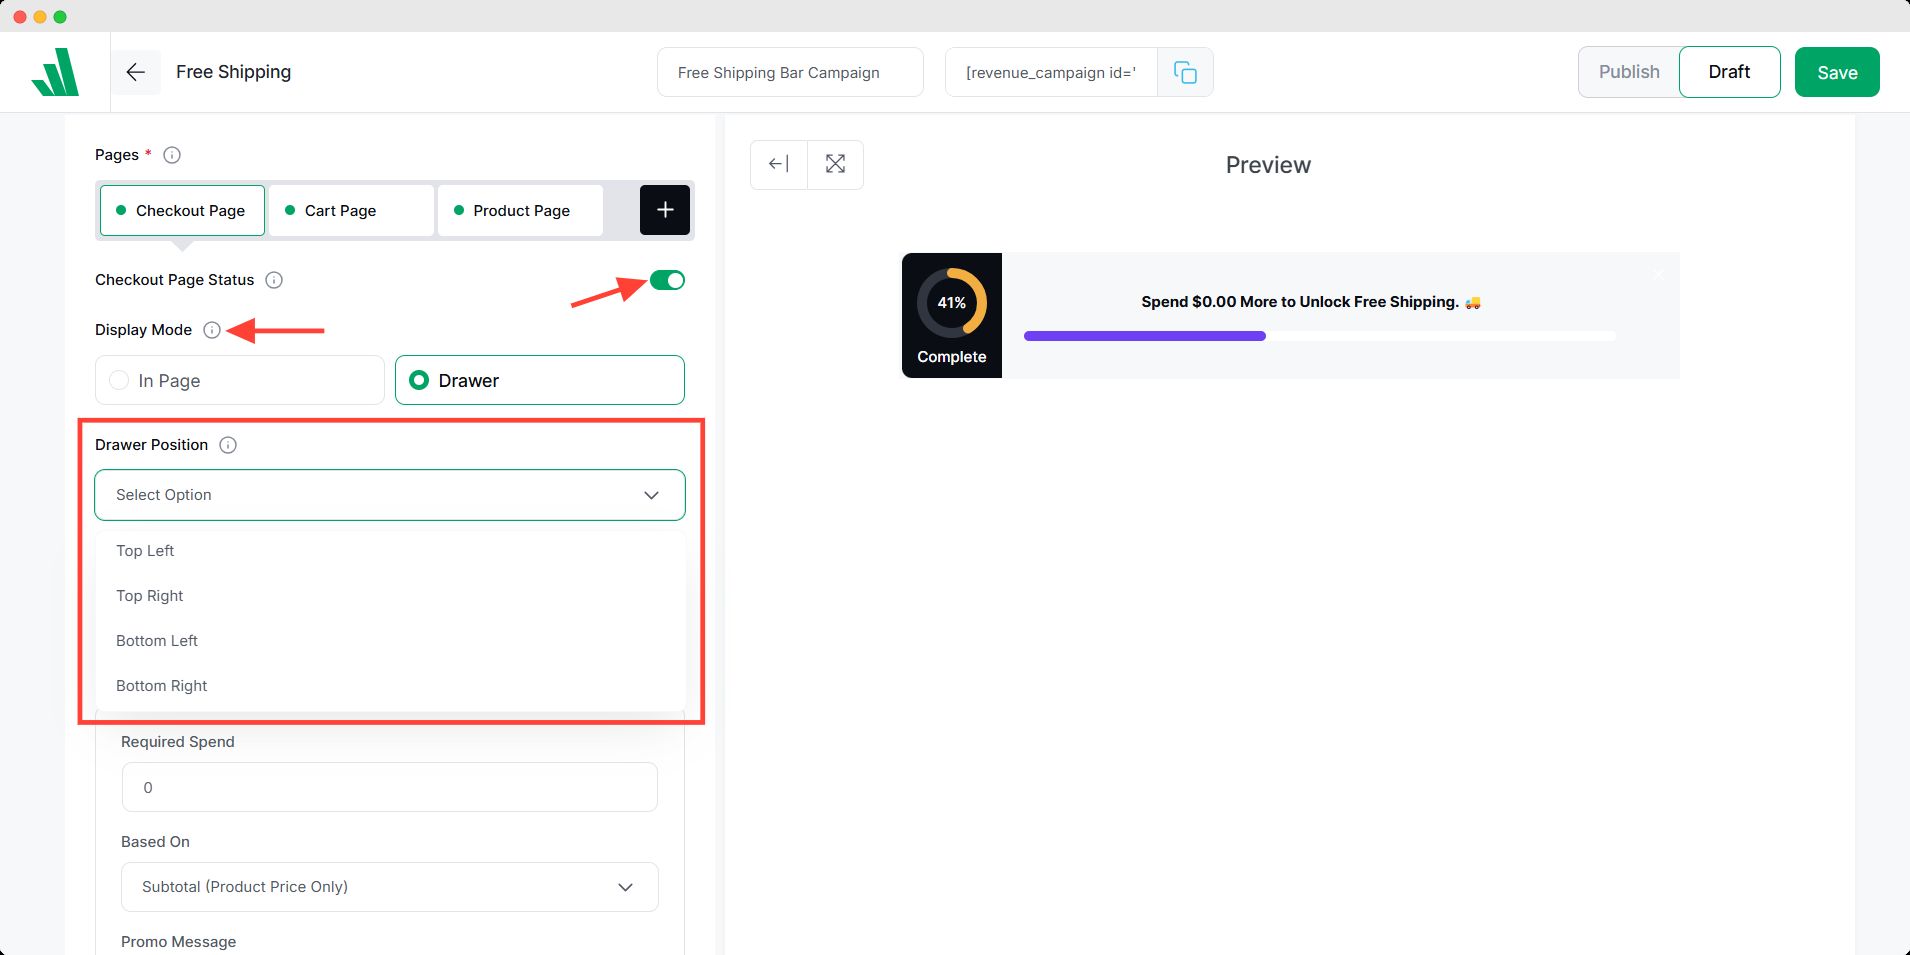
For Product, Cart, or Checkout Pages, you will have two display mode options:
In-Page: Display the campaign directly within the page content.
Drawer: Show the campaign in a sliding or pop-out drawer.
For the Entire Site, you will have three display mode options: Top, Bottom, and Drawer
Positioning Options: After selecting the display mode, you have to customize the positioning. The options will vary based on your display mode selection.
Once these options are configured, you can proceed to the additional campaign details.
Shipping Bar & Progress Settings
In this section, you can set up the details for the progress bar for which you want to offer a free shipping campaign. To set up the progress bar settings, follow these steps:
Enable Progress Bar: Enable this to display a progress bar
Display Confetti: Display a cheerful animation when customers reach their goals to celebrate their reward.
Display Close Button: Enable this to let visitors close the bar
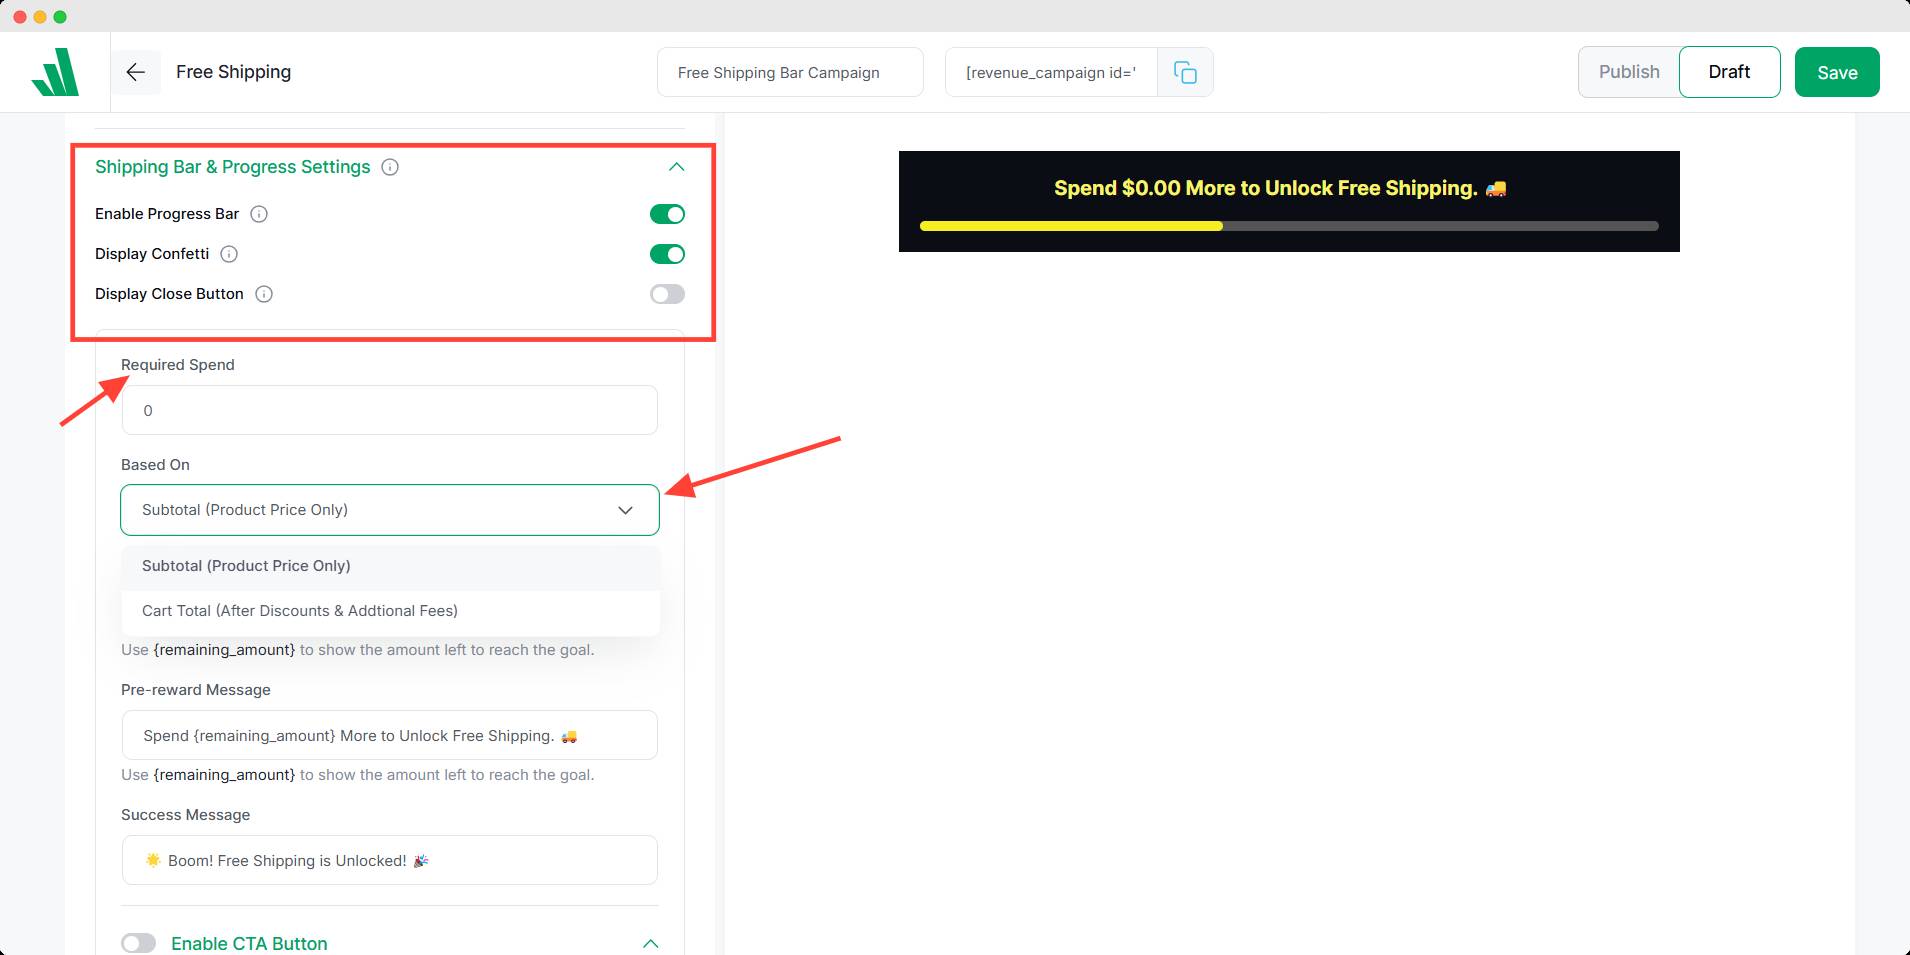
Required Spend: Enter the minimum amount a customer must spend to qualify for free shipping. For example, set this value to 100.
Based On: Select what the required spend is calculated on.
Choose Subtotal (Product Price Only) to base the calculation solely on the total product prices. Or you can choose, Cart Total (After Discounts & Additional Fees)
Promo Message: Customize the message shown to customers to encourage them to reach the free shipping threshold.
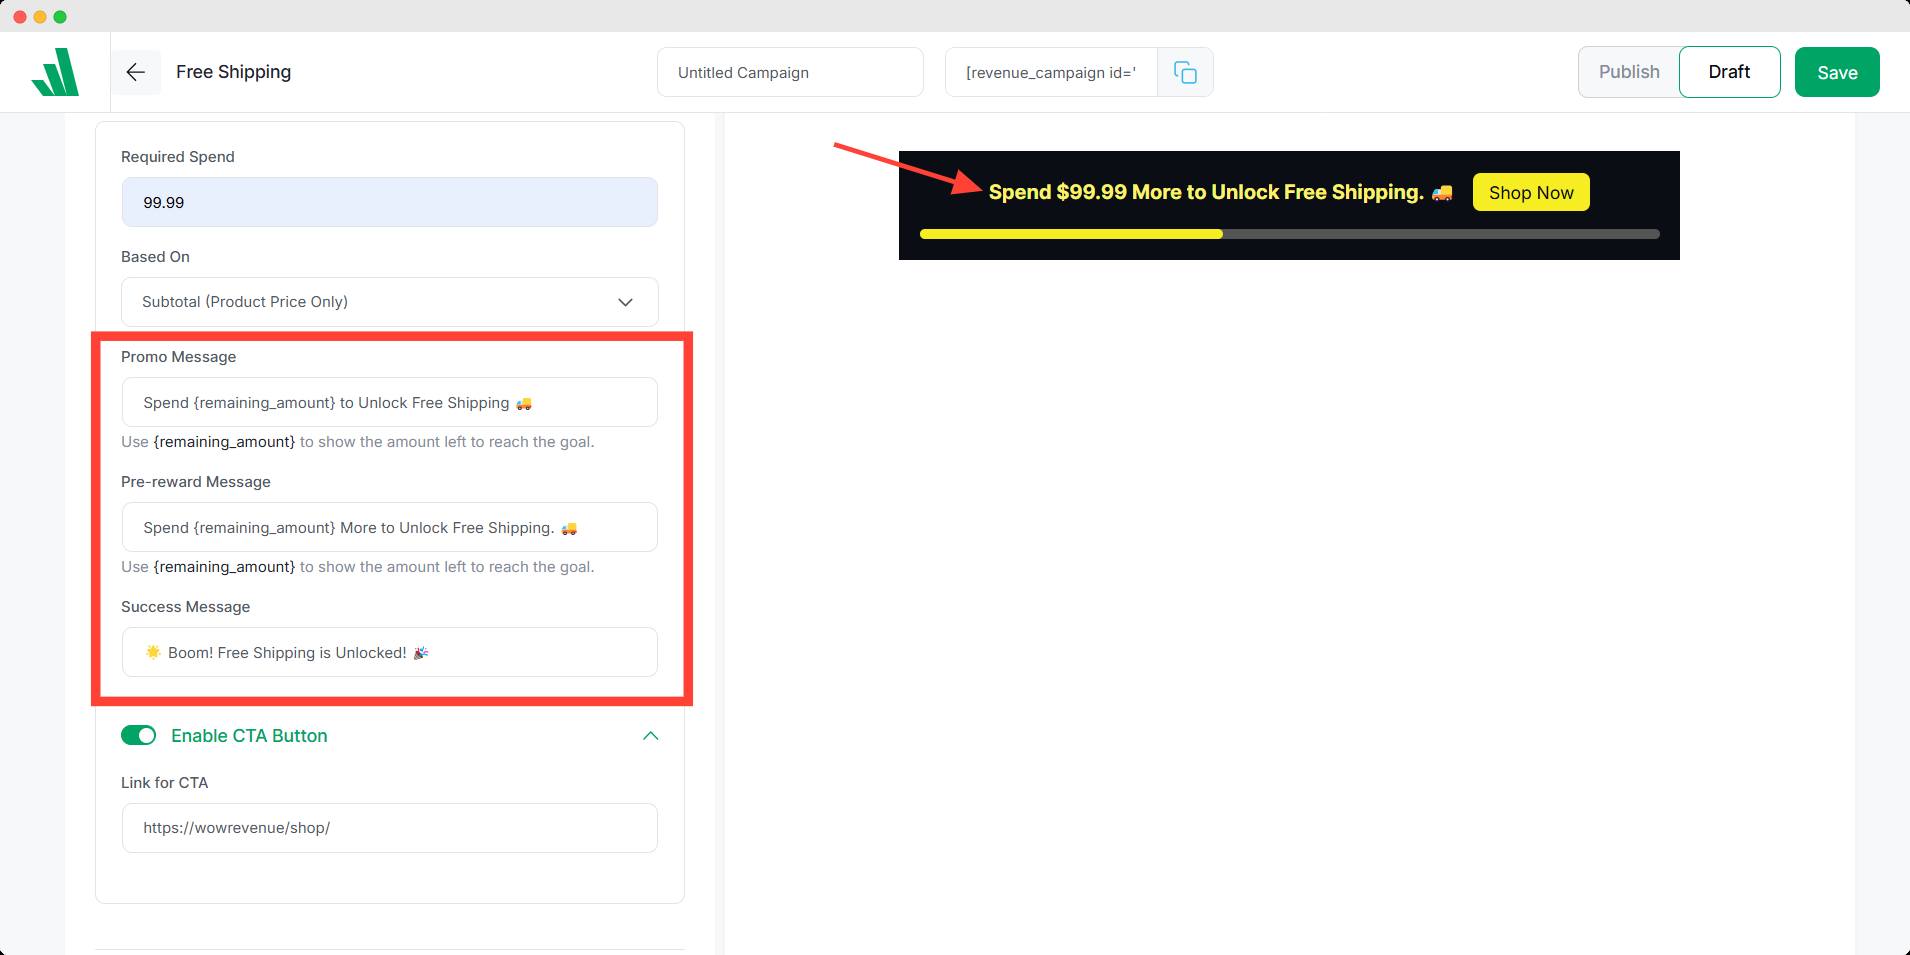
Pre-reward Message: Set a message to let users know how much more to spend to get the free shipping goal met.
Success Message: Define the message displayed once the free shipping goal is achieved.
Enable CTA Button: If you enable this, there will be a CTA button after the bar message. Such as Shop Now or you can add a page through it.
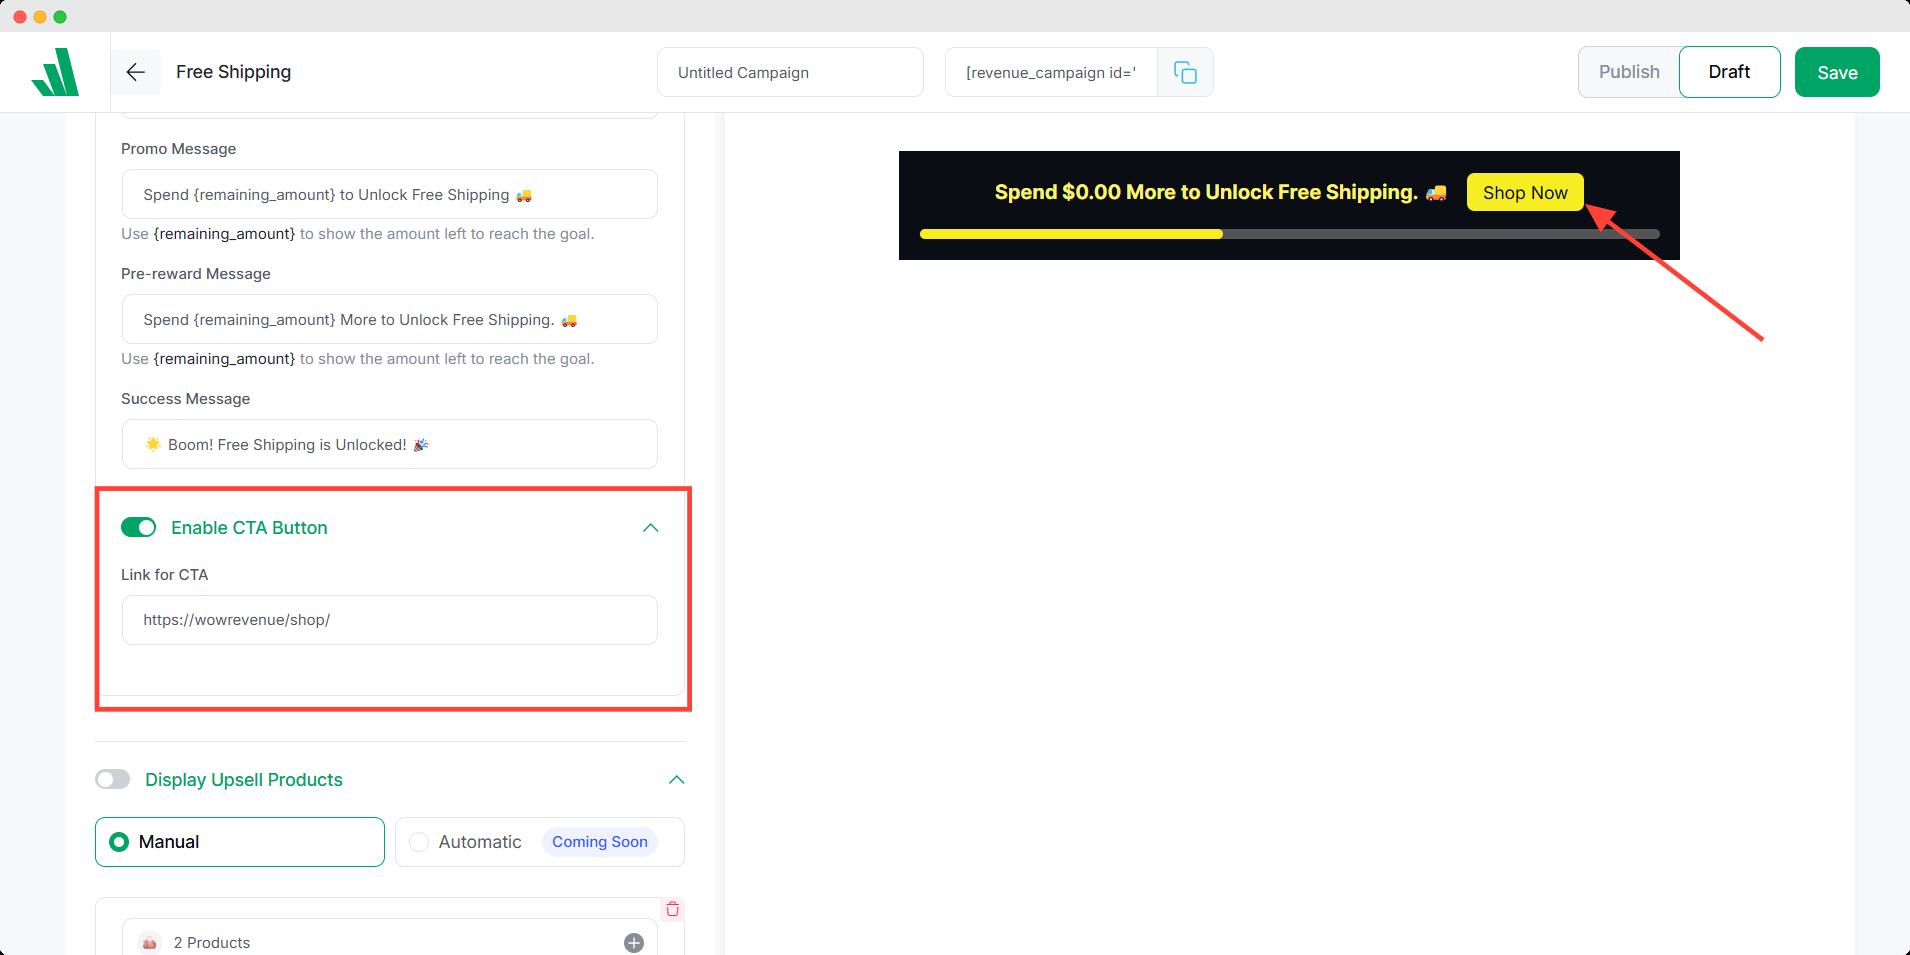
To do it:
- Enable the CTA button.
- Insert a link to where you want to navigate the users.
- Change the CTA button label if required from the design preview section.
Display Upsell Products
To set up upsell products for your free shipping campaign, follow these steps:
Selection Mode: Choose how upsell products will be displayed. Currently, the manual selection mode is available. And the Automatic mode is coming soon.
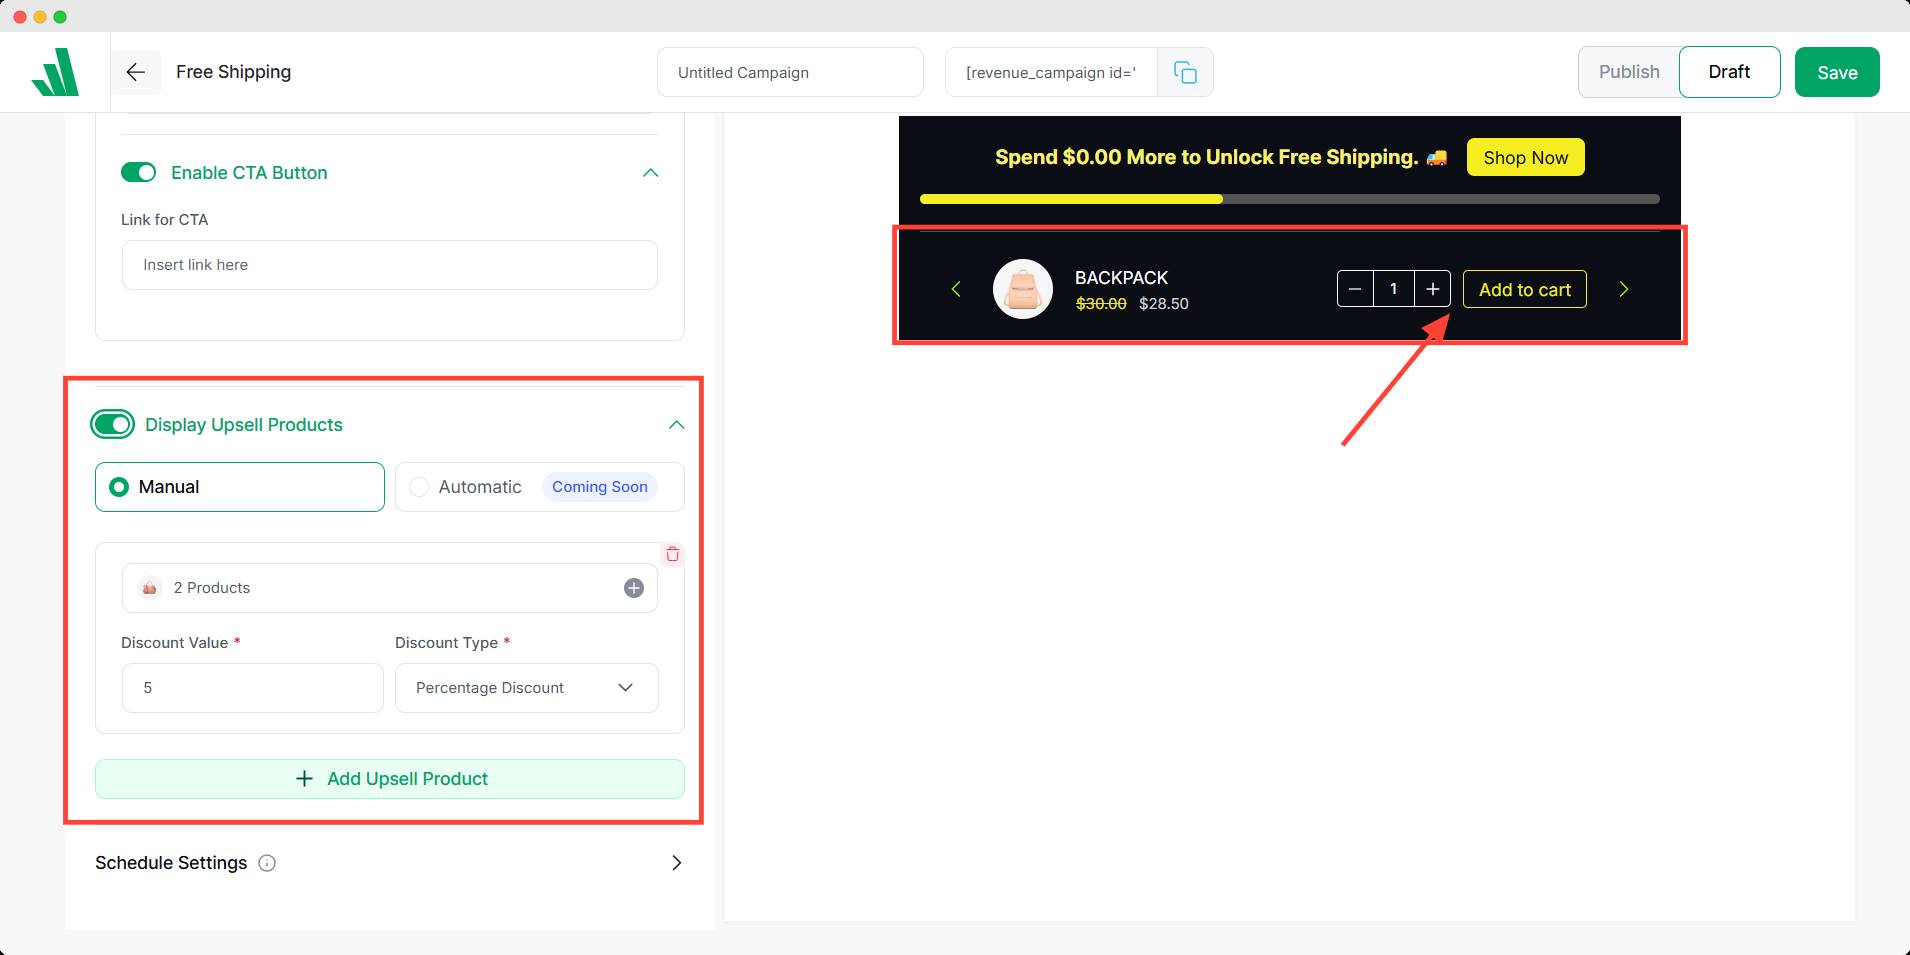
- Select the products you want to upsell.
- Enter the discount amount (e.g., 0 for no discount or a specific value).
- Choose the type of discount (e.g., percentage, fixed amount, or “No Discount”).
- Click the “Add Upsell Product” button to add another upsell product.
These settings allow you to customize how upsell products are displayed and promoted during the campaign.
To set up the Campaign Schedule Settings, just [click here].
If you need help designing your campaign, like adjusting Typography, Colors, Spacing, and more, click [click here].


