Did you know that 48% of online shoppers abandon their carts because of high shipping fees? Yeah, It’s a big issue. But here’s the thing: You can totally flip the script by offering free shipping.
In fact, 93% of customers say they’re more likely to buy if free shipping is an option. But you have to make sure your customers know about it. That’s where a free shipping bar comes in.
So, if you’re running a WooCommerce store and want to give your sales a little boost, I’m going to walk you through how to set up a free shipping bar in WooCommerce step by step.
But for a quick overview of the Free Shipping Bar, check out this video!
What is a Free Shipping Bar in WooCommerce?
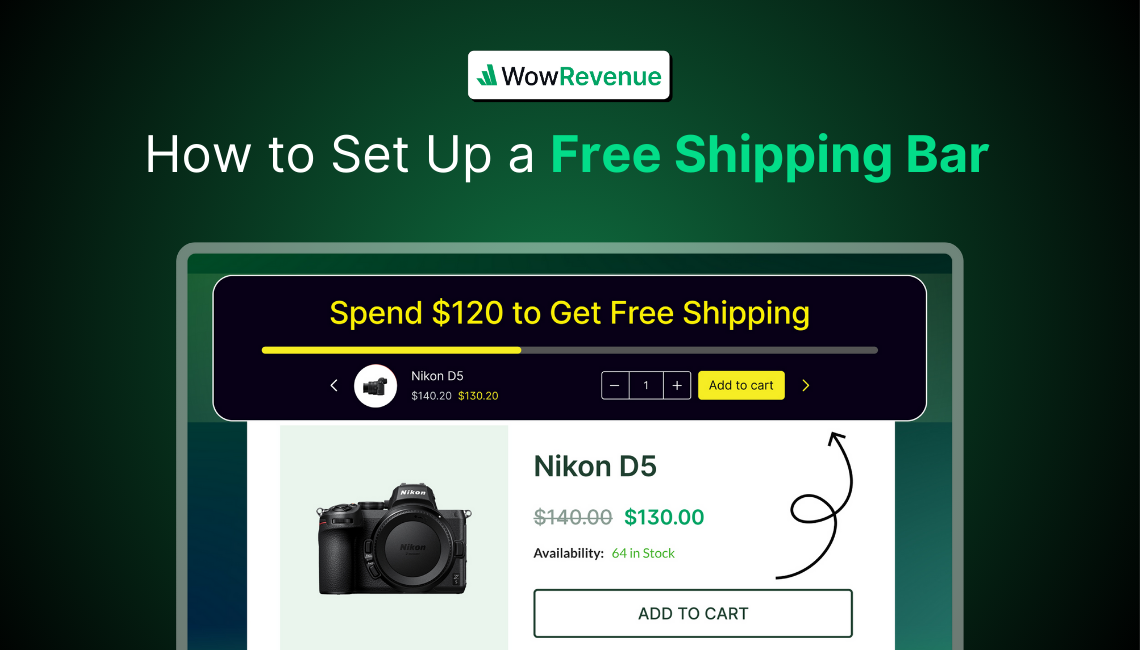
You’ve probably seen those little banners at the top of big retail sites that say, “Spend $25 more for free shipping!” These are called Free Shipping Bars in WooCommerce.
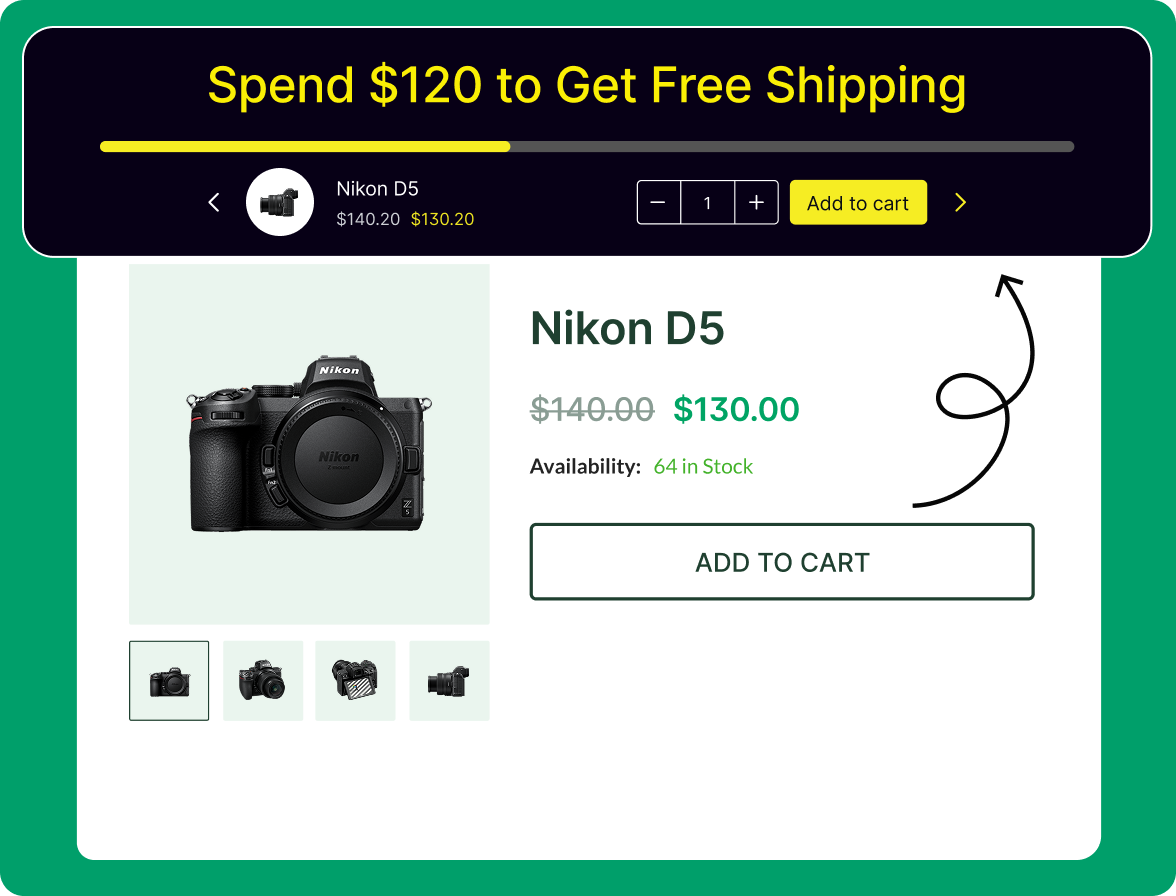
It is basically a promotional announcement bar or a progress indicator that aware customers about the offering and also how close they are to getting free shipping on their order. As the customer adds more products, the bar fills up until they hit your free shipping threshold.
It’s usually sits at the top of your online store and updates in real-time as customers add items to their cart.
Key Features of Free Shipping Bars
- Progress Tracking: Displays how much more customers need to spend to qualify for free shipping.
- Real-time Updates: Adjusts automatically as items are added to or removed from the cart.
- Customizable Design: Can be styled to match your store’s branding and aesthetics
- Conditional Display: Can be configured to show on specific pages.
Is Free Shipping Bar a Competitive Edge for Your WooCommerce Store?
In a crowded market, offering free shipping gives your store a distinct competitive edge. With the Free Shipping Bar, you can highlight your offer creatively. It helps strengthen your brand and sets you apart from competitors still charging for shipping.
✅ Customer Expectations: It’s No Longer a Luxury
Customers expect free shipping, especially with brands. In fact, 68% of consumers say free shipping influences their purchase decisions.
✅ Increase AOV by Encouraging More Spending
A Free Shipping Bar can boost your average order value (AOV) by encouraging customers to add extra items. For example, “Add $15 more to get free shipping” pushes them to make that final purchase and turns small carts into bigger ones.
✅ Reduce Cart Abandonment
Unexpected shipping costs are a major cause of cart abandonment. The Free Shipping Bar addresses this issue upfront and reduces surprises to faster checkout completion.
✅ Enhanced User Experience
The Bar provides clear and upfront information about the shipping. It eliminates hidden fees and confusion. Customers appreciate transparency, which leads to a smoother shopping experience and builds trust in your store.
✨ Is It Worth the Cost? ✨
Offering free shipping means you’ll either absorb the shipping costs or raise product prices. However, the Free Shipping Bar can help offset these costs by increasing AOV and driving more sales.
How to Set Up a Free Shipping Bar in WooCommerce: 5 Easy Steps
Alright, let’s break this down and make sure everything’s set up just right. First, we’ll pick the right tool, and then dive into all the customization options.
The right plugin for a free shipping bar in WooCommerce is crucial. With so many options, how do you pick the right one for? Here are the 5 key factors you can look for:
☑️ Ease of Use: You want a plugin that’s easy to set up with intuitive interfaces and helpful guides.
☑️ Flexible Rules: The plugin should let you set customizable free shipping spending thresholds.
☑️ Custom Messages & Confetti: The plugin should have options for personalized messages to highlight your promo deals and rewards.
☑️ Analytics & Performance Tracking: You’ll want to track your campaign performance with detailed insights.
☑️ Reliable Support & Regular Updates: You need a plugin that offers solid support and regular updates.
Why I Think WowRevenue is a Great Choice
WowRevenue ticks all the boxes and more when it comes to setting up a free shipping bar in WooCommerce. It has:
✅ Choose where to display the bar—across the whole site or on specific pages.
✅ Show a progress bar with personalized messages and fun confetti animation.
✅ Integrate a customizable CTA button to direct customers to specific deals.
✅ Offer precise design options and boost sales by promoting upsell products.
These are exactly what you need for a free shipping bar, right? Now, let’s install WowRevenue:
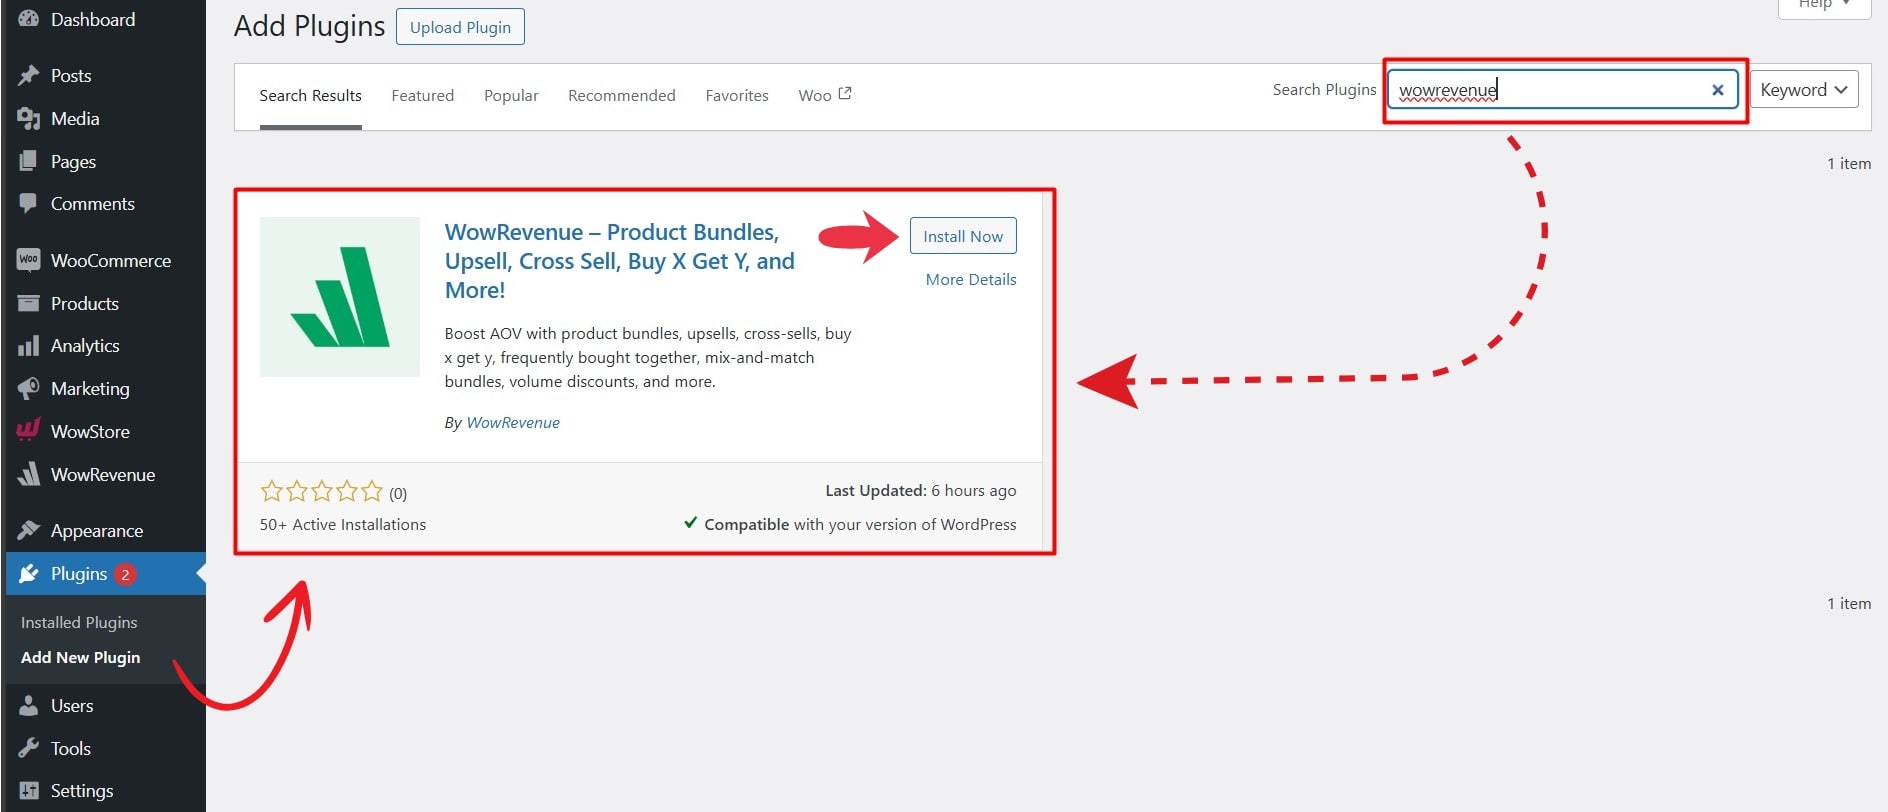
- Go to your WordPress dashboard.
- Head over to the “Plugins” section and search for “WowRevenue.”
- When you see it, click “Install.”
- Once it’s installed, activate the plugin, and you’re good to go!
Now, let’s move on to the next step!
Step #1: Create the Free Shipping Campaign
To create your Free Shipping campaign in WooCommerce, follow these steps:
- Go to your WordPress Dashboard.
- Navigate to WowRevenue -> Campaigns.
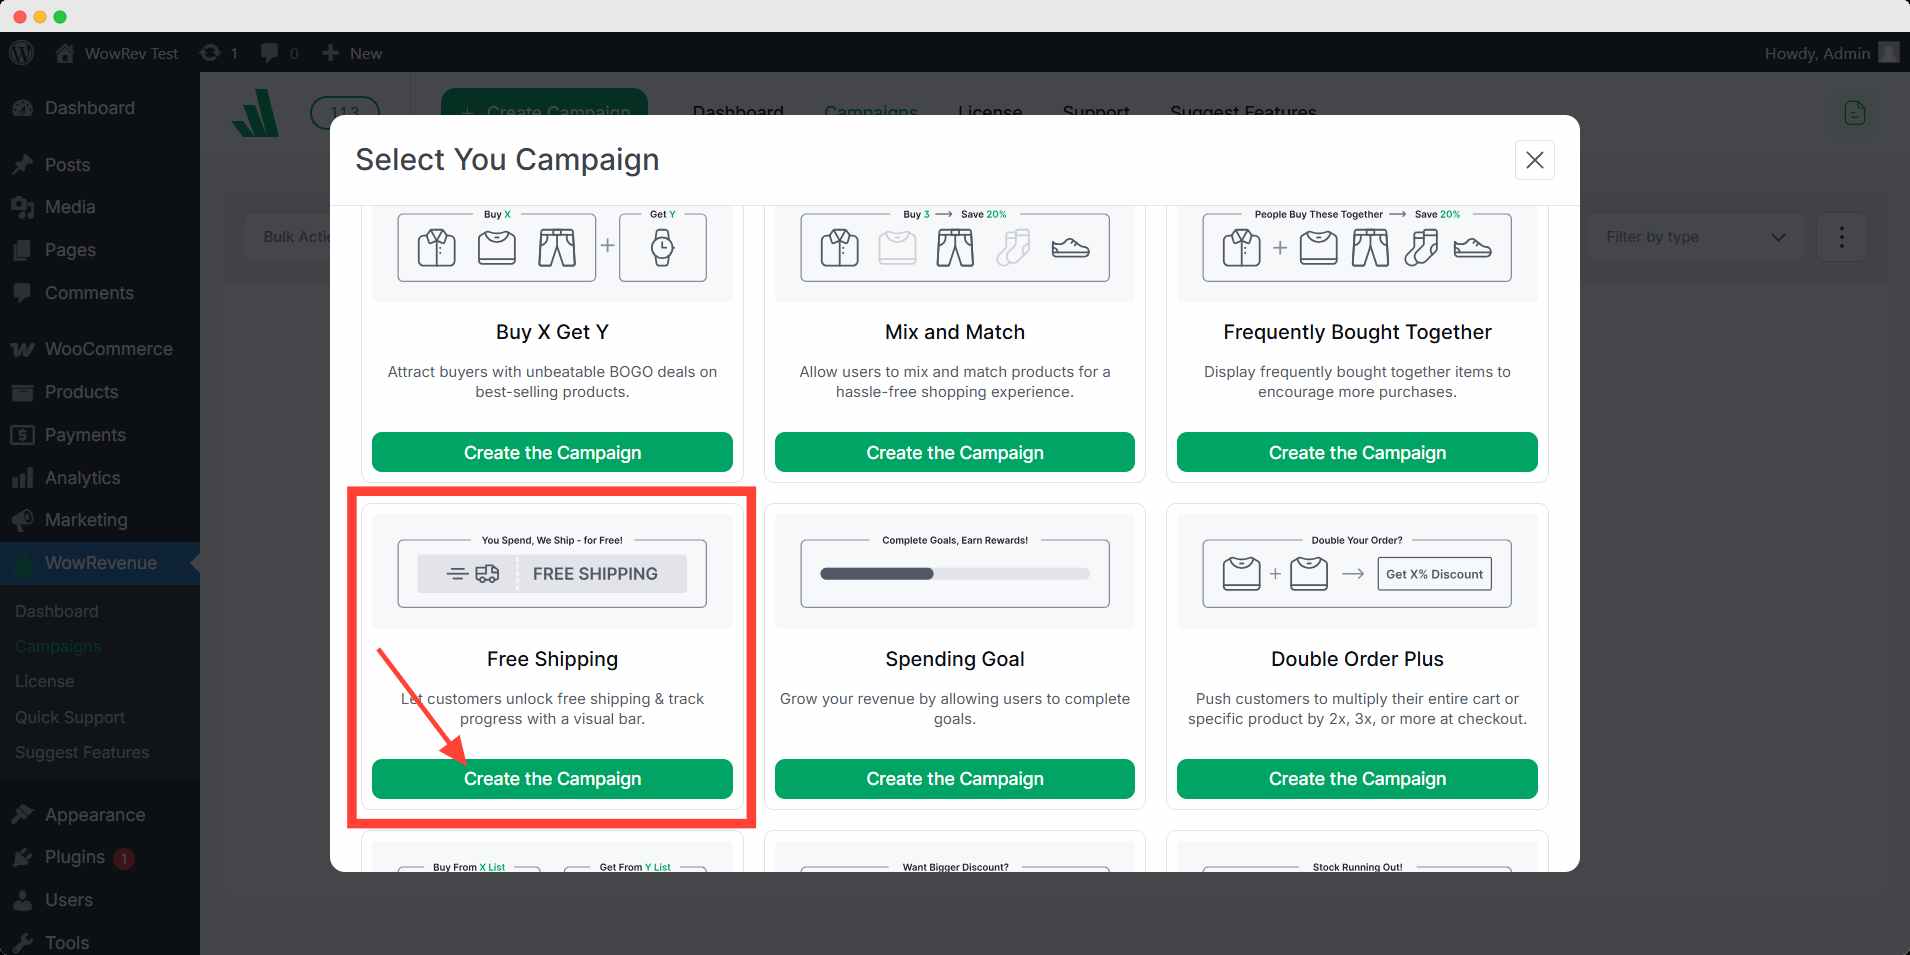
- Click on the “Create Campaign” button.
- A pop-up window will appear. Select “Free Shipping” from the options.
- Click “Create the Campaign” to proceed.
This will start the process of setting up your Free Shipping Bar. let’s move on to the next section.
Step #2: Set Up Display Options
Now that your Free Shipping campaign is created, choose where you want your Free Shipping bar to show up on your website. You have the following options:
- Entire Site: Display the free shipping bar across your entire site.
- Product Page: Show the free shipping campaign only on individual product pages.
- Cart Page: Display the campaign on the shopping cart page.
- Checkout Page: Show the campaign on the checkout page.
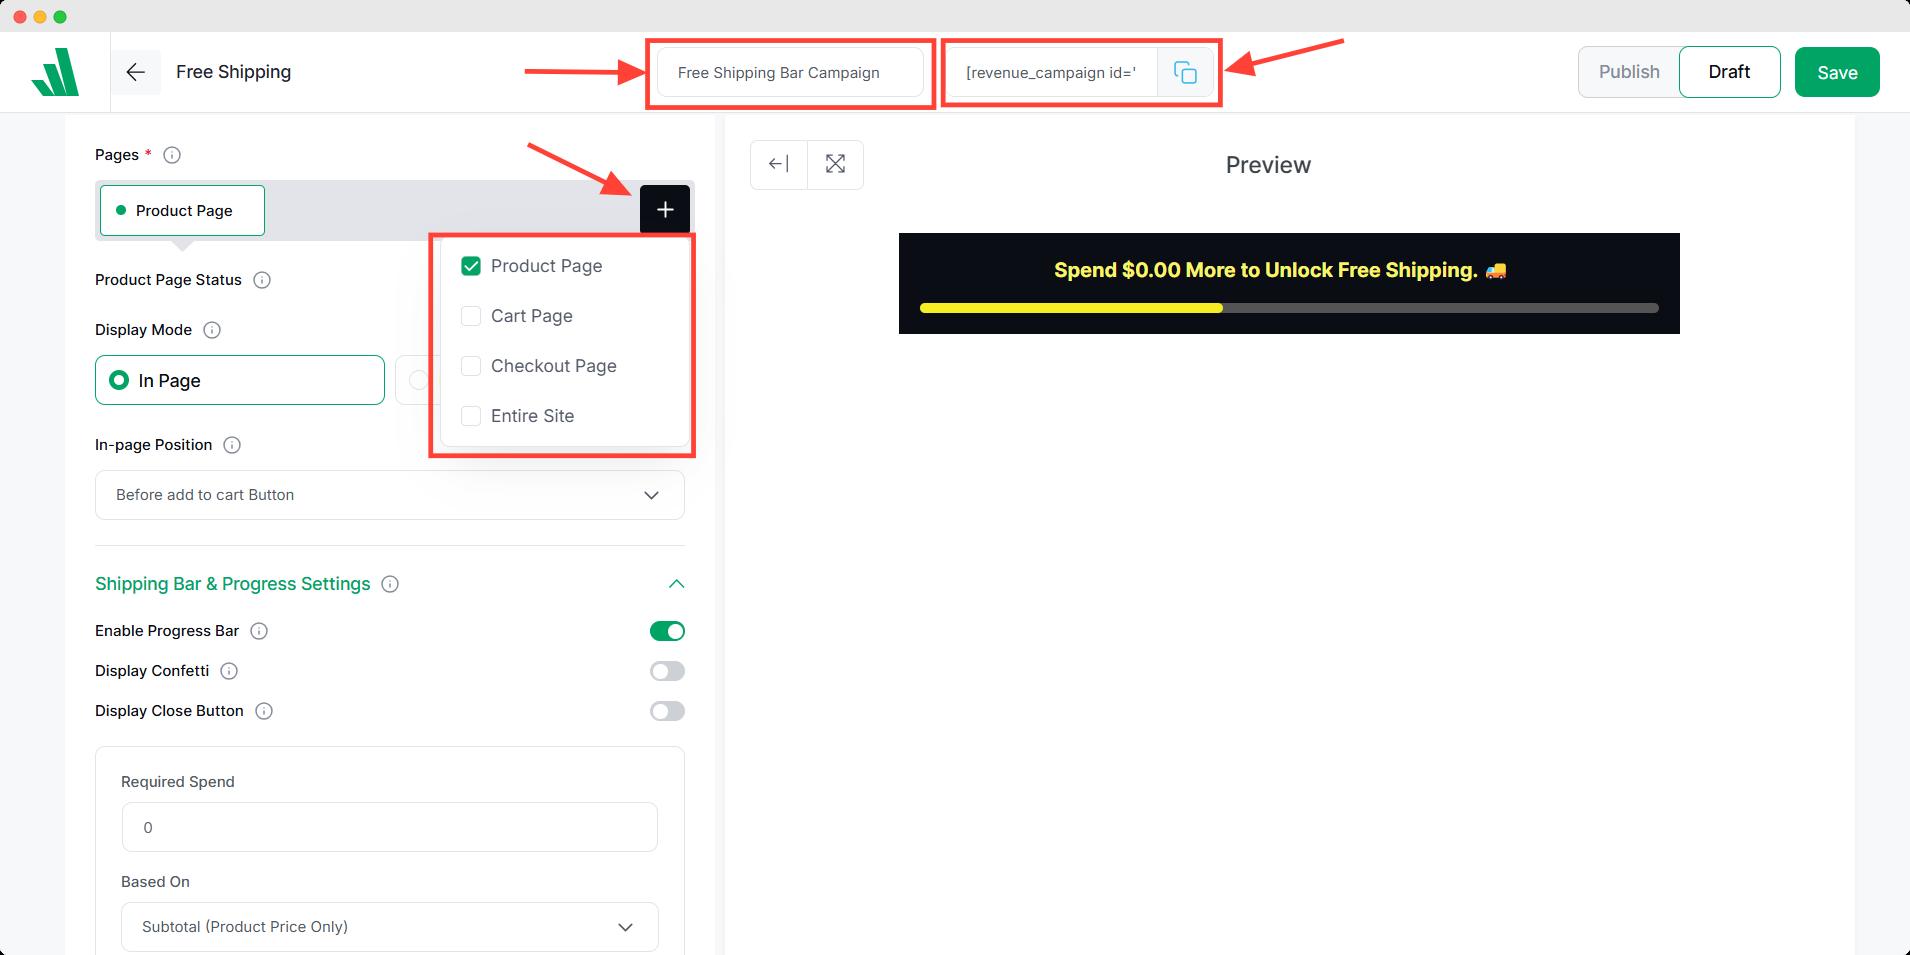
You can also control the Page Status (Active or Inactive) and decide when the campaign is live or temporarily disabled.
Once you choose the page(s) where the campaign will be displayed, you’ll need to select the display mode. Here’s what you can choose:
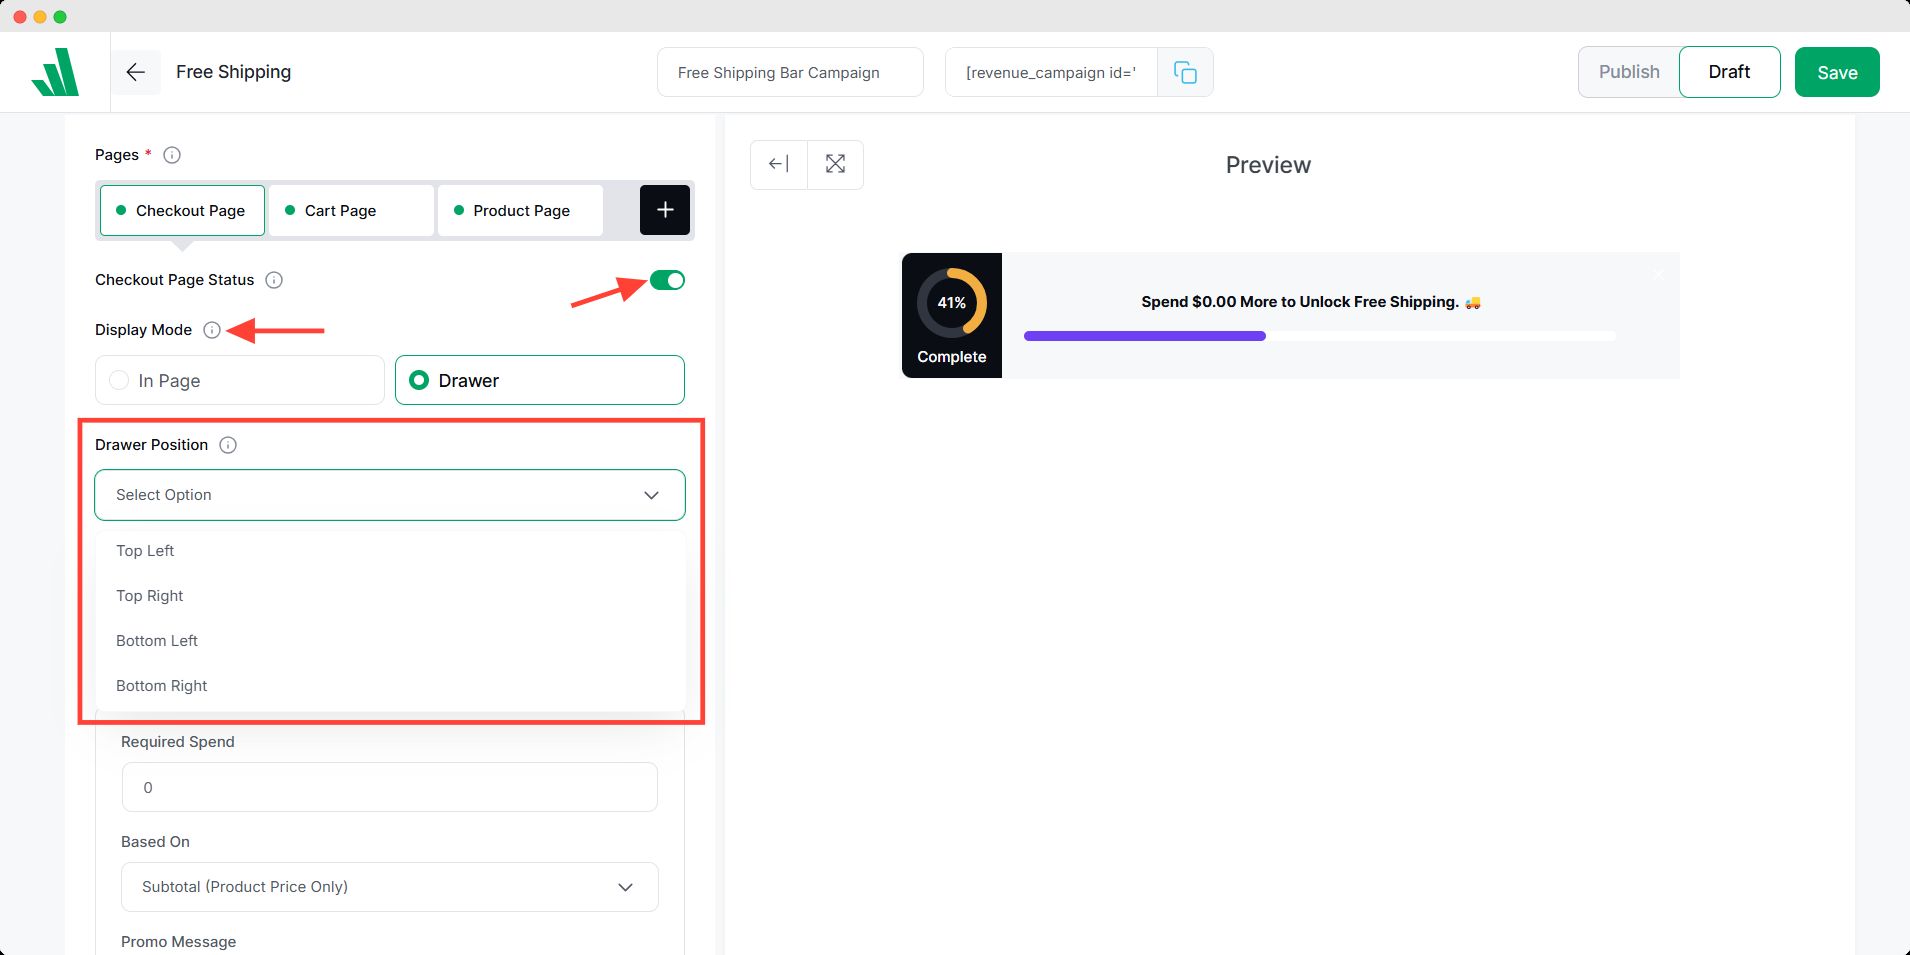
- In-Page: The campaign is displayed directly within the page content.
- Drawer: A sliding or pop-out drawer shows the campaign.
For the entire site, you have three options: Top, Bottom, or Drawer.
Step #3: Specify the Required Spend
This option is the core of free shipping bar. So, you must set the minimum amount a customer must spend to qualify for free shipping. For example, you could set this to $100.
After that, you need to choose the basis on which the spending logic will work. There aretwo options:
- Subtotal (Product Price Only): The total product price.
- Cart Total (After Discounts & Additional Fees): It will exclude discounts but add additional fees.
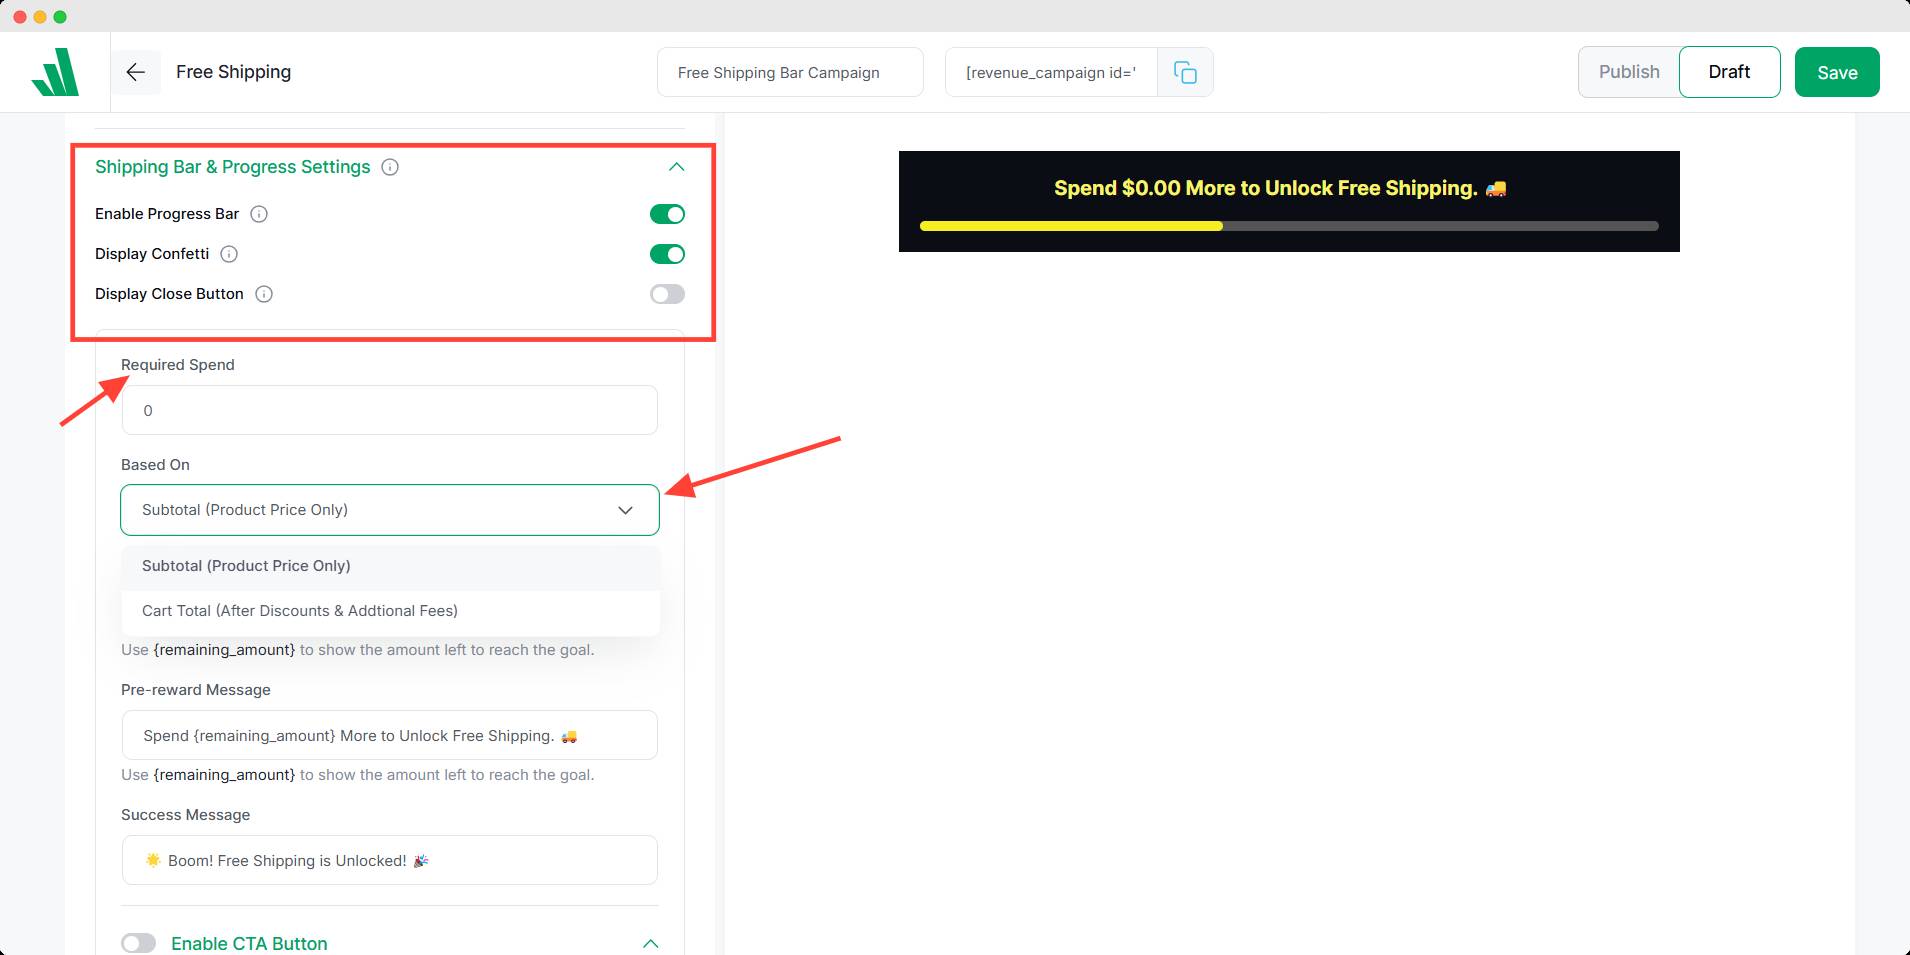
Step #4: Configure the Shipping Bar & Progress Settings
Next, you’ll configure the progress bar settings to display a progress tracker for free shipping:
Enable Progress Bar: Turn on this feature to display the progress bar as customers shop.
Display Confetti: Enable a fun confetti animation to celebrate when customers reach their free shipping goal.
Display Close Button: Allow customers to close the shipping bar when they’re done.
You can also customize messages to encourage customers to reach the free shipping threshold.
For example:
- Pre-reward Message: Let customers know how much more they need to spend to unlock free shipping.
- Success Message: Show a message once the free shipping goal is achieved.
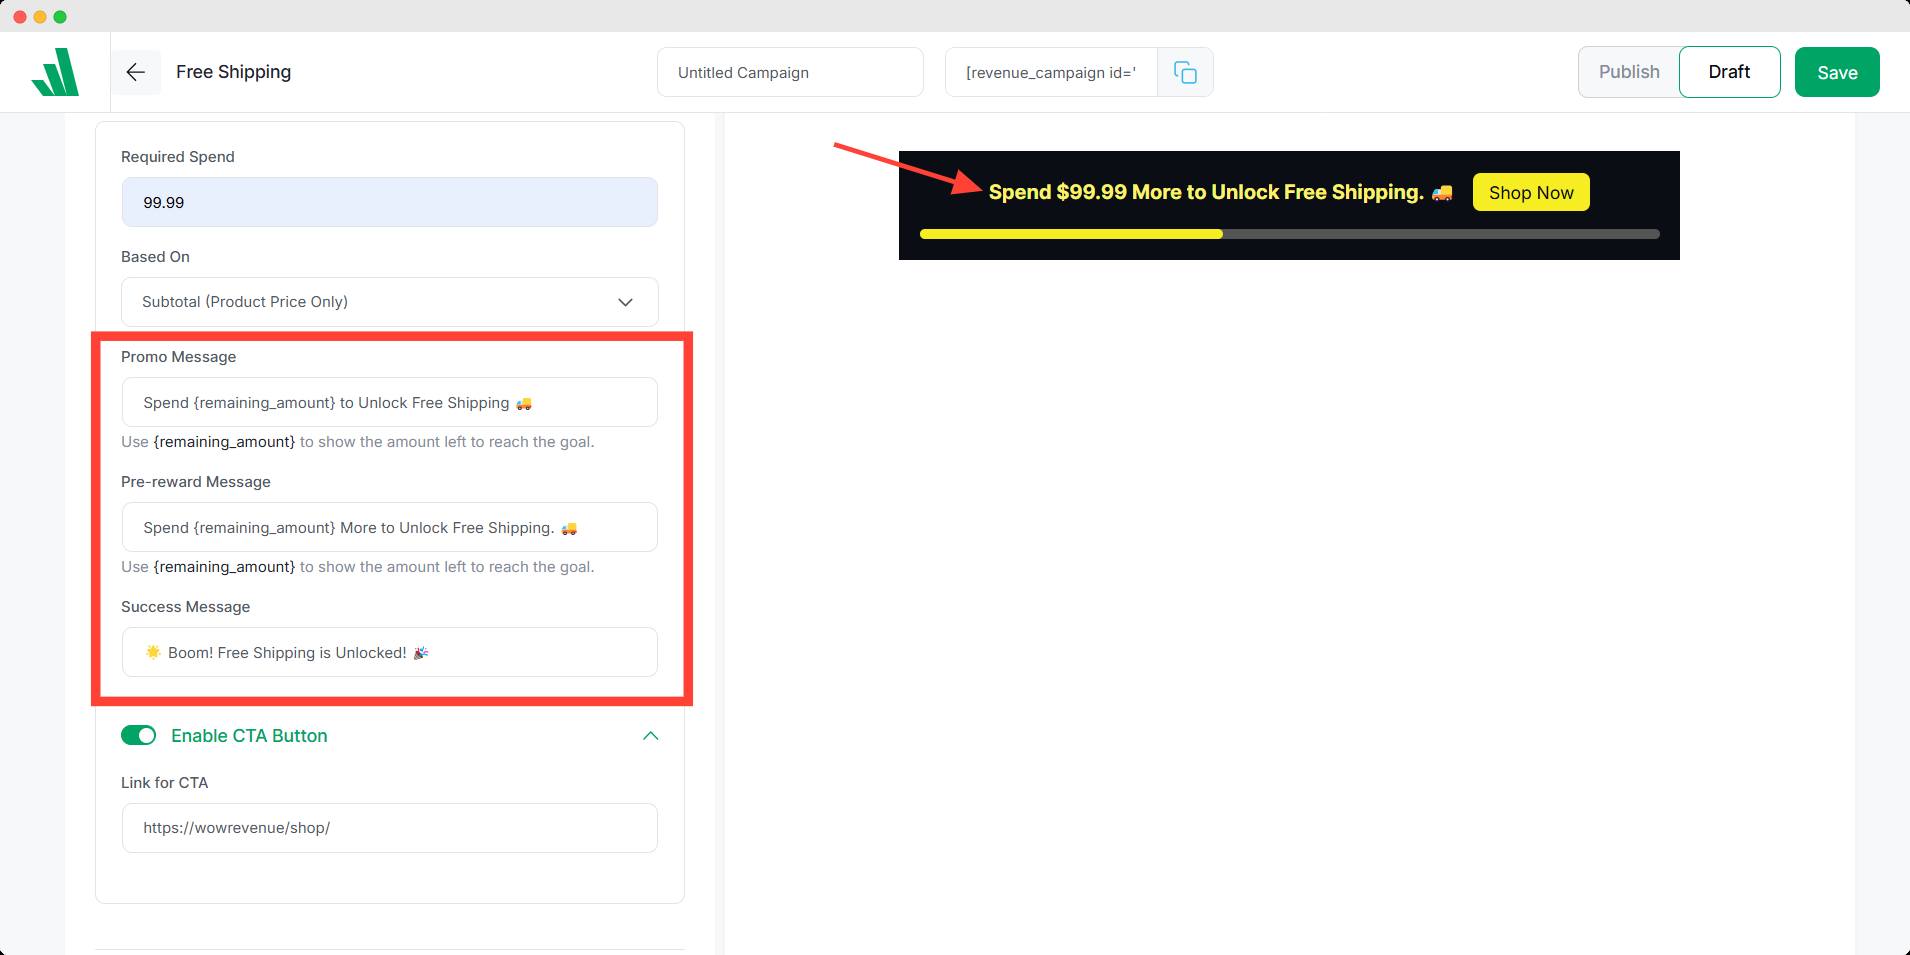
Step #5: Additional Settings (Optional but Effective)
In this section, you can add a CTA button, showcase upsell products, and schedule your free shipping bar campaign. Let’s go through each of these features one by one.
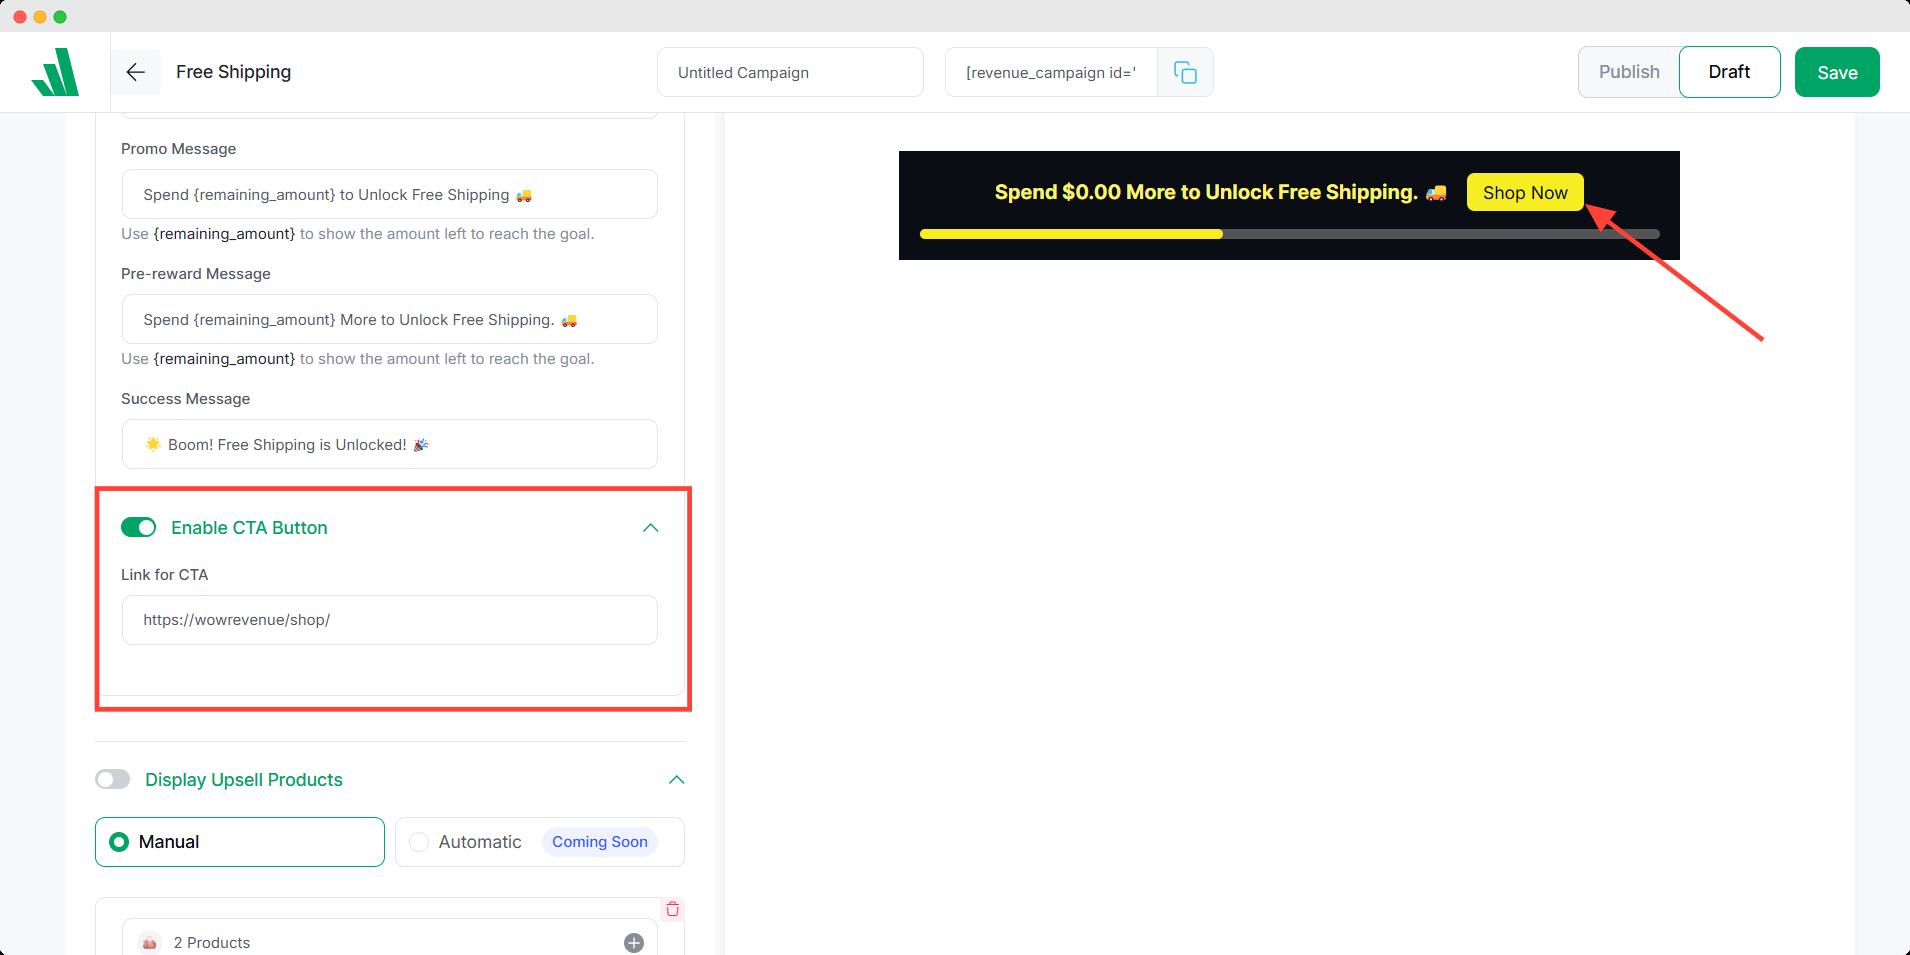
Enable the CTA Button
Here, you can add a call-to-action (CTA) button to direct your customers exactly where you want. Here’s how you can add a CTA:
- Enable the CTA button to appear after the shipping bar message.
- Insert a link where you want users to navigate.
- Change the button label from the design preview section (e.g., Try Our Exclusive Table).
Display Upsell Products
To further enhance your Free Shipping Bar Camapign, you can display upsell products to customers to encourage quick purchases.
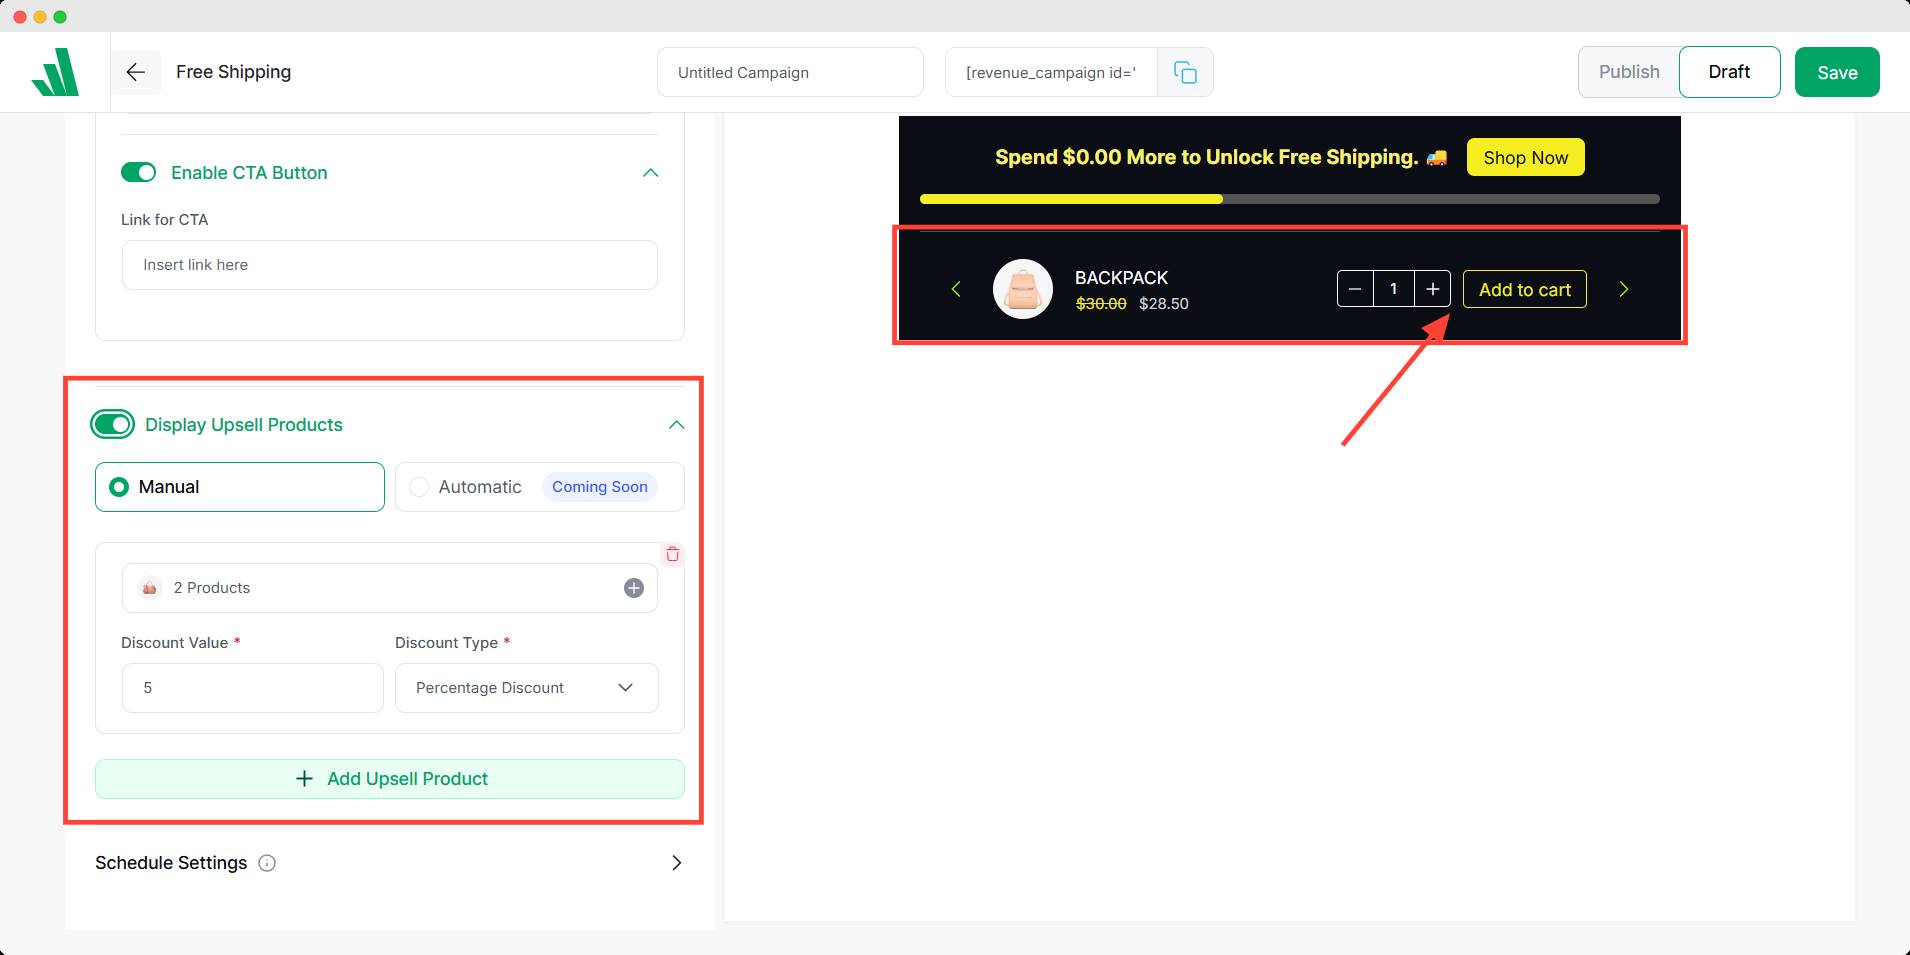
Here’s how to set it up:
- Select the products you want to upsell during the campaign.
- You can even set a discount, such as a fixed amount or percentage (or no discount) for the upsell products.
- Click the “Add Upsell Product” button to add more products to the campaign.
Now, simply set a start and an end date to schedule your free shipping bar campaign.
Once you’ve set up all the details, review your settings, and when you’re ready, activate the campaign. Your Free Shipping bar will now be live on your store, driving conversions and incentivizing customers to shop more.
Notable Case Studies of Free Shipping Bar
Here are two ecommerce based case studies and some industry insights on the effective implementation of free shipping bars:
TrailCam Pro: 20% Sales Growth
TrailCam Pro, a retailer specializing in trail cameras, used free shipping as part of a broader conversion rate optimization (CRO) strategy. By offering free shipping and returns, they tackled customer objections about additional costs, resulting in a 20% increase in online sales.
RIPT Apparel: 7.9% Increase in AOV
RIPT Apparel, a retailer specializing in limited-edition graphic t-shirts, implemented a free shipping bar with a $69 threshold. After conducting an A/B test, they observed a 7.9% increase in AOV.
Supporting Industry Insights
In addition to these specific case studies, broader research reinforces the value of free shipping bars:
- Baymard Institute: Found that 48% of U.S. online shoppers have added items to their carts specifically to qualify for free shipping.
- Walker Sands Communications: Reported that 88% of consumers are more likely to shop online if free shipping is offered.
- Wharton Professor David Bell: Noted that orders qualifying for free shipping are, on average, 30% higher in value.
Proven Tips to Maximize Results with Free Shipping Progress Bars
To make your free shipping progress bar more effective, here’s what to focus on:
✨ Visibility: Place the bar at the top or bottom of the page or in a slide-in drawer so it’s easy to spot.
✨ Achievable Threshold: Set a realistic spending goal that isn’t too high, but still encourages customers to spend a little more.
✨ Engaging Colors: Use bright, contrasting colors to grab attention and show progress, like changing the color as the bar fills up.
✨ Personalized Messages: Show dynamic messages like “Almost there!” to create a more personal touch.
✨ Tie with Promotions: Use it alongside seasonal offers or loyalty rewards to boost its impact.
✨ Test and Optimize: A/B tests different designs and thresholds to see what drives the most conversions.
Delight Customers and Grow Revenue with Every Order!
Now, you know adding a free shipping bar to your WooCommerce store is a small change that can make a big difference.
It’s all about giving your customers a little nudge to shop a bit more while making their experience feel seamless and rewarding.
The best part? It’s quick to set up, leading to happier customers and bigger orders. So give it a shot, you might just be surprised by the results. 🛒✨
FAQs about Setting Up a Free Shipping Bar in WooCommerce
Got questions? No problem, we’ve got you covered! Here’s the quick rundown:
How do I get free shipping above a certain amount in WooCommerce?
To offer free shipping based on a minimum cart total:
– In your WordPress dashboard, go to WooCommerce > Settings.
– Under the Shipping tab, select the shipping zone for free shipping.
– Click Add Shipping Method and choose Free Shipping.
– In the Free Shipping Requires dropdown, select A minimum order amount.
– Set your desired minimum order (e.g., $50) to activate free shipping.
Save your changes.
But for better control and customization, use WowRevenue’s Free Shipping Bar.
How to set WooCommerce shipping cost based on cart total?
To set shipping costs based on the cart total with WowRevenue, follow these steps:
– Install and activate WowRevenue.
– Create a Free Shipping Campaign.
– Set the minimum order amount for free shipping.
– Select Cart Total from the dropdown menu named Based on.
– Customize the progress bar’s color, style, and text.
Save and test to ensure it works.
How to add a free shipping progress bar in WooCommerce?
To add a free shipping progress bar, follow these steps:
– Install and activate WowRevenue.
– Create a Free Shipping Campaign from WowRevenue.
– Configure the display settings.
– Hit on “Enable Progress Bar”
– Set the minimum order amount for free shipping.
– Customize the color, style, and text of the progress bar.
Once everything is set, save the settings and test the cart to ensure the progress bar is displayed correctly.