You’ve optimized your product page, streamlined your checkout, and customers are making purchases. But did you know right after someone buys something, you can sell them even more?
According to a recent study by PredictiveIntent, post-purchase upsells are 3-4 times more effective than pre-purchase offers, with conversion rates averaging 20-25% compared to just 5-7% for pre-checkout upsells.
WooCommerce store owners who implement post-purchase upsells see an average increase of 10-15% in average order value (AOV) within the first month alone. Yet surprisingly, only about 30% of online stores are fully capitalizing on this technique.
This guide will teach you how to create post-purchase upsell in WooCommerce – from plugin selection to offer strategy – based on techniques I’ve personally implemented across dozens of successful online stores.
What Are Post-Purchase Upsells in WooCommerce (And Why They Work)
Think, you’ve bought something online, and right after completing the order you saw another offer pop up? That’s a post-purchase upsell! It’s a clever way that WooCommerce store owners use to push sales without needing more visitors.
So What Exactly Are Post-Purchase Upsells?
Post-purchase upsells are special offers shown to customers after they’ve completed their purchase. Here’s what makes them different:
- Show up right after checkout (not at checkout).
- Related to what the customer just bought.
- Come with a special discount.
- Need just one click to accept (no need to re-enter payment info)
For example: Someone buys a T-shirt from your store. After they complete their purchase, you show them an offer for matching socks at 15% off (without complicating their original checkout process). That’s a post-purchase upsell!
Why Do Post-Purchase Upsells Work So Well?
The core reason is the perfect timing with the following factors:
- The customer already trusts your store enough to buy something.
- They don’t have to enter their shipping and payment details again.
- They’re in a “buying mood” and more likely to say yes.
- When the offer complements their purchase, it feels helpful rather than pushy.
💰 How Can Post-Purchase Upsells Benefit Your WooCommerce Store?
Adding post-purchase upsells to your WooCommerce store is like getting extra money with no effort:
✅ Bigger orders without more traffic – Your existing customers spend more without additional marketing costs.
✅ Customers discover more products: It’s a perfect way to showcase complementary items they might not have discovered otherwise.
✅ Keep your checkout process clean: Your initial checkout stays clean and quick. It simplifies the buying process and reduces cart abandonment.
✅ Better customer experience: When done right, customers appreciate relevant suggestions.
✅ Learn what products go together: You’ll learn which products naturally go together and can use this information to improve your marketing.
🆚 A Quick Comparison of the Top Post-Purchase Upsell Plugins in WooCommerce
WooCommerce doesn’t support post-purchase upsells natively, so you’ll need a plugin. While there are many options, WowRevenue is the best choice for some really valid reasons.
You must have a clear understanding of why it’s the best choice for you in terms of features, support, and reliability. Here’s a quick comparison table for you:
| Features | WowRevenue | UpsellWP | One Click Upsell Funnel | Post Purchase Upsell |
|---|---|---|---|---|
| Free Version Availability | ✅ Yes | ✅ Yes | ❌ No | ✅ Yes |
| Post-Purchase Upsell Flow | ✅ Yes (Highly customizable) | ✅ Yes (Basic) | ✅ Yes (Advanced) | ✅ Yes (Basic) |
| Customizable Upsell Offers | ✅ Advanced (Drag-and-drop editor, dynamic rules) | ✅ Moderate (Limited customization) | ✅ Advanced (Pre-built templates) | ✅ Moderate (Basic customization) |
| Schedule Upsell Offers | ✅ Yes (Flexible scheduling) | ❌ No | ✅ Yes (Limited scheduling options) | ❌ No |
| Analytics & Reporting | ✅ Yes (Detailed insights into upsell performance) | ❌ No | ✅ Yes (Basic reporting) | ❌ No |
| Best For | All-in-one discount solution: 12+ discount types and beyond. | Small stores needing only basic upsell functionality | Advanced users looking for pre-built funnels | Beginners seeking simple post-purchase upsells only |
| Support & Updates | ✅ Top-notch Support, Regular Updates | ❌ Limited Support, Community-Driven | ✅ Premium Support, Regular Updates | ❌ Community Support, Occasional Updates |
Let’s Create Post Purchase Upsell in WooCommerce (6 Simple Steps)
Now that you’re familiar with the top plugins for post-purchase upsells, let’s begin creating one. I’ll be using WowRevenue since it provides the most value for my needs. After installing and activating WowRevenue, I’m ready to set it up.
✔️ Step #1: Create a Post-Purchase Upsell Campaign
In WowRevenue, here’s how to create a post-purchase upsell offer:
First, go to WowRevenue → Campaigns in your dashboard and click the “Create Campaign” button.
Choose “Normal Discount” from the options. This is a versatile discount type in WowRevenue.

Finally, click “Create the Campaign” to move forward.
✔️ Step #2: Configure Basic Campaign Settings
Now, you’ll need to set up some basic information. This is where you’ll create the foundation for your post-purchase upsell campaign and determine how it will appear to customers:
Always remember to give your campaign a memorable name (something that helps you identify it later). It will be a lifesaver when you run multiple campaigns simultaneously.
Now, from the pages field, select Thank You Page. Since customers have just completed their purchase, this is the perfect spot to offer upsell products.

Then choose a display mode from the three available options:
- In-page: Blends naturally with your existing content
- Pop-ups: Grab attention for time-sensitive offers
- Floating bars: Stay visible as customers scroll, providing gentle reminders
I’m choosing pop-up for this tutorial, which gives us a few more options to configure. I’ve selected the “swing” animation style to make the popup entrance more engaging.
I also set a 3-second delay so customers have a moment to see their order confirmation message before the offer appears.
Note: You can use the shortcode if you want to place it in specific locations on your site beyond the default options.
✔️ Step #3: Set the Trigger Products
This is where you decide which purchases will trigger your upsell offer. The right triggers can dramatically improve conversion rates. Let’s see how to set it right.
The first thing is choosing between:
- All products (show post-purchase upsell after any purchase)
- Specific products (only show after specific items are bought)
- Specific categories (show for any product in selected categories)
You need to be super specific for post-purchase upsell offers because generalizing without relevant product suggestions won’t work well here. Thoughtfully pairing triggers with offers can significantly increase your conversion rate.
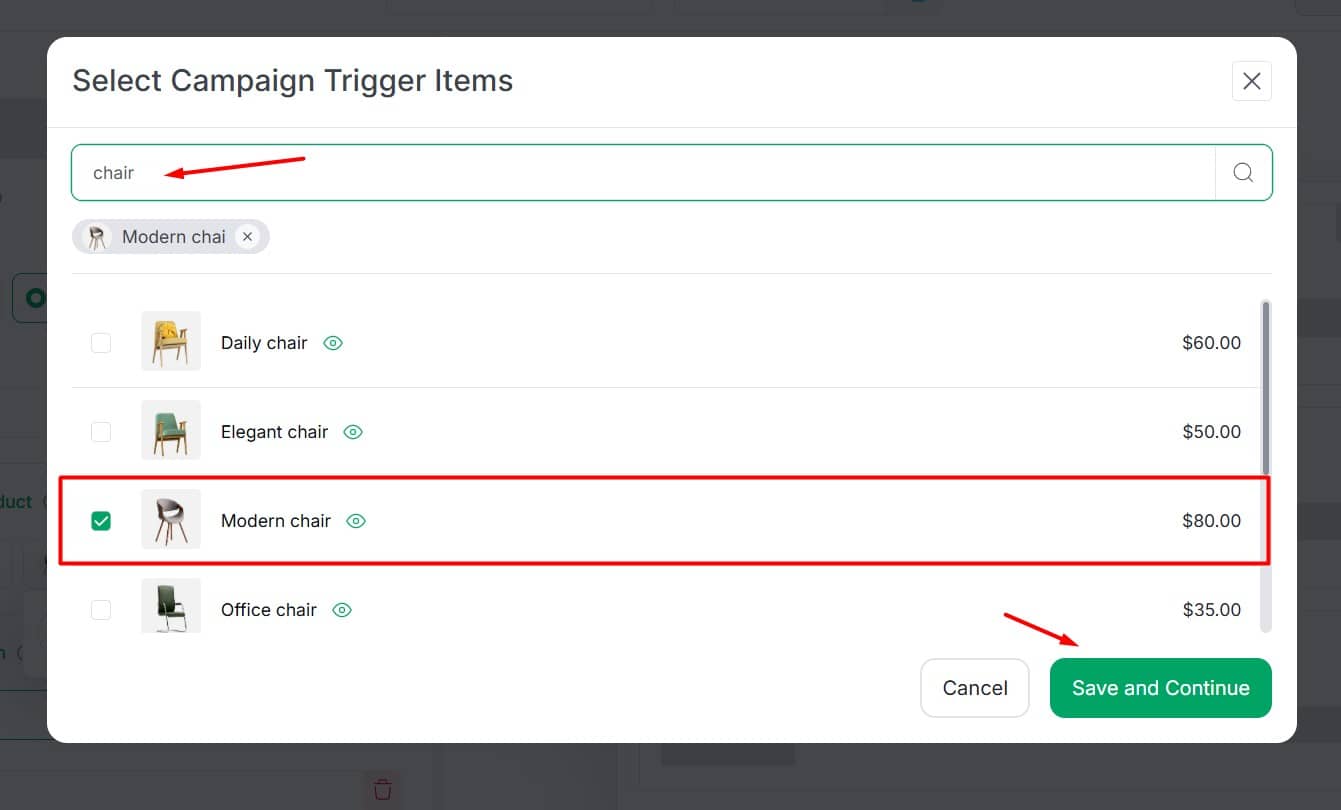
For this example, I’m choosing a specific product – a modern chair – as my trigger product. This means when someone purchases this exact chair, they’ll see my carefully selected upsell offer.
Let’s move on to setting up the upsell offer.
✔️ Step #4: Offer Your Upsell Items
Now it’s time to set up the actual products you want to offer as upsells. This is where you create compelling offers that will entice customers to make that additional purchase.
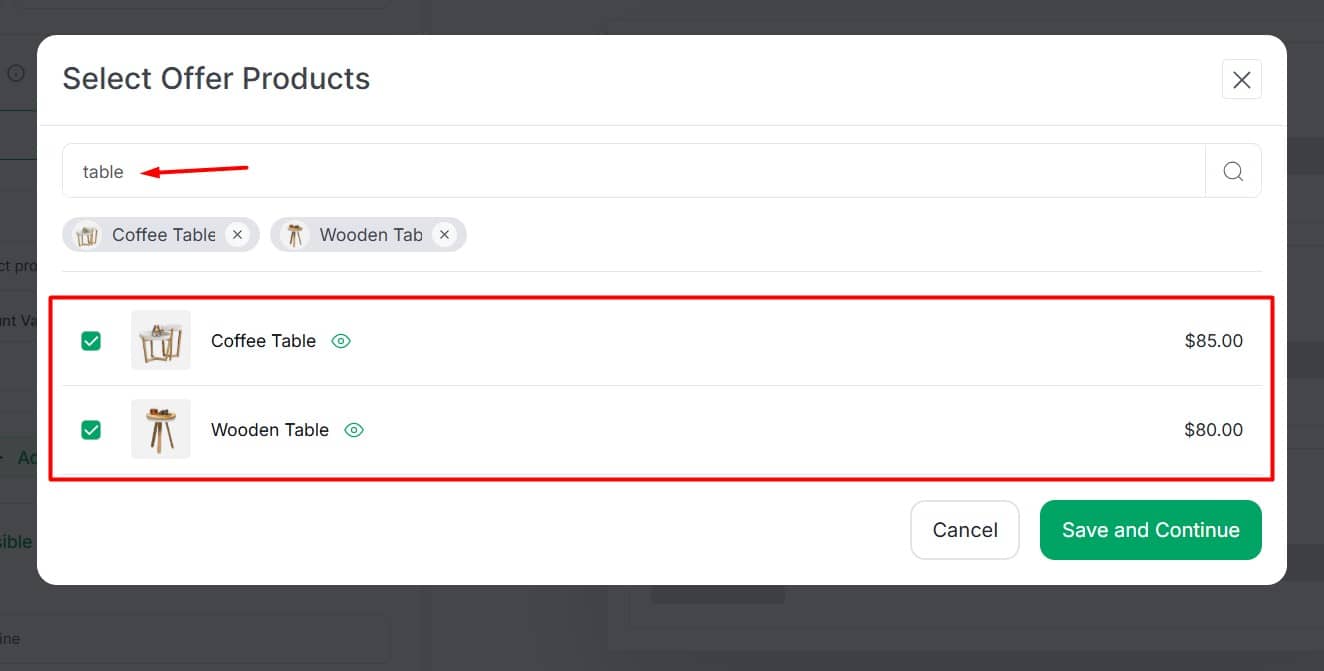
First, navigate to the Product for Promotion section.
Search for the items you want to offer. I’ve chosen two categories of tables. Because offering a matching table creates a natural bundle opportunity When someone buys a chair.
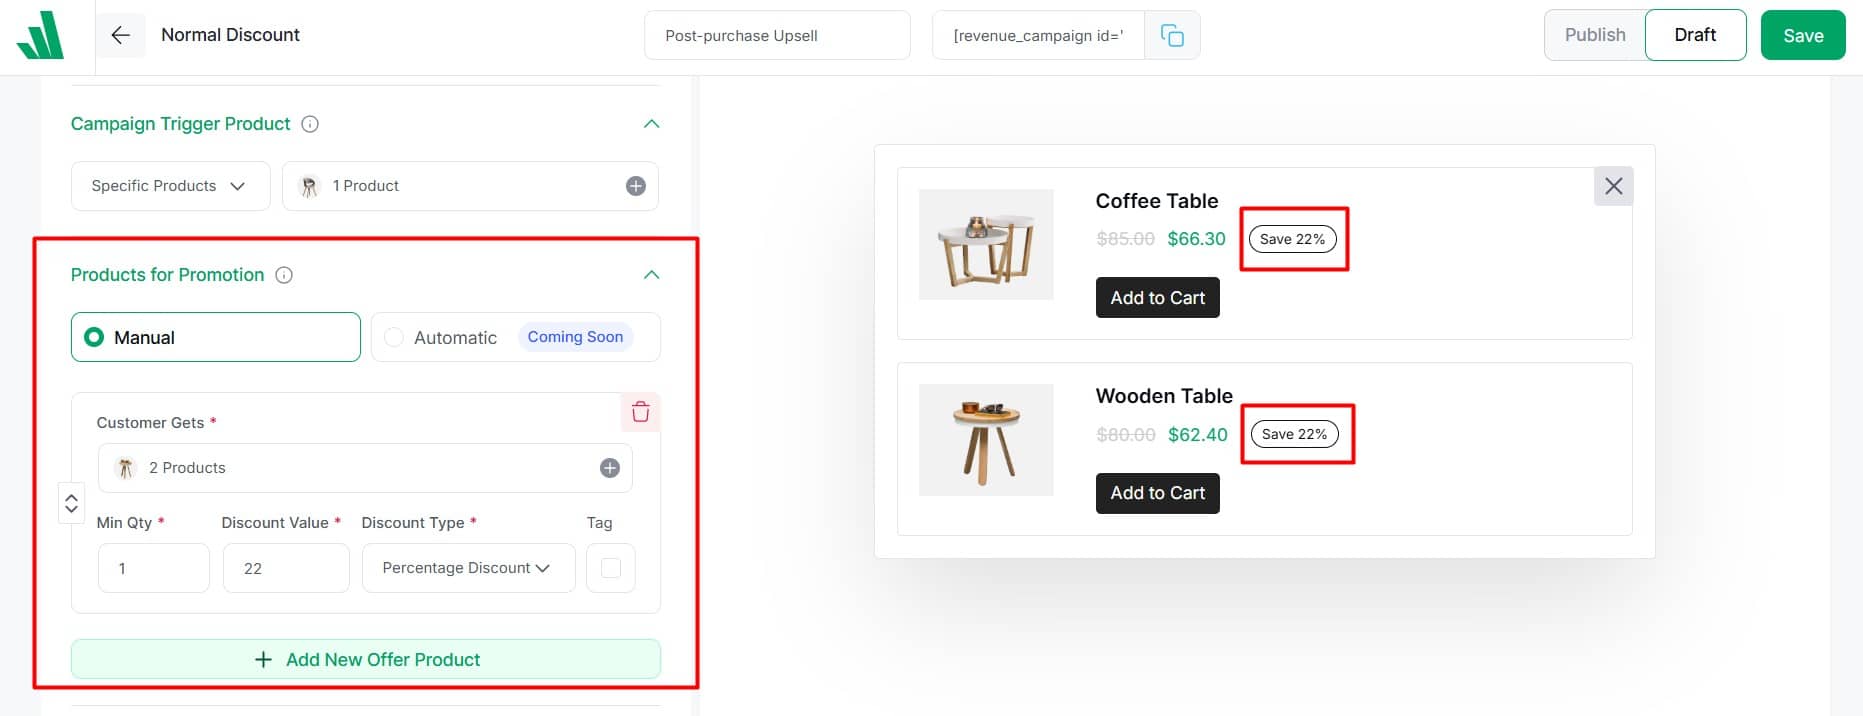
Next, set a minimum quantity requirement if you want customers to buy multiple units. I’m keeping it at 1, but you can adjust this according to your item types.
Many store owners find that time-limited post-purchase offers with significant discounts (20-30%) work particularly well since they create urgency and provide genuine value.
For this campaign, I’m setting a 22% discount to make the offer more compelling. In the next step, I’m going to enable the countdown timer to create urgency.
A good tweak can be adding tags like “Most Popular” to highlight an item and create social proof.
You can also add multiple offers if desired, and arrange them using drag and drop to prioritize your most profitable or successful upsells.
✔️ Step #5: Additional Settings
These settings help you fine-tune your campaign and make it even more effective. So, you must take time to configure these to significantly improve your conversion rates:
Campaign Headline Settings
From this section, you can create compelling headlines that grab attention immediately after purchase:
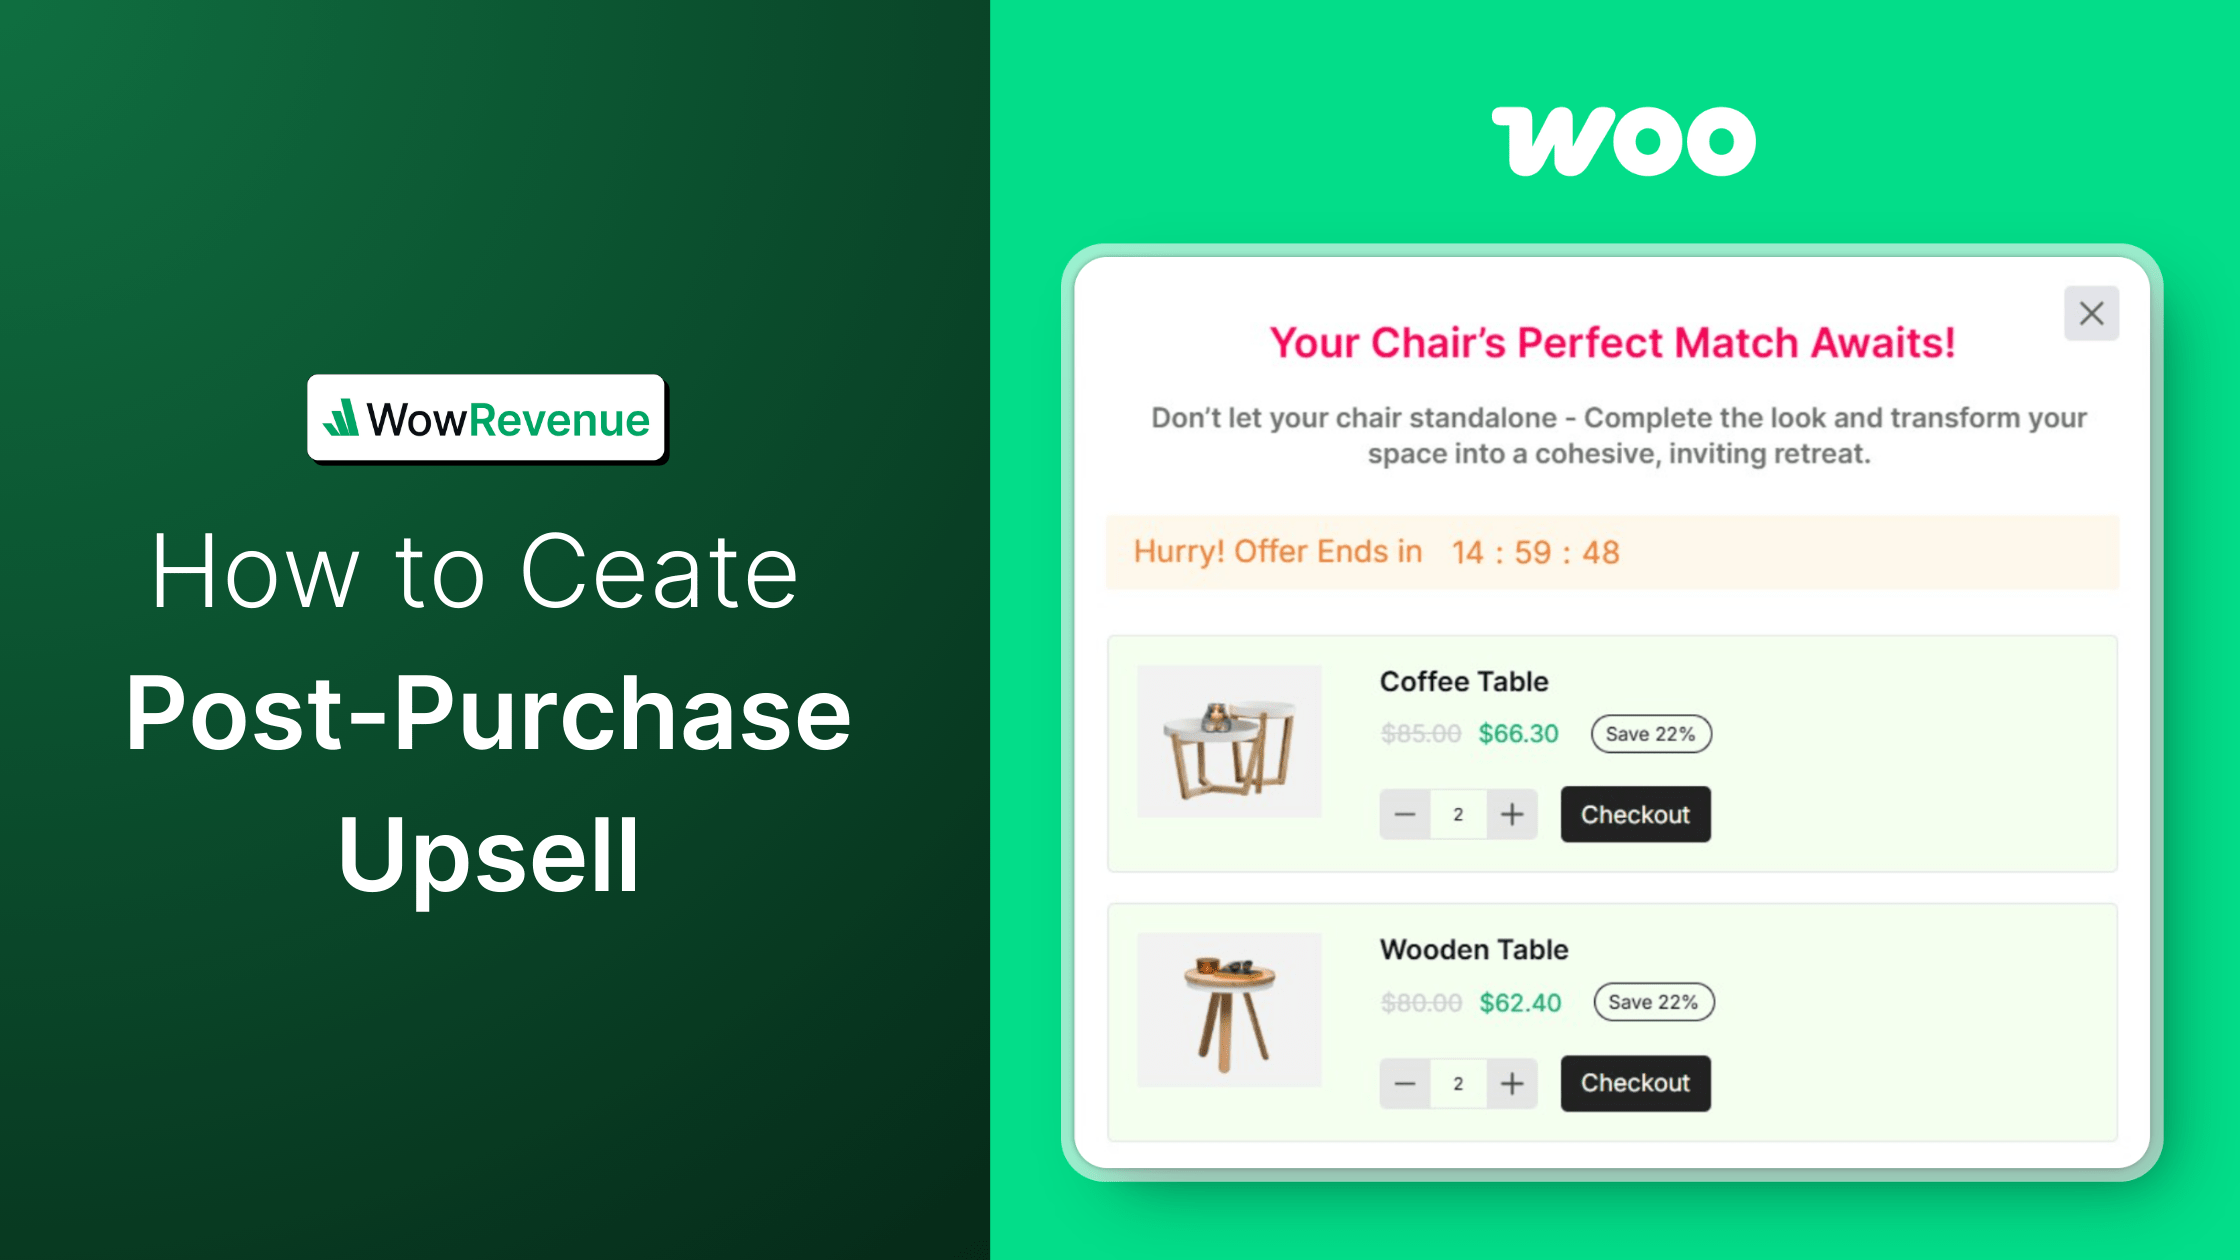
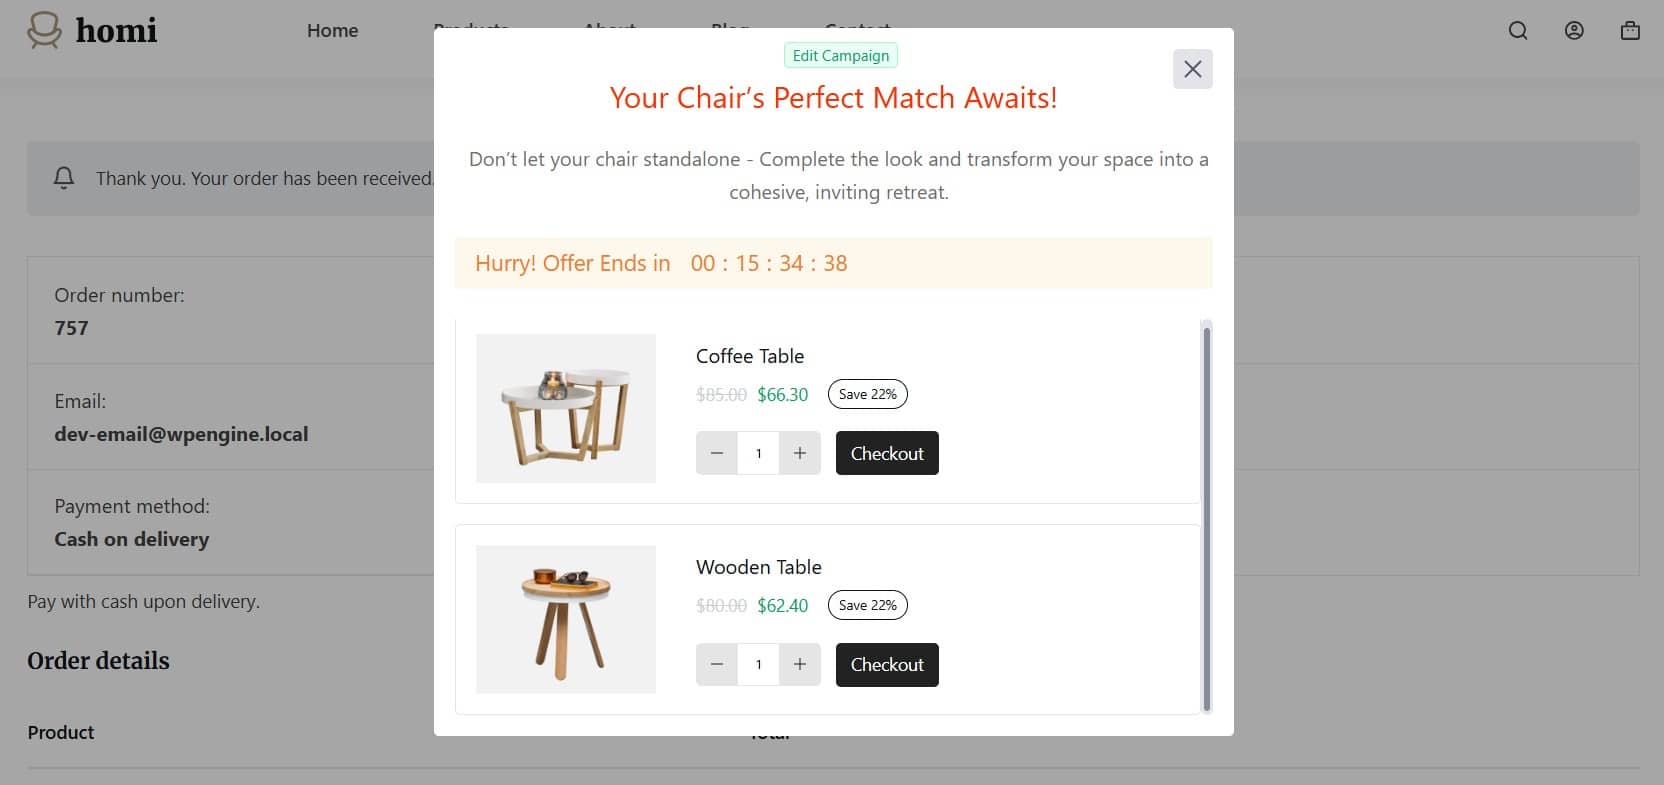
Add a primary headline that clearly communicates the value like “Your Chair’s Perfect Match Awaits!”.
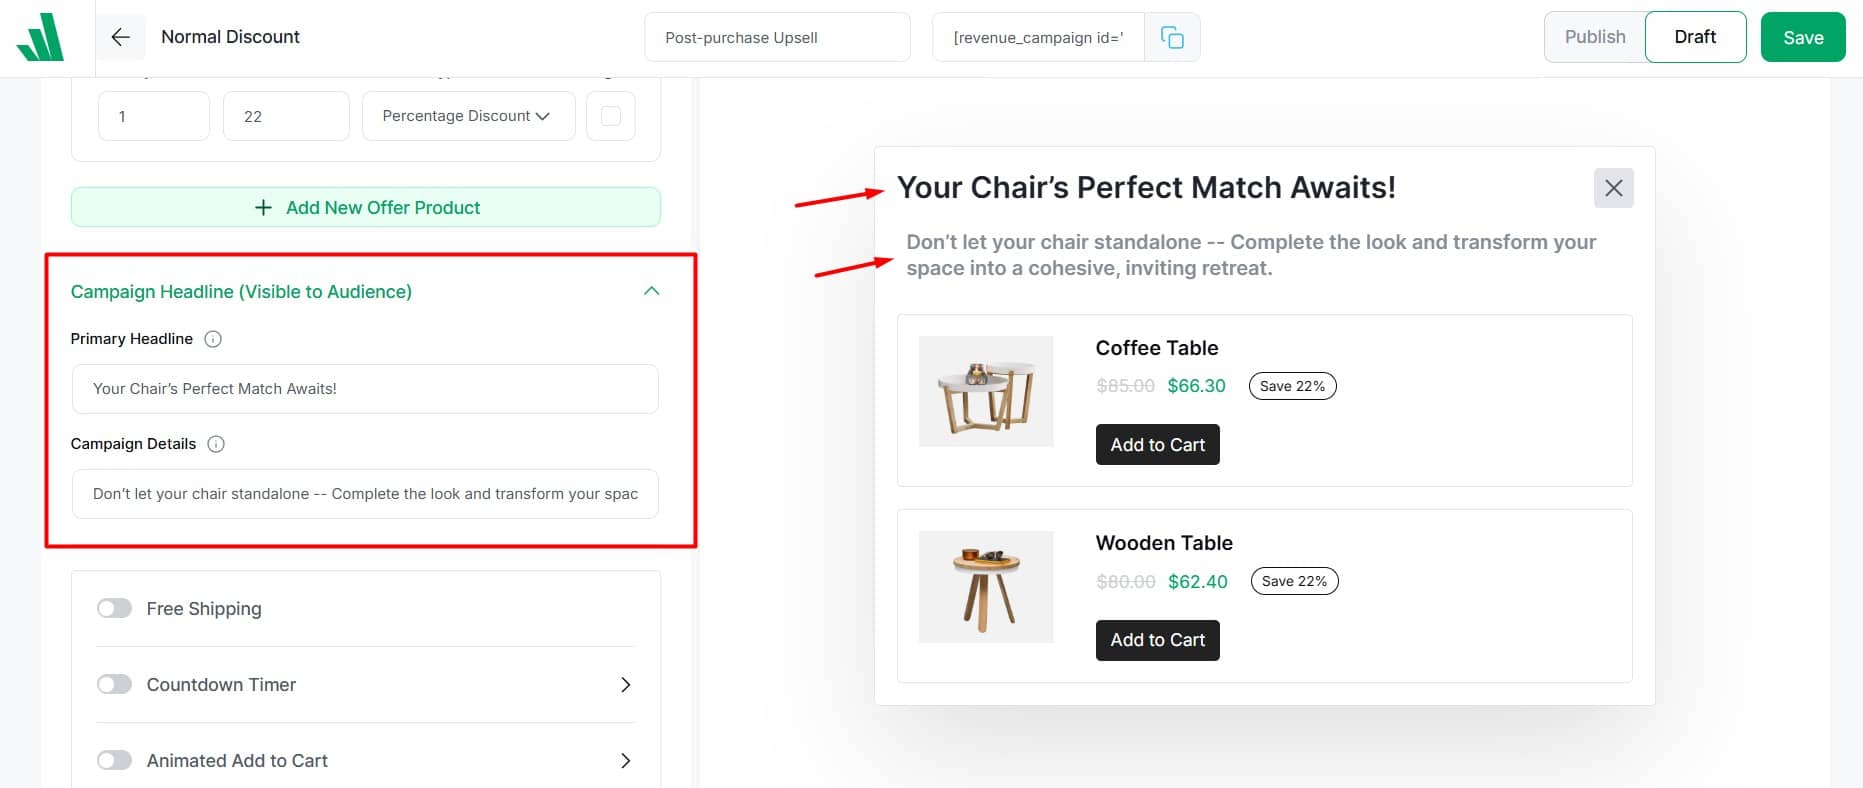
Next, Include a detailed message that explains the benefits such as “Don’t let your chair standalone — Complete the look and transform your space into a cohesive, inviting retreat.”
Conversion-Boosting Features
This section is a powerful conversion booster, offering features designed to drive action and increase sales.
You can enable free shipping to incentivize purchases, add a countdown timer to create urgency, and even animate the “Add to Cart” button to make it more eye-catching and engaging.
Schedule Settings
You can control exactly when your campaign runs to align with promotions or seasons.
Set specific start dates and times for your campaign to coordinate with marketing efforts.
Optionally add an end date to create urgency or to limit seasonal offers
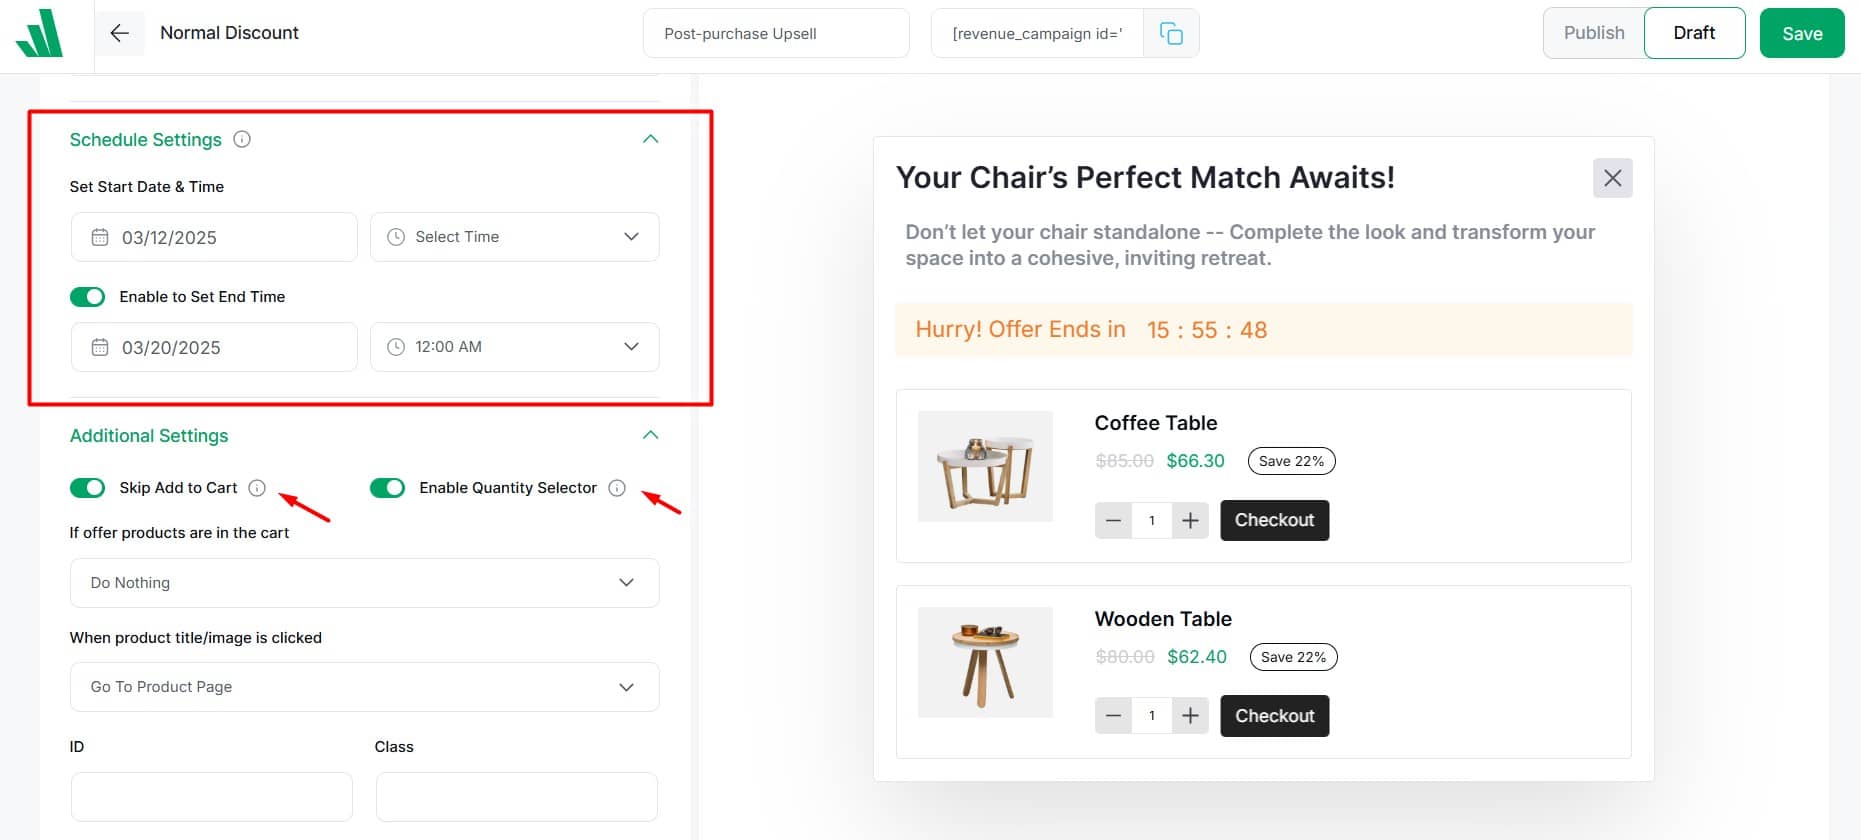
Remember that all scheduling follows your WordPress timezone settings, so check that these are configured correctly
These additional settings let you create a smoother buying experience that feels natural and convenient for your customers, rather than pushy or interruptive.
✔️ Step #6: Design Your Post-Purchase Upsell
This is where you make your upsell offer visually appealing and aligned with your brand. A well-designed upsell that matches your store’s branding builds trust and reduces the feeling that this is a last-minute add-on.
You can toggle between Grid or List views using the view icon in the preview section on the right side of your campaign page. Here I choose list view.
In the preview section, you have complete control over how your offer appears to customers.
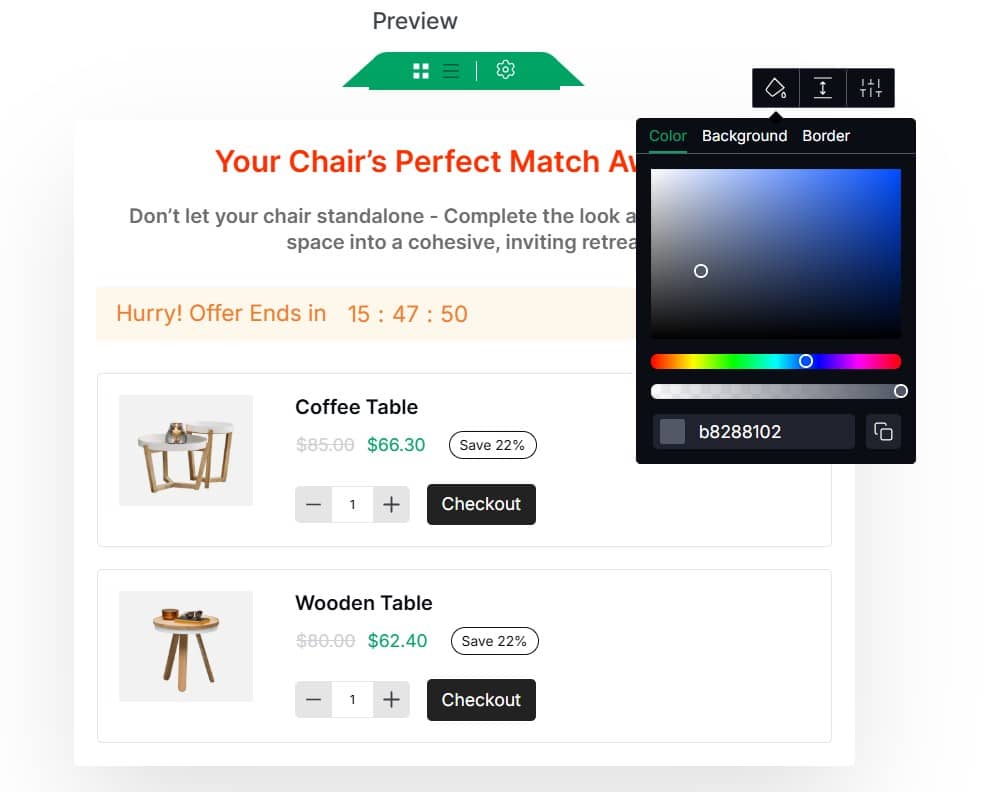
You can adjust typography, alignment, colors, and spacing to make your headline stand out. Modify font style, size, and color for clear product identification. Customize button colors, size, and typography to drive action
These tweaks create a professional extension of your store that feels intentional and valuable to customers.
And that’s it! Your post-purchase upsell campaign is ready to go. Once customers complete their purchase, they’ll see your carefully crafted upsell offers.
Remember to monitor your campaign performance regularly and adjust your offers based on what’s converting best.
3️⃣Examples of Post-Purchase Upsells Done Right
Have you ever noticed how some online stores boost their sales without needing more traffic? The secret lies in a powerful strategy called post-purchase upsells. Let’s explore real-world examples of these three stores that have perfected this technique.
1. Simply Chocolate: Sweet Success with Gourmet Treats
Simply Chocolate found a clever way to introduce customers to new products in their gourmet chocolate line.
Their approach was pretty smart:
- They set up an offer to show right after purchase.
- Offered mini-versions of their premium chocolate collections at special discount prices.
- Created a sense of urgency with “today only” type offers
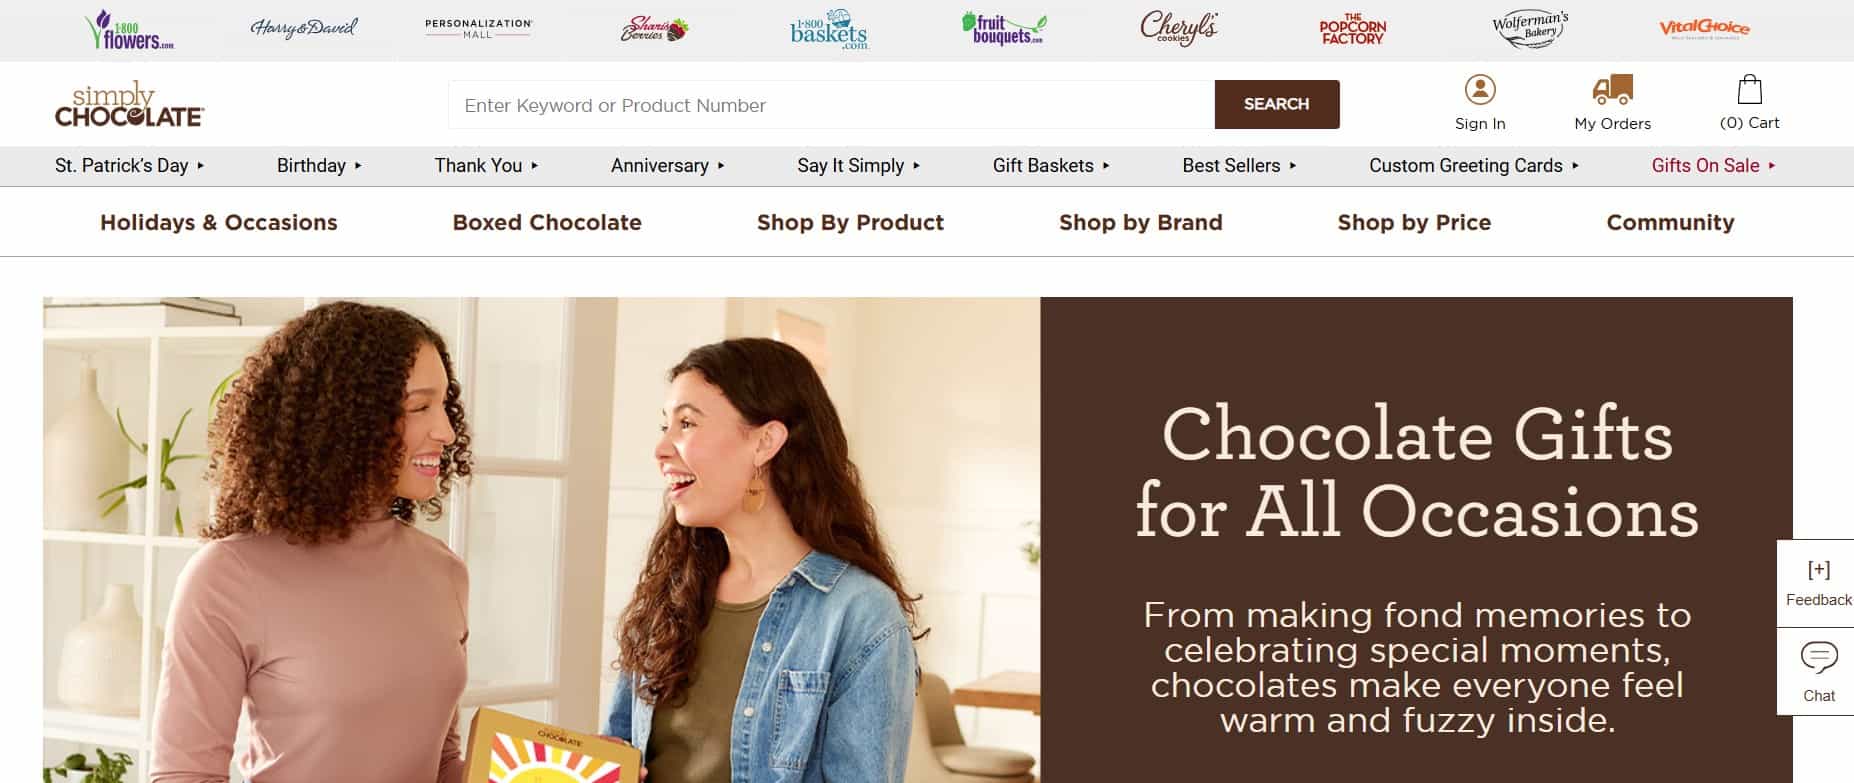
And guess what? A whopping 22% of customers grabbed these post-purchase deals! They also saw 18% more people trying their other product lines and their customer lifetime value shot up by about 20%.
2. Brilliant Earth: Sparkling Upsell Strategy
Who doesn’t love a little extra sparkle? Brilliant Earth found that their customers certainly do!
How they made it work:
- Added upsell offerings to their thank-you page.
- When someone bought jewelry, they’d offer matching care kits to keep those precious items looking new.
- Created different upsell offers based on how much the customer had just spent.
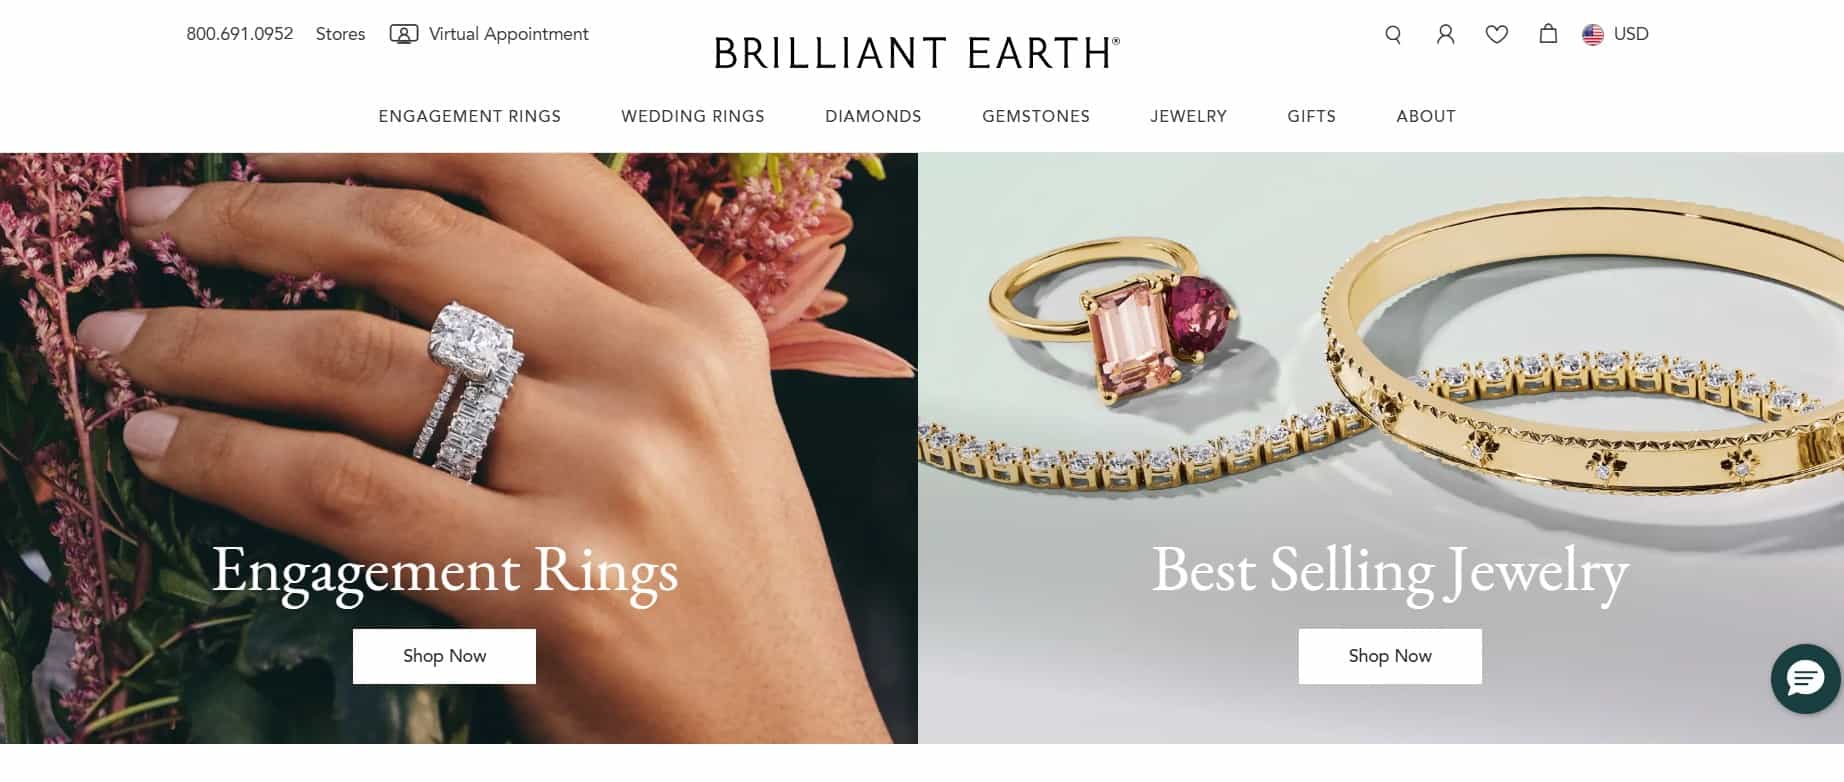
The results were as beautiful as their jewelry – 12% of customers said yes to these offers, they kept their checkout process clean (reducing abandonment), and saw revenue increase by 8% just from these post-purchase offers.
3. Allbirds: Stepping Up with Accessory Upsells
Allbirds successfully implemented a post-purchase strategy that complemented their sustainable footwear perfectly.
Their clever approach:
- Used WooCommerce Thank You Page to display personalized recommendations
- When customers purchased shoes, they’d offer matching eco-friendly socks or shoe care products.
- Emphasized how the additional items would extend the life of their primary purchase.

The results walked all over their expectations – 24% of customers added accessories to their original order, their average order value increased by $18.50, and their customer feedback specifically mentioned appreciation for the helpful product pairings that enhanced their sustainable shopping experience.
What We Can Learn From These Success Stories
The beauty of these examples is that they show how post-purchase upsells can work for any type of store. You don’t need to be a huge brand to make this work!
Some key takeaways:
- Keep it relevant: The best upsells complement what customers just bought.
- Timing matters: Immediate offers generally work better than delayed ones.
- Focus on value: Successful stores emphasized how the additional product would benefit the customer.
- Keep it simple: One-click processes convert way better than complicated ones.
- Test and improve: These stores didn’t get it perfect on day one; they kept refining their approach.
Start Post-Purchase Upselling Today!
Look, post-purchase upsells aren’t rocket science, but they do require some thought. I’ve seen stores double their AOV just by showing the right offer at the right time.
Once set up in WooCommerce, the system works automatically – customers get relevant product suggestions, and you increase revenue without needing more traffic.
Use WowRevenue‘s insights, follow your data, and be willing to adjust. Your customers already said “yes” once, and if your offer adds value, they’ll likely say “yes” again.
Implement this now, and you’ll appreciate the results when reviewing next month’s revenue. 💸
🧠 FAQs about Creating Post Purchase Upsell Offer
You might have a question or two about post-purchase upsells, and these answers may address your concerns perfectly.
1. How to upsell products in WooCommerce?
With WowRevenue, use the no-code campaign builder to create upsell offers on the thank you page. Select products, set discounts, and add urgency with timers or animated “Add to Cart” buttons for one-click upsells.
2. How do I add product details to WooCommerce?
Add product details in WooCommerce via the “Products” section (title, description, price, images). Then, use WowRevenue to link these products to upsell campaigns with custom discounts.
3. How do I add custom prices in WooCommerce?
WowRevenue lets you set custom prices for upsells by applying percentage or fixed discounts in the campaign settings, without changing the original WooCommerce product price.
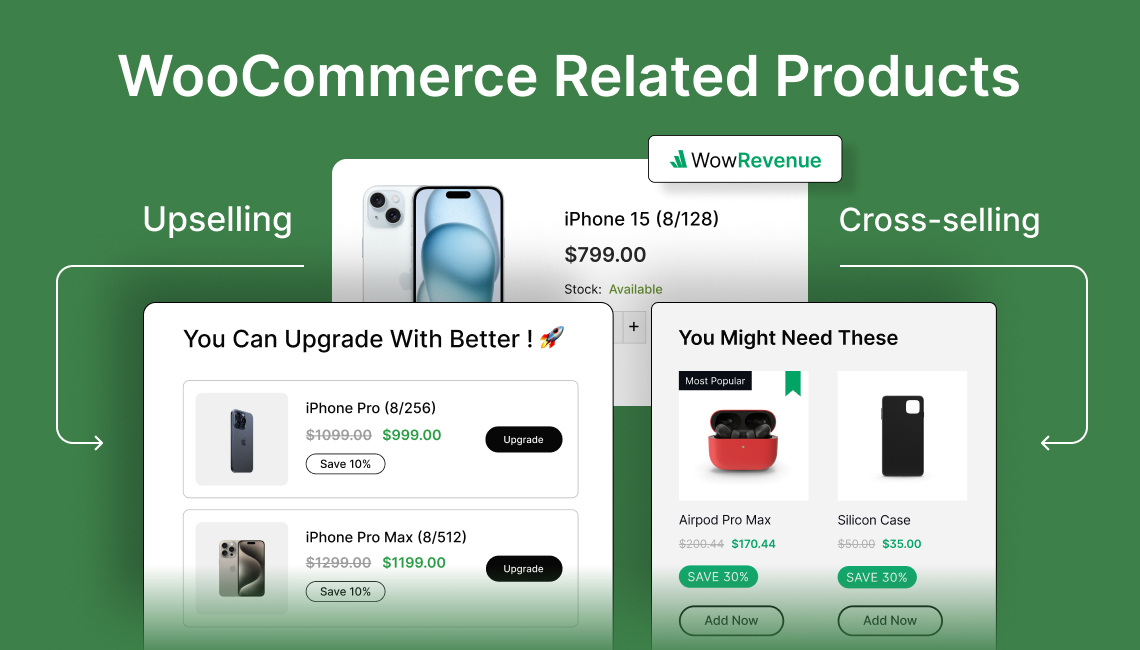
4. What is the difference between cross-selling and upselling in WooCommerce?
Cross-selling: Recommending related or complementary products (e.g., suggesting a phone case when buying a phone).
Upselling: Encouraging customers to buy a more expensive version of the product they’re considering (e.g., recommending a premium model with better features).
5. What is a post-purchase upsell?
A post-purchase upsell, supported by WowRevenue, offers additional products on the thank you page after purchase (e.g., a discounted laptop bag after buying a laptop), using one-click upsells and timers to boost AOV.