Does Spending Goal Matter in E-Commerce?
WooCommerce Spending Goal Bar has one very important goal – persuade the customer to spend more on your store. This results in better sales and improved average order value.
TRAILCAMPRO had a 20% increase in sales. All they did was offer free shipping; this made their sales grow!
In this blog, I will help improve online sales by implementing a free shipping progress bar on your WooCommerce store.
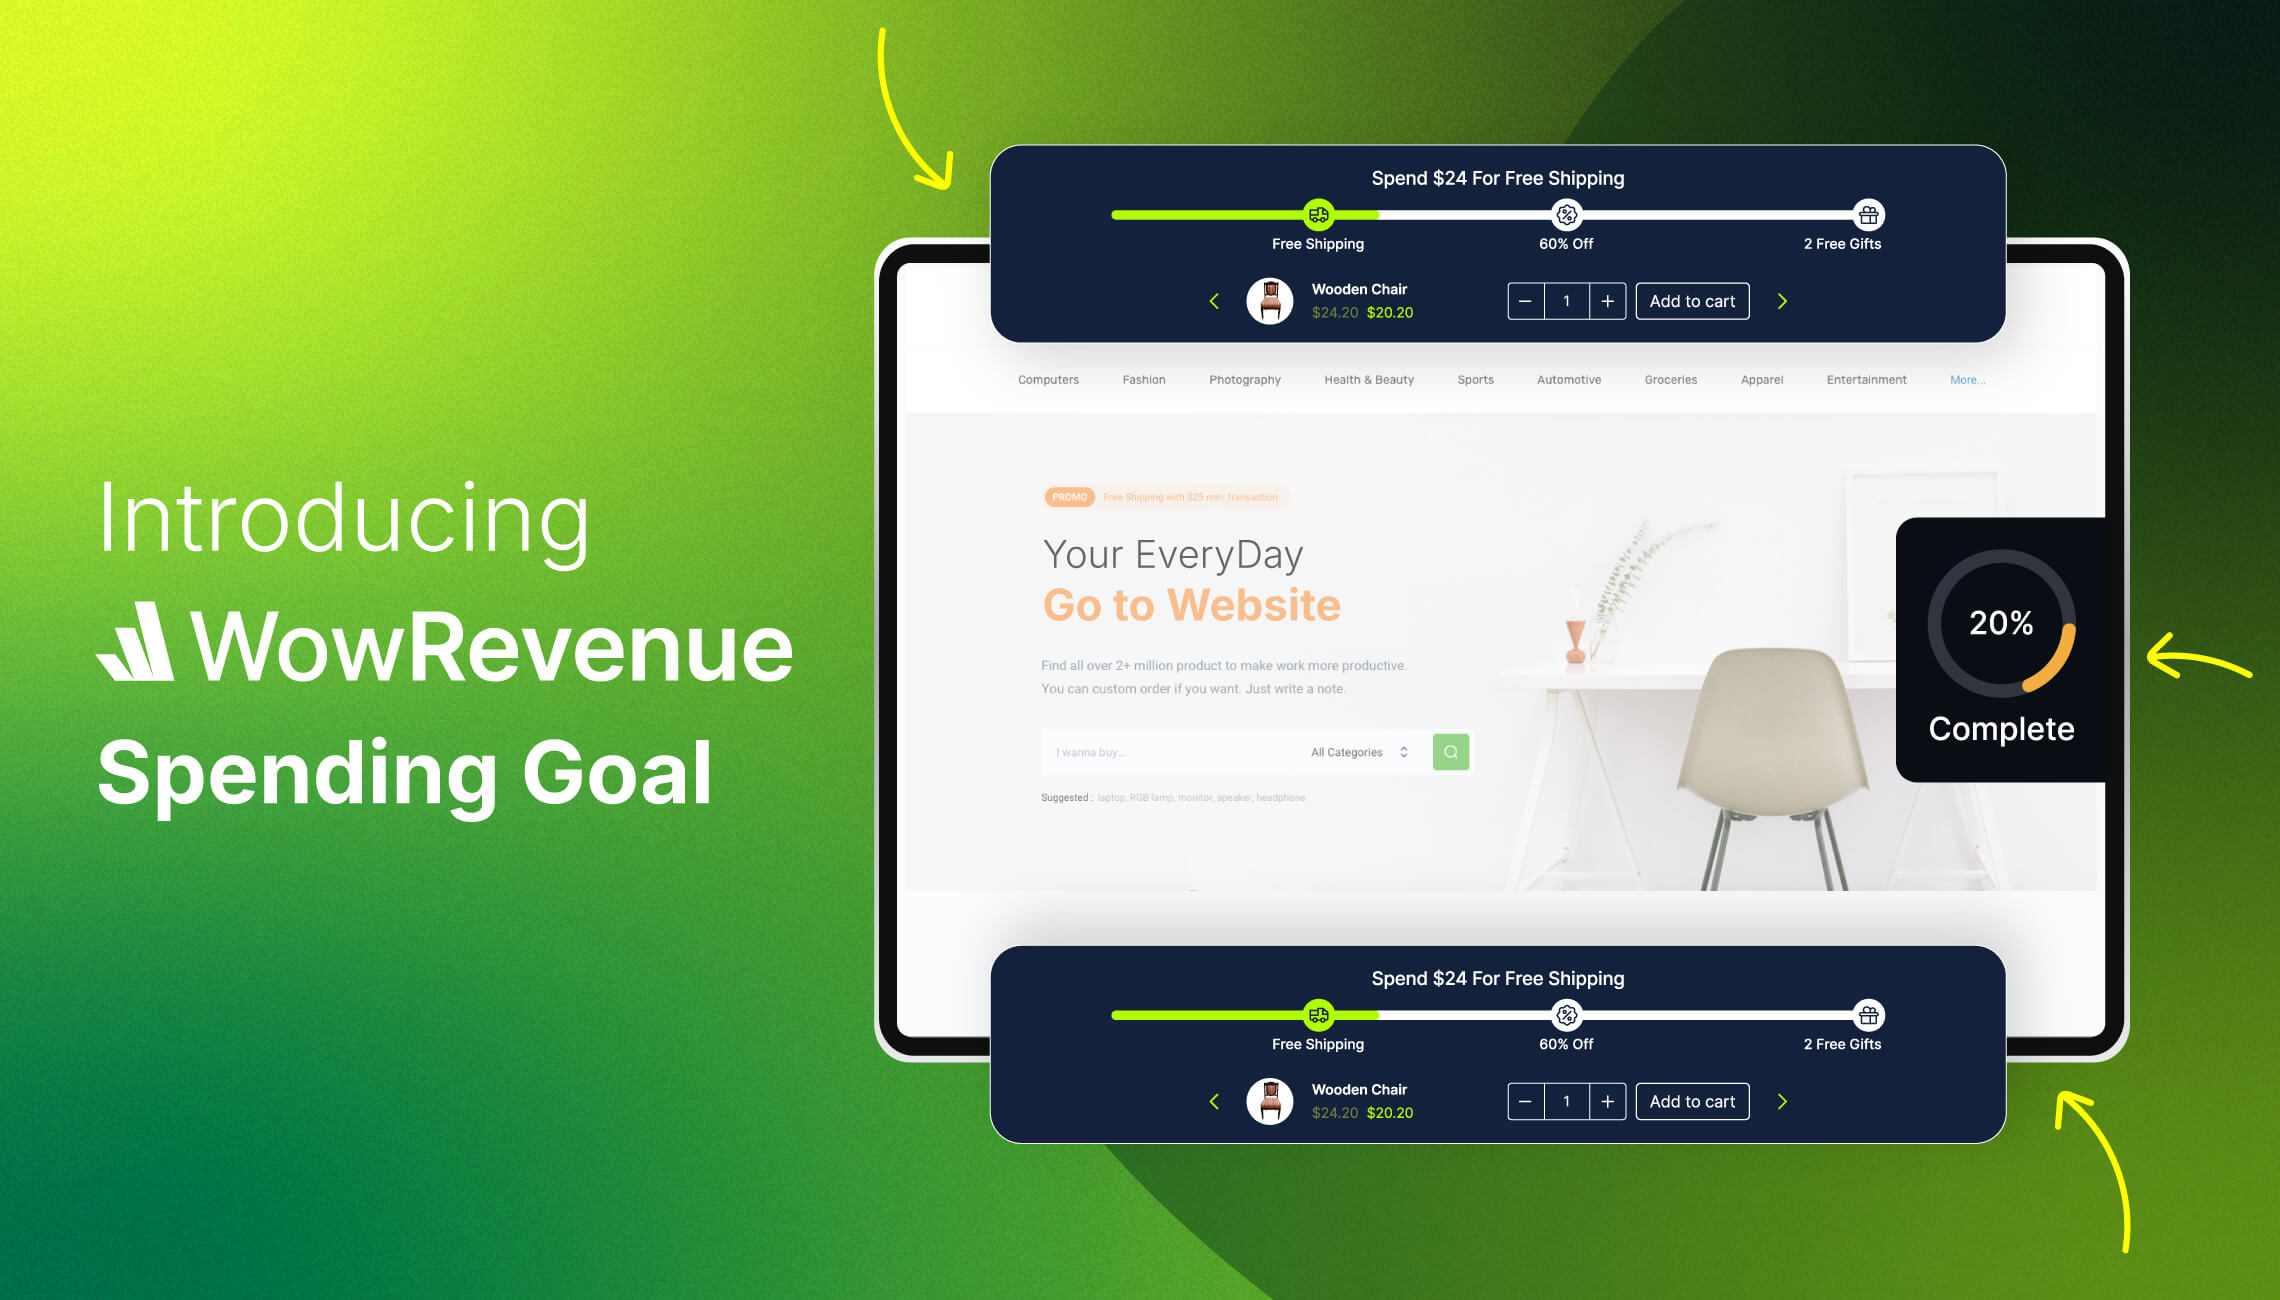
I’m proud to announce the arrival of the WowRevenue Spending Goal feature for WooCommerce. You can offer both free shipping and custom discounts and help users complete their goals – essentially, you get users to spend more!
You’ll get an idea about the concept – how it works and how it can have a sales impact. Furthermore, you’ll learn to create one without coding on your WooCommerce store.
There will also be some tips on A/B testing and improvements – follow these and there’s a good chance you can increase the average order value of your WooCommerce store.
What is a Spending Goal Progress Bar [The Purpose]
Such a progress bar is often used to offer free shipping.
A Spending Goal Progress Bar is a visual bar (on an E-Commerce store) that shows how far a user is from achieving a goal.
It’s simply a progress bar with reward(s). Again, the most popular use case of a WooCommerce spending goal progress bar is letting the user spend a certain amount to get free shipping.
However, with the technique I’m going to show today, you can create certain checkpoints for spending on your store. Once a user completes these checkpoints, they will get free shipping.
That’s the ultimate purpose of this feature.
An example of it can be like this:
There will be 3 checkpoints on the E-Commerce free shipping bar. The first checkpoint prompts the user to spend at least $50. Once he or she does that, they work to move to the second checkpoint.
Finally, they work their way to achieve free shipping!
You can easily create a spending goal bar with WowRevenue. But, WowRevenue has plenty of good features going for it. Check it out below:
Is Spending Goal a Game Changer for WooCommerce?
If you’re a WooCommerce store owner, then there are definitely some benefits you need to know about:
Improved Chances of Conversions: A spending goal bar works indirectly as a converter. If you implement this properly, the chances of conversions improve by 2X.
For example, Shopify implemented the spending goal bar with free shipping and saw a 56% increase in conversions.
Boost WooCommerce Sales: As you’re offering a free shipping bar (or presenting the spending goal bar in another way), you are increasing your chances of boosting WooCommerce store sales.
FOMO-driven Sales: Such visual queues can help push users to buy more from your WooCommerce store. It creates a sense of ‘urgency’ among buyers.
Low Cart Abandonment Rate: Such visual strategies have a positive impact on the cart abandonment rate. Depending on the implementation, your cart abandonment rate can go down (significantly!). This can be one of the super-effective cart abandonment solutions that can improve your site growth.
With the spending goal bar, you won’t just be able to implement free shipping strategies, you can build your custom strategies and offer it on your WooCommerce store.
How to Add a Spending Goal Progress Bar in WooCommerce: A Step-by-step Guide
There are plenty of WooCommerce plugins for free shipping. However, the WowRevenue Spending Goal feature (it is a pro campaign by the way) has a lot more going on – here’s how to create a conversion-focused spending goal progress bar for your E-commerce store.
WowRevenue offers great flexibility when it comes to creating a proper free shipping bar. Here’s why it’s a great option for you:
1. Installing the WowRevenue Plugin
Installing the WowRevenue plugin is the same as installing any other plugin on your WordPress WooCommerce website.
I’m assuming you already know how to do it. In case you don’t, click here to visit the full installation documentation.
2. Creating the Spending Goal Campaign
WowRevenue has 5+ campaigns currently available. You’ll find these listed under the ‘campaigns’ section of the plugin.
Creating the spending goal campaign (you may call it a ‘free shipping bar’ if you wish!) is simple. Just go to Campaigns > Scroll down to Spending Goal > and click on ‘Create Campaign’.
You can use these steps to create other campaigns like bundle discounts, buy x get y discounts, etc.
3. Spending Goal Progress Bar Placement
There are 3 things to discuss here:
You can set the pages for the spending goal campaign. You can either show it on the entire site or set it to show it on specific pages.
There are some pre-defined page positions – on which position should you show the progress bar.

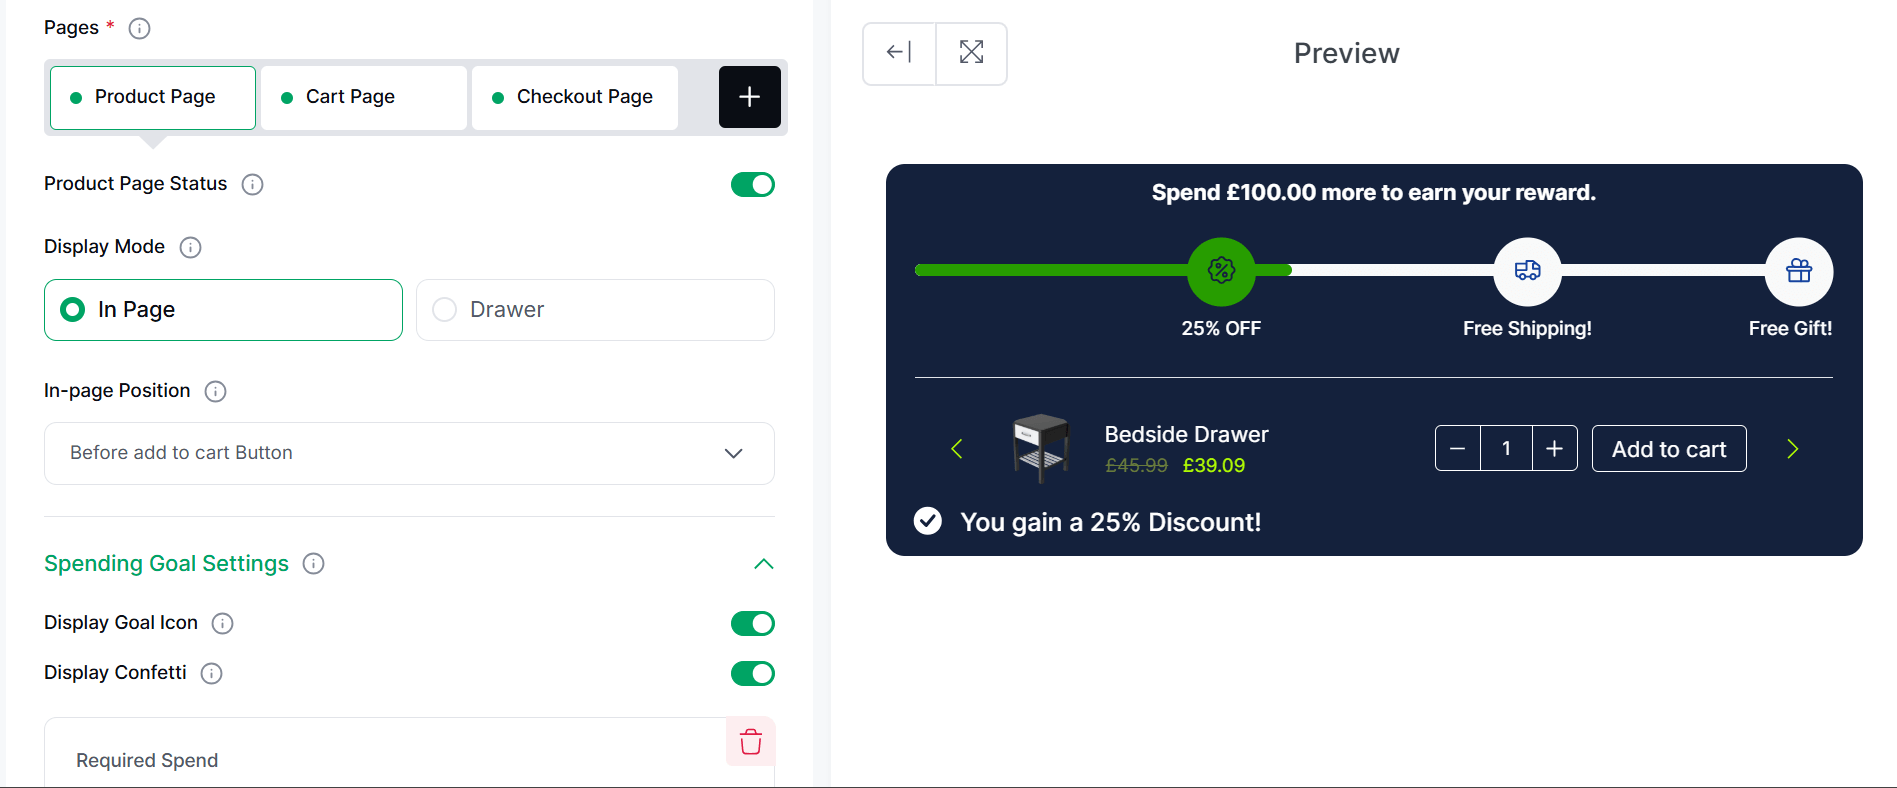
Here’s the example I will follow:
- I will select ‘Product Page’ – the progress bar will only show on this page
- It will appear ‘In page’ – it will appear as a full bar
- I will select the ‘Before Add to Cart Button’ – the bar will appear before the Add to Cart Button
Please note that the spending goal bar can be set as a drawer. Here’s how it looks:
4. Set a Realistic Spending Goal Threshold
The WowRevenue Spending Goal feature lets you set spending goals just the way you want. You pretty much have everything you need to offer custom discount checkpoints.
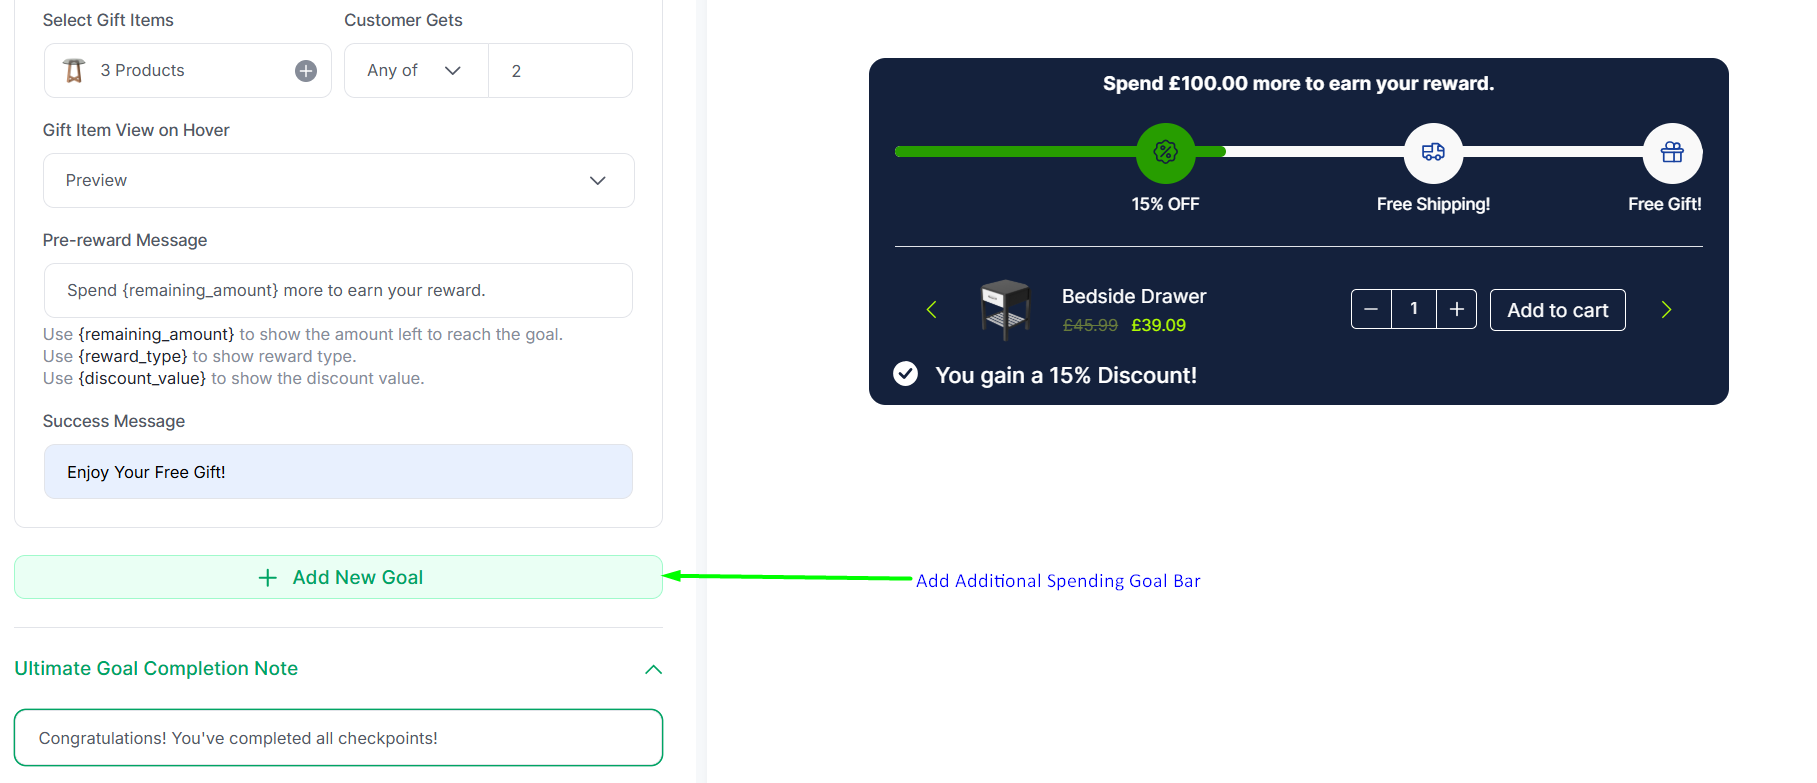
These checkpoints are called ‘Goal Tiers’. By default, you need to create a Goal Tier, you can add others as you move on.
For this example, I created a 3-goal tier spending goal progress bar. It means a user has to complete 3 goals to get the ultimate reward:
I chose the ‘spending goal value’ to be $50 – the reward type is a discount 15% discount – so the discount value is 15 and the discount type is a percentage.
You can customize the ‘Text before You Reach Your Reward’ and the ‘Text after You Reach Your Reward’ in the following way.
In the second tier, we offer free shipping for a $200 spending goal. The final tier allows you to spend $1000 to get a gift.
Finally, add a showcase text – when a user completes all the goals, they will see these words. You display confetti as well.
Now, the question is, is it the ideal approach for you?
No. This was just an example. There are certain things you can do to get the most out of the Spending Goal Progress by following these things:
How to Get the Most from the WowRevenue Spending Goal Progress Bar?
Here are the things you need to do:
- Analyze your average order value
- Get a clear idea about shipping costs (you should have a clear idea already)
- Create a threshold that works – make it profitable
- Make the offers appear clear and concise
- Monitor the performance
- Adjust if necessary
Here’s a complete example:
Let’s say your average order value is $97 and the average shipping cost is $15. The profit margin is 25%.
Now the general rule of thumb is to set the profit allocation to be higher for shipping. Let’s say you adjust it and make a profit of 30% – considering the shipping.
So, the profit before shipping is,
Profit = Average Order Value (AOV) X Profit Margin = 97 x 0.25 = $24.25
As you are allowing a 30% profit margin to allow shipping, the allotted shipping cost becomes:
Profit X 0.3 = 24.25 X 0.3 = $7.275 (let’s round it up to $7.28)
See that the average shipping cost is $15. But the business can allocate 7.28 USD without losing profit.
So, you need to add some buffer – do this to keep your profit margin intact. You can do so in the following way:
Buffer = (Your Average Shipping Cost – Allocated Shipping Cost)/Your Initial Profit Margin = (15 -7.28)/0.25 = 30.88
So, the free shipping threshold will be:
Free Shipping Threshold = 97 + 30.88 = $127.88 ~ $128
So, a customer will have to spend $128 to get free shipping!
5. Additional Setup
There are 2 things to setup here:
You can upsell products with specific discounts. You can select the products and offer discounts on them.
You can schedule the appearance of the spending goal progress bar. You can choose a start and end date – the campaign will remain active within this time.
6. Publish and Observe
Once everything is ready, you can publish the campaign. Here’s how it appears on the front end.
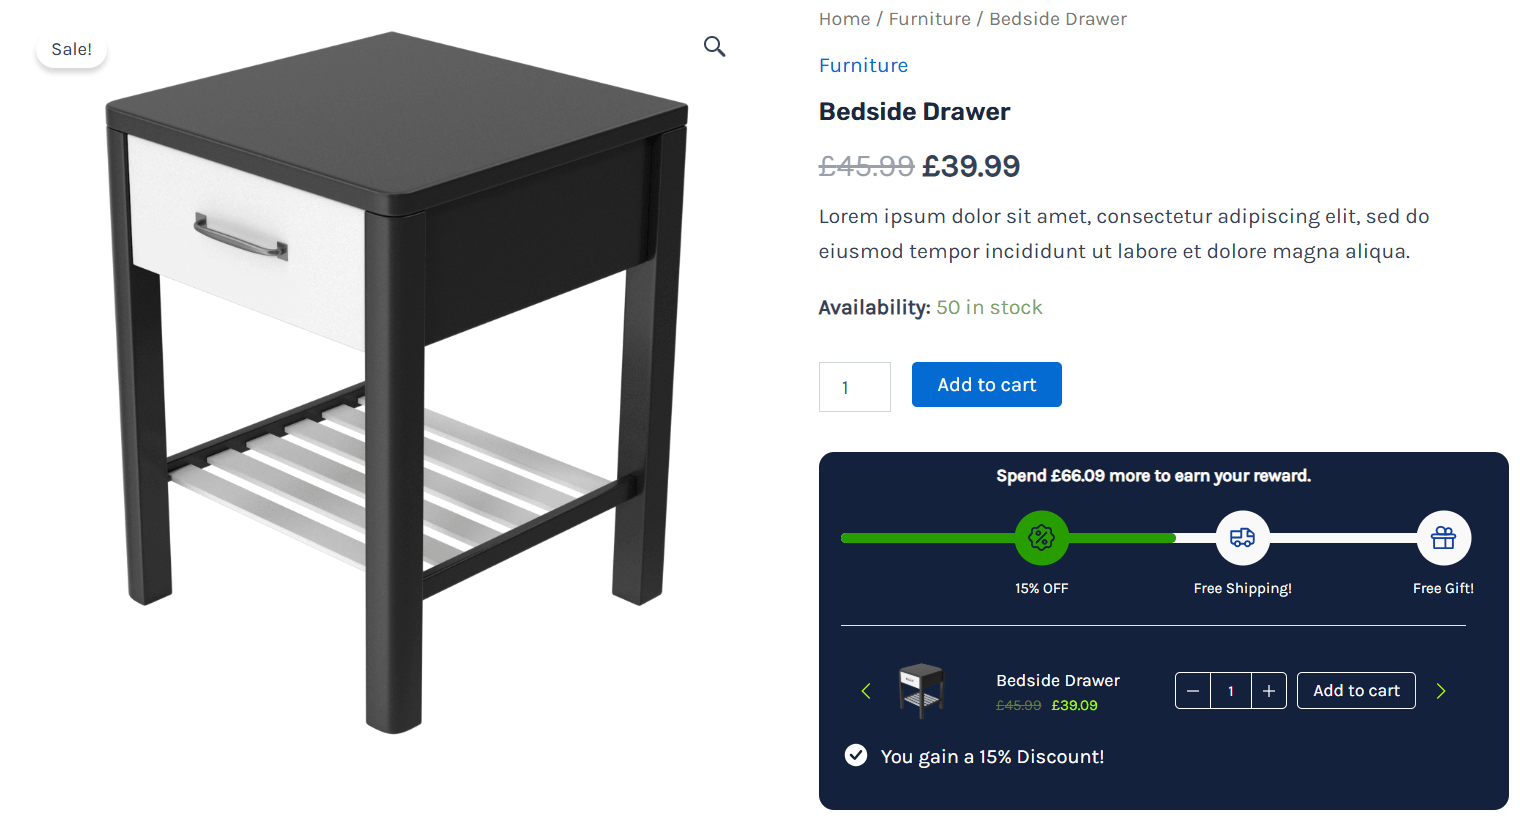
But that’s not the end of the road.
You need to constantly observe the campaign performance. The WowRevenue analytics dashboard can help you out here.
You can do a lot more with the spending goal feature of WowRevenue. To learn more about the features, you can visit the following link:
Best Practices to Follow for Maximizing Spending Goal Impact
You already know how to set the threshold for free shipping. It’s super easy to set up with the WowRevenue spending goal feature. However, there are other best practices you can follow as well:
The design of the spending goal bar needs to be simple and direct – it shouldn’t be messy. Yet, it should bear your brand identity
The placement matters – you can place it wherever you want – A/B testing will help get better results
The appearance should bear your brand identity. However, it should not be too messy. The CTA should be clear.
To summarize:
- Keep it simple
- Keep it direct
- Offer a clear CTA
- Highlight your brand identity
- Test, Retest, and Redeploy
If you wish to get more insights, then you may want to look into this article from Growth Rock. The article talks about the effects of a free shipping bar in decent detail.
Spending goal isn’t just the only feature of WowRevenue, there are other types of discount campaigns you can create with WowRevenue as well. Follow the link to learn more.
Notable Case Studies of Spending Goal Progress Bar
Here are 2 case studies on the effective implementation of the spending goal feature.
NuFACE Free Shipping Campaign
NuFACE had a wonderful campaign that let users get free shipping. ‘Free Shipping on Orders Over $75” was the campaign – the results were very positive. Strategic placement of the free shipping bar pushed users to complete the goal and receive free shipping.
2BigFeet’s Free Shipping Threshold
2BigFeet had a similar campaign. However, they had a $100 free shipping threshold. They saw a major uplift in conversions as users were keen on using the given coupon code to meet the goal.
FAQ
How do I add a Free Shipping Progress Bar to my store?
Creating a free shipping progress bar on your WooCommerce store is super easy with WowRevenue. There are 6 steps to follow here – install the plugin > create the spending goal campaign > initial setup > spending goal threshold setup > additional setup > publish the campaign.
Are spending goals effective for increasing sales?
Yes, spending goals are super effective. There are pieces of evidence of increased sales and conversions – see the case studies. It mostly depends on the pricing, placement, and design of the spending goal bar.
How do free shipping progress bars reduce cart abandonment?
Free shipping induces a sense of urgency among buyers. They feel compelled to complete the goal(s) and get the rewards. This has a direct impact on reducing the cart abandonment rates of a WooCommerce store.
Can you display a free shipping progress bar using custom code?
Yes, you can. Here’s the custom code to do it:
// Add Free Shipping Bar
add_action('wp_footer', 'custom_free_shipping_bar');

function custom_free_shipping_bar() {

    // Set the free shipping threshold amount

    $free_shipping_threshold = 100; // Adjust to your desired threshold

    // Get the current cart total

    $cart_total = WC()->cart->get_cart_contents_total();

    // Calculate the remaining amount to qualify for free shipping

    $remaining_amount = $free_shipping_threshold - $cart_total;

    // Only display the bar if the cart total is below the threshold

    if ($cart_total < $free_shipping_threshold) {

        ?>

        <div id="free-shipping-bar" style="position: fixed; bottom: 0; width: 100%; background: #4caf50; color: #fff; text-align: center; padding: 10px; font-size: 16px;">

            <?php if ($remaining_amount > 0): ?>

                Spend $<?php echo number_format($remaining_amount, 2); ?> more to get FREE shipping!

            <?php else: ?>

                Congratulations! You've qualified for FREE shipping!

            <?php endif; ?>

        </div>

        <?php

    }

}

// Add styles for the bar

add_action('wp_head', 'custom_free_shipping_bar_styles');

function custom_free_shipping_bar_styles() {

    echo '<style>

        #free-shipping-bar {

            z-index: 9999;

            box-shadow: 0 -2px 5px rgba(0,0,0,0.1);

        }

    </style>';

}
Now there are some issues with this approach. You need to use this code in the functions.php file of your WordPress website, a simple error can break your website. Now if you want to create such a progress bar without any plugins, you’re welcome to do so.
However, using a plugin is highly recommended if you’re not comfortable coding.
Want to Improve Sales: Start Today!
The discussion doesn’t just introduce the functionality of the brand-new WowRevenue spending goal. There are some essential tips you can use to 5X your outcome from the spending goal bar feature.
The feature can directly and indirectly have a positive impact on your E-commerce business.
Do you wish to 3X your sales – try out this new feature from WowRevenue today!